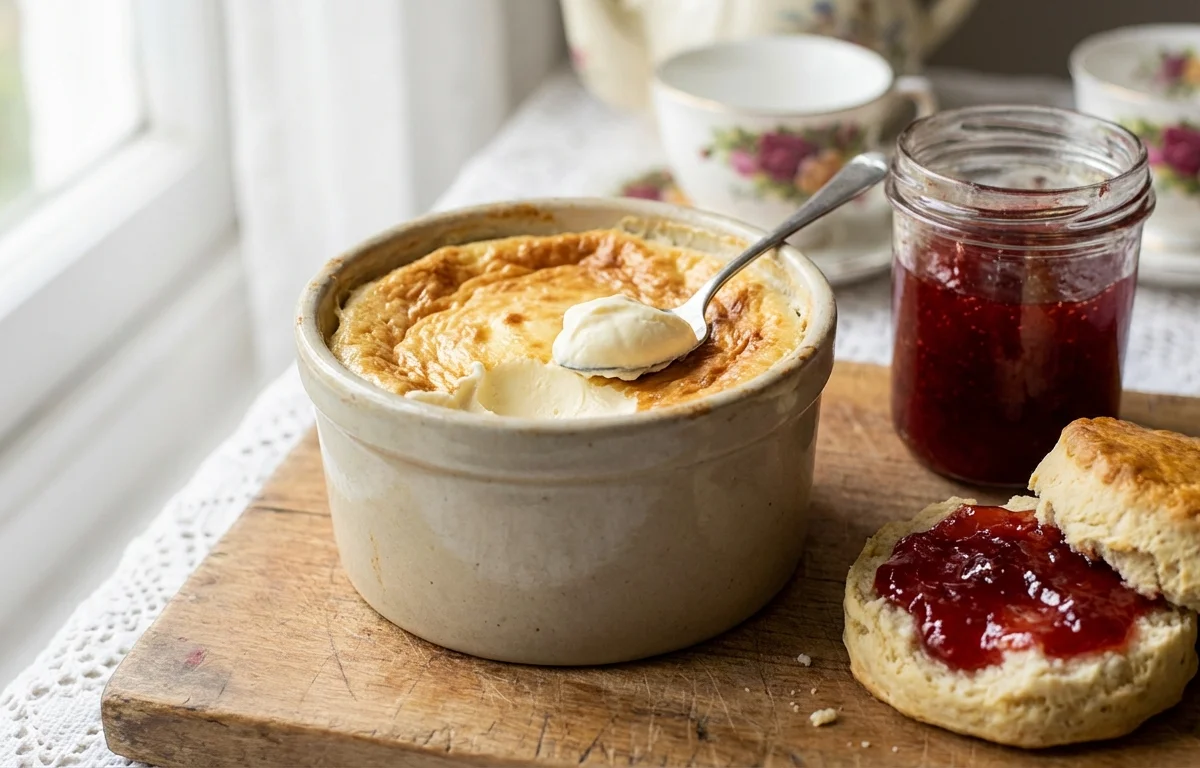
Clotted Cream
Rich, thick, and incredibly luxurious, this traditional English clotted cream is the perfect companion to scones and jam. Made by gently heating rich cream and letting it cool overnight, the cream develops a golden crust and a velvety, nutty-sweet flavor that melts in your mouth.
For 8 servings
- prep
Preheat the oven to 80°C (175°F).
Set your oven to a very low temperature. The gentle heat is key to forming the clotted top without scrambling the cream.
TIPUse an oven thermometer if you can — accuracy is crucial for clotted cream. - prep
Pour the cream into a shallow baking dish.
Pour the heavy cream into a large, shallow ceramic or glass baking dish. The cream should be about 2 to 3 cm deep to create a large surface area for the crust to form.
- bake · ~720 min
Bake the cream for 12 hours.
Place the dish in the preheated oven and leave it completely undisturbed for 12 hours. Do not open the oven door during this time. The cream will develop a thick, golden-yellow crust on the surface.
TIPThe crust should look firm and golden. If it's still pale, give it another 1-2 hours. - rest · ~600 min
Cool at room temperature, then refrigerate overnight.
Remove the dish carefully from the oven. Allow it to cool completely at room temperature, then cover with plastic wrap and refrigerate undisturbed for at least 8 hours, or overnight. This sets the clot.
TIPDon't rush this step — the cream must be completely cold before you separate it. - assemble
Separate the clotted cream from the whey.
Use a slotted spoon to gently lift the thick, clotted crust off the top, allowing the thin, milky liquid underneath to drain away. Transfer the clotted cream to a bowl.
TIPStir the collected cream lightly to smooth it, but expect a slightly lumpy, rich texture. - serve
Stir and serve or refrigerate.
Stir the clotted cream until smooth. Serve immediately at room temperature with fresh scones and strawberry jam, or refrigerate in an airtight container for up to 5 days.
What to keep in mind.
6 tips from the recipe — small details that make a real difference to the final dish.
- 1Use non-ultra-pasteurized cream for best results — it clots more reliably.
- 2An oven thermometer is essential; a swing of even 10°F can prevent crust formation.
- 3Don't skip the overnight chill — the cream must be fully cold before separating.
- 4Gently lift the clot with a slotted spoon; tilting the dish helps drain the whey.
- 5Stir the finished cream lightly to smooth it, but keep some lumps for authentic texture.
- 6Store clotted cream in an airtight container; it keeps up to 5 days refrigerated.
Adapt it for your goals.
Salted caramel swirl
Before baking, stir a tablespoon of flaky sea salt into the cream for a subtle salted caramel note that enhances the nutty flavor.
vanilla beanVanilla bean
Split a vanilla bean and scrape the seeds into the cream before baking for a fragrant, dessert-like twist.
cinnamon spicedCinnamon-spiced
Add a cinnamon stick to the cream during baking for a warm, spiced undertone that pairs beautifully with apple desserts.
Why this is on our healthy list.
Rich in Fat-Soluble Vitamins
Made from heavy cream, clotted cream naturally contains vitamins A, D, E, and K, which support immune function and bone health.
Source of Conjugated Linoleic Acid
The gentle heating process preserves beneficial fatty acids like CLA, which are linked to metabolic health.
Lower Lactose Than Fresh Cream
The slow baking and separation reduce whey, so clotted cream contains less lactose than regular cream, making it easier to digest for some people.
Frequently asked questions
Yes, but it may not form as thick a crust because the heat treatment denatures proteins that help the clot set. Non-ultra-pasteurized is strongly preferred.