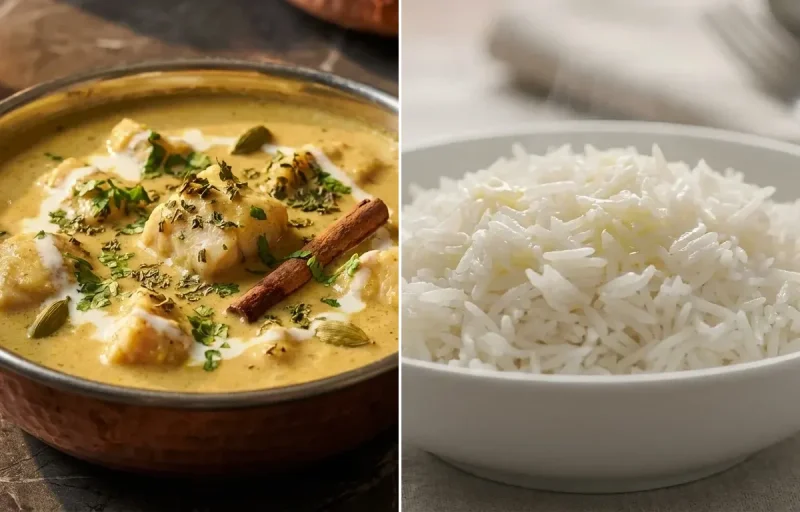
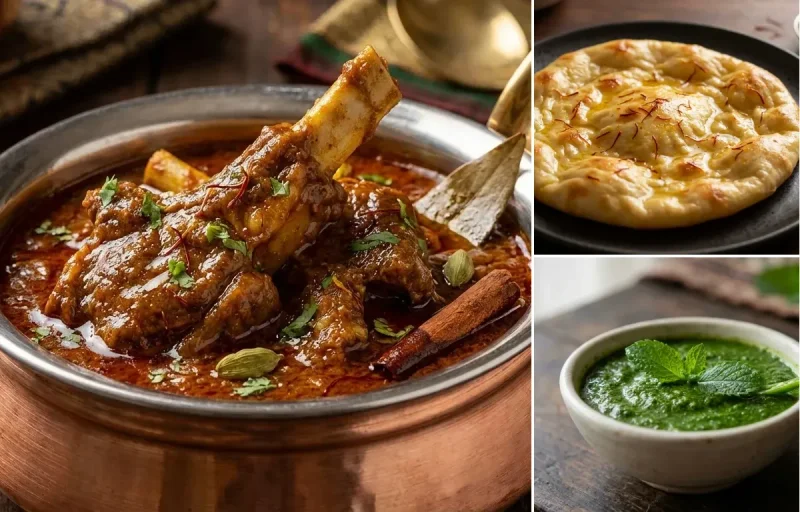
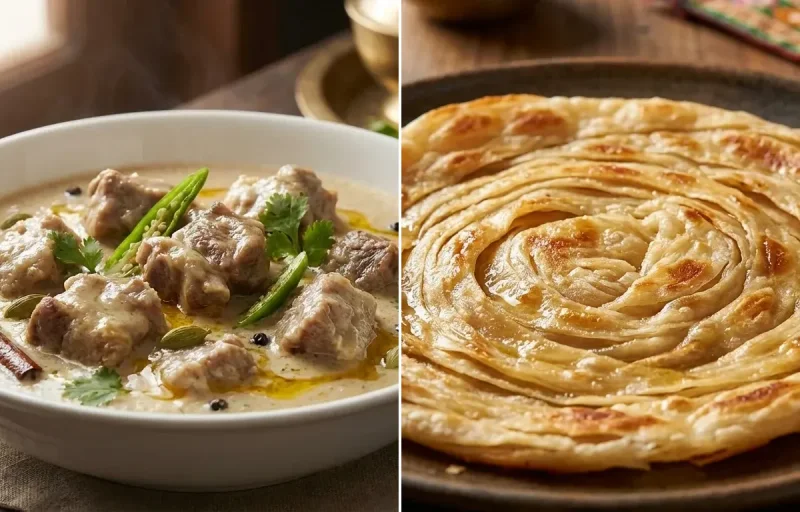
A rich, aromatic slow-cooked mutton stew where the meat becomes incredibly tender. This classic Mughlai dish, seasoned with a special blend of spices, is a true delicacy often enjoyed with warm naan.
Prep30 min
Cook180 min
Servings4
Serving size: 1 serving
733cal
39gprotein
18gcarbs
57g
Ingredients
750 g Mutton Shanks (bone-in, also known as nalli)
A soft and spongy leavened flatbread from Mughlai cuisine. Made with whole wheat flour and yeast, this roti has a delightful tangy flavor and a pillowy texture, perfect for scooping up rich curries.
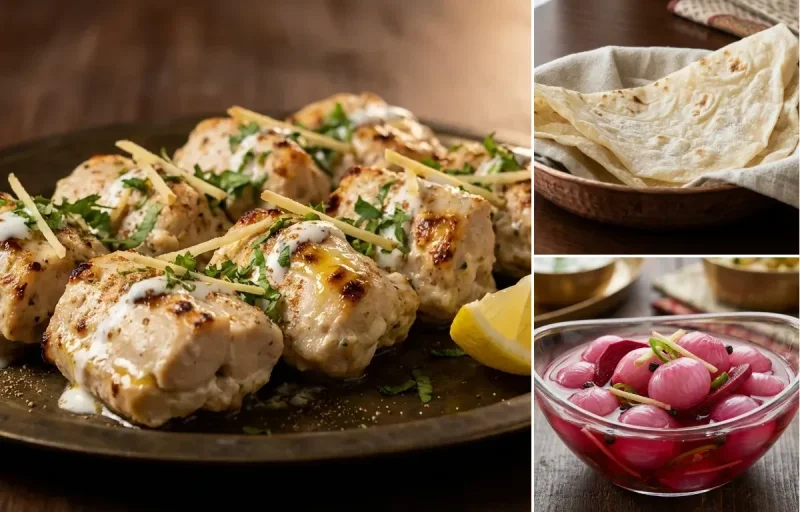
Crisp, tangy, and slightly sweet, this homemade Japanese pickled ginger (Gari) is incredibly easy to make. It's the perfect zesty palate cleanser for sushi and a vibrant condiment for salads and sandwiches, ready with just a few simple ingredients.
Prep45 min
Cook5 min
Soak30 min
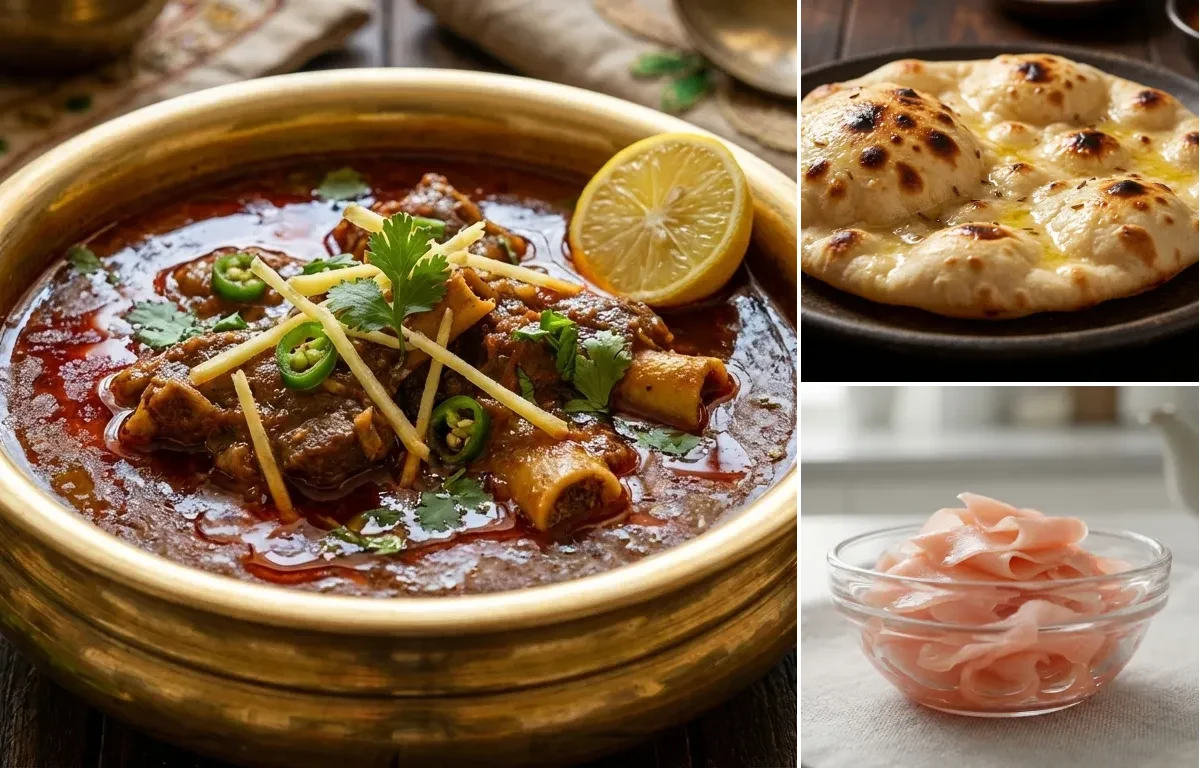
About Mutton Nihari, Khamiri Roti and Pickled Ginger
Soul-satisfying Nihari with soft Khamiri Roti – a rich, aromatic, energy-giving homestyle delight!
This mughlai dish is perfect for lunch. With 1134.0800000000002 calories and 48.59g of protein per serving, it's a nutritious choice for your meal plan.
Other Cuisines to Explore
Discover authentic meals from cuisines around the world.
In a dry skillet over low heat, toast the whole spices: fennel seeds, black peppercorns, cloves, green and black cardamoms, cinnamon stick, bay leaf, and mace.
Toast for 2-3 minutes, stirring frequently, until they become fragrant. Be careful not to burn them.
Remove from heat and let the spices cool completely.
Transfer the cooled spices to a grinder. Add the dry ginger powder and nutmeg powder, and grind to a very fine powder. Set this fresh Nihari masala aside.
2
Brown the Mutton
Heat ghee in a heavy-bottomed pot or Dutch oven over medium-high heat.
Add the thinly sliced onions and fry for 10-12 minutes, stirring occasionally, until they are deep golden brown and crisp (berista). Remove half of the fried onions and set aside for garnish.
To the remaining onions in the pot, add the mutton shanks. Sear the meat on all sides for 5-7 minutes until it's well-browned.
Add the ginger-garlic paste and sauté for another 2 minutes until the raw aroma disappears.
3
Slow Cook the Nihari
Reduce the heat to low. Add the prepared Nihari masala, Kashmiri red chili powder, red chili powder, turmeric powder, and salt. Stir for 1 minute to cook the spices.
Add the whisked yogurt and stir continuously for 3-4 minutes until the oil begins to separate from the masala.
Pour in 4 cups of hot water, stir well, and bring the mixture to a rolling boil.
Once boiling, reduce the heat to the absolute lowest setting. Cover the pot with a tight-fitting lid and let it simmer for 3-4 hours. The key is a very gentle simmer, not a boil. The mutton should be fall-off-the-bone tender.
4
Thicken the Gravy
After the slow cooking is complete, skim off the layer of red oil (rogan/tari) from the surface and set it aside. This will be used for garnish.
In a small bowl, whisk the whole wheat flour with 1/2 cup of room temperature water to create a smooth, lump-free slurry.
Slowly and steadily pour the flour slurry into the simmering nihari, whisking constantly with your other hand to prevent any lumps from forming.
Increase the heat slightly to a medium-low and let the gravy cook for another 15-20 minutes, stirring occasionally, until it has thickened and the raw taste of the flour is completely gone.
5
Garnish and Serve
Turn off the heat. Ladle the hot Mutton Nihari into serving bowls.
Drizzle the reserved red oil (rogan) over each serving.
Garnish generously with ginger juliennes, slit green chilies, fresh coriander leaves, and the reserved fried onions.
Serve immediately with lemon wedges on the side, to be squeezed over just before eating. It pairs best with hot naan, khameeri roti, or sheermal.
4
Serving size: 1 serving
346cal
9gprotein
46gcarbs
15gfat
Ingredients
2 cup Atta
1 tsp Active Dry Yeast
1 tsp Sugar (To activate the yeast)
0.5 cup Warm Water (Around 105-115°F (40-46°C))
0.5 cup Warm Milk
4 tbsp Ghee (Melted, 2 tbsp for dough and 2 tbsp for brushing)
1 tsp Salt
Instructions
1
Activate the Yeast
In a small bowl, combine the warm water, sugar, and active dry yeast.
Stir gently and let it sit for 5-10 minutes.
The mixture will become frothy and bubbly, indicating the yeast is active and ready to use.
2
Prepare the Dough
In a large mixing bowl or the bowl of a stand mixer, combine the atta and salt.
Create a well in the center and pour in the activated yeast mixture, warm milk, and 2 tablespoons of melted ghee.
Mix until a shaggy dough forms, then transfer to a lightly floured surface.
Knead for 8-10 minutes by hand (or 6-7 minutes with a dough hook) until the dough is soft, smooth, and elastic. It should be pliable and not too sticky.
3
Proof the Dough
Form the dough into a ball and place it in a lightly greased bowl.
Cover the bowl with a damp cloth or plastic wrap.
Let the dough rest in a warm, draft-free place for 90 minutes, or until it has doubled in size.
4
Shape the Rotis
Once proofed, gently punch down the dough to release the air.
Briefly knead for another minute.
Divide the dough into 8 equal portions and roll each portion into a smooth ball.
5
Cook the Rotis
Heat a tawa or cast-iron skillet over medium-high heat.
Take one dough ball, dust it lightly with atta, and roll it into a 6-inch circle, keeping it slightly thicker than a regular chapati.
Place the rolled roti on the hot tawa. Cook for about 30-40 seconds, until small bubbles start to appear on the surface.
Flip the roti and cook the other side for about 1 minute, pressing down gently with a spatula to encourage puffing.
Flip again and cook for another 30 seconds until golden-brown spots appear on both sides.
For a charred, tandoori-like effect, you can carefully lift the roti with tongs and hold it over a low open flame for a few seconds until it puffs up completely.
6
Serve
Remove the cooked roti from the heat and immediately brush it with the remaining melted ghee.
Repeat the process for all the dough balls, stacking the cooked rotis in a casserole dish or wrapped in a kitchen towel to keep them soft and warm.
Serve hot with your favorite curry, dal, or kebab.
1 slice Beet (Optional, paper-thin for a vibrant pink color)
Instructions
1
Prepare the Ginger
Peel the young ginger using the edge of a spoon or a vegetable peeler.
Using a mandoline slicer or a very sharp knife, slice the ginger paper-thin against the grain.
Place the ginger slices in a non-metallic bowl and toss with 1 teaspoon of salt. Let it stand for 30 minutes. This step draws out excess moisture and tames its sharp bite.
After 30 minutes, rinse the ginger thoroughly under cold running water to remove the salt. Gently squeeze the slices to remove as much water as possible, then pat completely dry with paper towels.
2
Make the Pickling Liquid
In a small, non-reactive saucepan (such as stainless steel or enamel), combine the rice vinegar, granulated sugar, and the remaining 1/2 teaspoon of salt.
Bring the mixture to a rolling boil over medium-high heat, stirring continuously until the sugar and salt are completely dissolved. This should take about 2-3 minutes.
Once boiling and clear, remove the saucepan from the heat.
3
Pickle and Store
Pack the dried ginger slices into a sterilized, heatproof glass jar. If using, tuck the thin slice of beet amongst the ginger.
Carefully pour the hot pickling liquid over the ginger, ensuring all slices are fully submerged. Use a spoon to press down the ginger if needed.
Let the jar cool to room temperature on the counter, uncovered, for about 1 hour.
Once cool, seal the jar with a tight-fitting lid and transfer to the refrigerator. The pickled ginger is ready to eat after a few hours, but the flavor and color will deepen and improve significantly after 24-48 hours.