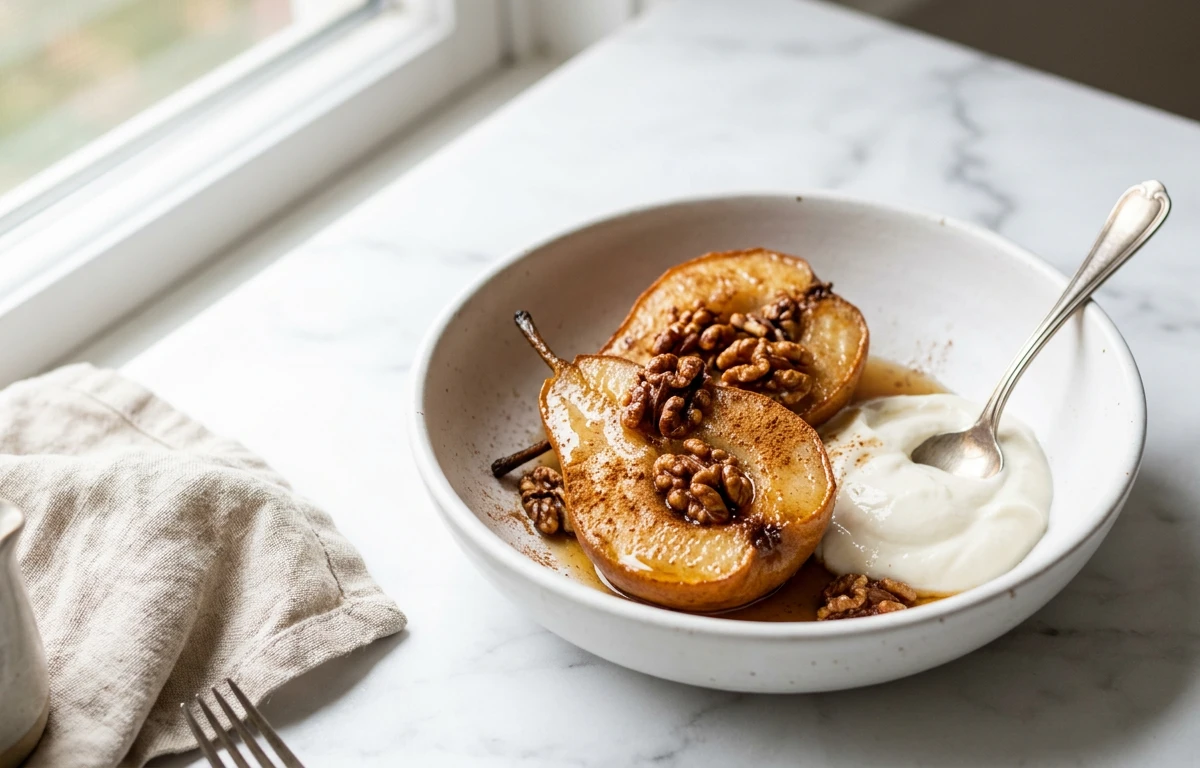
Cinnamon Baked Pears with Walnuts
Warm, tender pears baked until soft and juicy, filled with a crunchy walnut and cinnamon crumble. The natural sweetness of the fruit intensifies in the oven, creating a simple yet elegant dessert that feels indulgent but comes together with just a handful of pantry staples.
For 4 servings
- prep · ~10 min
Preheat the oven and prepare the pears.
1.Preheat oven to 375°F (190°C).2.Slice each pear in half lengthwise and use a spoon to scoop out the core and seeds.3.Arrange pear halves cut-side up in a baking dish, nestling them snugly so they stay upright.TIPUse pears that are ripe but still firm — overripe pears turn mushy during baking. - mix · ~2 min
Make the walnut-cinnamon filling.
1.In a small mixing bowl, combine chopped walnuts, brown sugar, cinnamon powder, and salt.2.Pour melted butter over the mixture and stir until everything is evenly coated.TIPThe butter helps the filling clump together making it easier to mound onto the pears. - assemble · ~2 min
Fill the pear cavities.
1.Spoon the walnut mixture generously into each cored pear cavity, mounding it slightly above the surface.2.Press gently with the back of the spoon to pack the filling in place. - bake · ~25 min
Bake until tender and golden.
Bake uncovered for 20-25 minutes, until the pears are fork-tender and the walnut filling is golden and fragrant. The kitchen should smell warm and cinnamony.
TIPIf the walnuts start browning too quickly, tent loosely with foil for the last 5 minutes. - rest · ~5 min
Cool briefly before serving.
Let the pears rest in the dish for 5 minutes. Spoon any pan juices over the tops before serving warm.
TIPThe juices in the bottom of the dish are pure gold — don't leave them behind.
What to keep in mind.
6 tips from the recipe — small details that make a real difference to the final dish.
- 1Use pears that are ripe but still firm to prevent them from turning mushy during baking.
- 2Scooping a small, even cavity from each pear half helps the filling stay in place.
- 3If the walnut topping browns too quickly, tent the dish loosely with foil for the last 5 minutes.
- 4Spoon the pan juices over the baked pears before serving for extra flavor and moisture.
- 5Let the pears rest for 5 minutes after baking so the filling sets slightly.
- 6For a prettier presentation, brush the cut sides of the pears with a little melted butter before filling.
Adapt it for your goals.
Vegan
Replace the butter with coconut oil or a vegan butter alternative and use maple syrup instead of brown sugar to keep it plant-based and naturally sweetened.
Gluten FreeGluten-Free
This recipe is naturally gluten-free, but double-check that your cinnamon and brown sugar are certified gluten-free if you have celiac sensitivity.
Low SugarLow-Sugar
Reduce the brown sugar to 1 tablespoon or substitute with a pinch of stevia, letting the natural sweetness of the ripe pears shine.
Spiced UpSpiced-Up
Add a pinch of nutmeg, cardamom, or ginger to the cinnamon filling for a more complex warming spice profile.
Nut FreeNut-Free
Swap the walnuts for an equal amount of sunflower seeds or pepitas to maintain crunch without nuts.
Why this is on our healthy list.
Rich in Fiber
Pears are an excellent source of dietary fiber, which supports digestion and helps maintain steady blood sugar levels.
Heart-Healthy Fats
Walnuts provide omega-3 fatty acids that are known to support cardiovascular health and reduce inflammation.
Natural Sweetness
This dessert relies on the fruit's own sugars for sweetness, meaning less added sugar than many baked treats.
Antioxidant Boost
Cinnamon is packed with antioxidants that help protect cells from oxidative stress.
Frequently asked questions
Firm varieties like Bosc, Anjou, or Bartlett hold their shape well during baking. Avoid very soft or overripe pears.