Cool Taro & Chickpea Salad
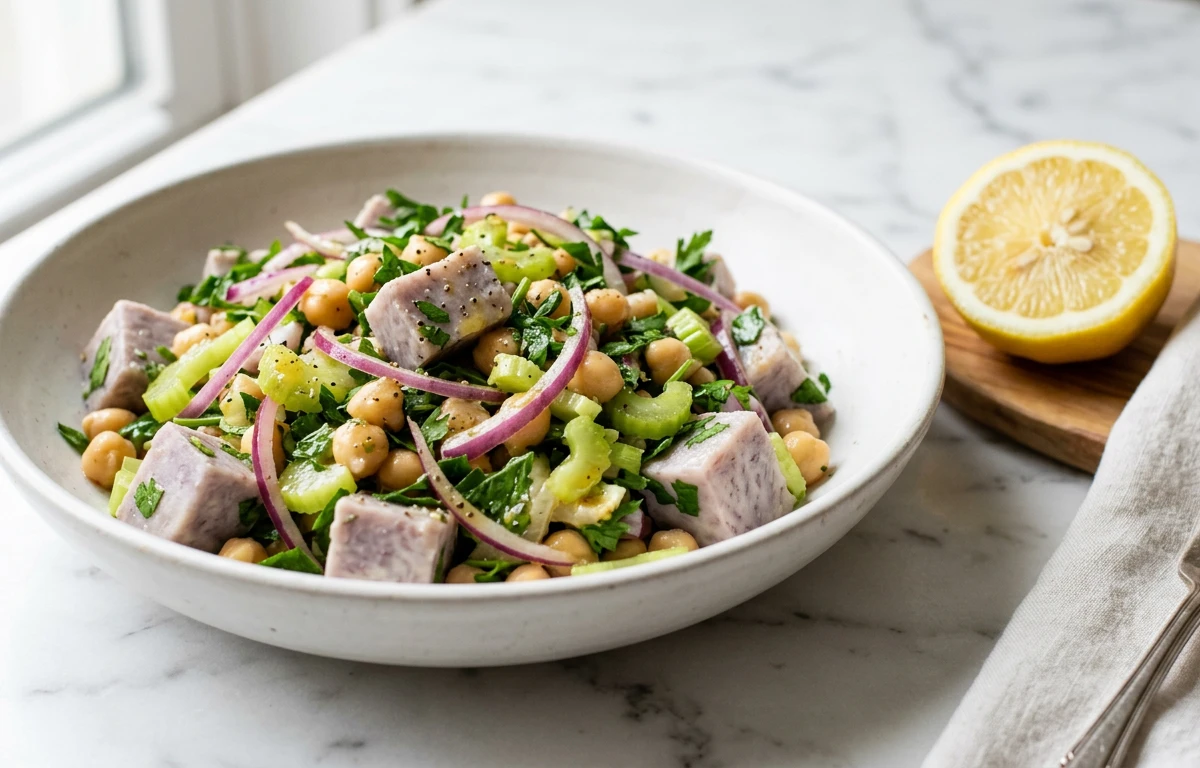
A refreshing, earthy salad that pairs tender steamed taro root with protein-packed chickpeas. Brightened with fresh lemon, cumin, and crunchy red onion, this chilled salad comes together quickly and tastes even better after resting. Perfect as a light lunch or vibrant side dish.
For 4 servings
- prep
Soak the chickpeas overnight.
Rinse the dried chickpeas and soak them in enough water to cover by 2 inches for 8 hours or overnight. Drain before cooking.
- pressure cook · ~15 min
Pressure cook the chickpeas.
Add the soaked and drained chickpeas to a pressure cooker with 2 cups of fresh water. Cook on medium heat for 4 to 5 whistles or until tender but not mushy. Drain any excess water and let them cool completely.
TIPThe chickpeas should hold their shape and have a slight bite, not turn to mush. - steam · ~12 min
Steam the taro root cubes.
Place the peeled and cubed taro root in a steamer basket. Steam for 10 to 12 minutes until fork-tender. Spread on a plate to cool to room temperature, then refrigerate for at least 15 minutes.
TIPDon't over-steam; the taro should be tender but firm enough to hold its shape in the salad. - prep
Chop the fresh vegetables.
Finely chop the red onion, deseeded tomato, green chili, and coriander leaves. Keep them chilled until assembly.
- assemble
Assemble the salad.
In a large mixing bowl, combine the cooled taro cubes, cooked chickpeas, chopped onion, tomato, green chili, and coriander leaves. Toss gently to mix without breaking the taro.
- mix
Season and dress the salad.
Sprinkle roasted cumin powder, chaat masala, salt, and black pepper over the salad. Pour the fresh lemon juice on top. Gently toss everything together until the seasonings coat the ingredients evenly.
- rest · ~20 min
Chill before serving.
Cover the bowl and refrigerate for 15 to 20 minutes to let the flavors meld. The salad tastes best when served cool.
TIPThis rest time is key — it allows the lemon and spices to soak into the warm notes of the taro and chickpeas. - serve
Serve the cool taro and chickpea salad.
Give the salad a gentle toss once more, adjust seasoning if needed, and serve chilled in individual bowls or cups.
What to keep in mind.
7 tips from the recipe — small details that make a real difference to the final dish.
- 1Steam taro just until fork-tender; over-steaming makes it crumble in the salad.
- 2Cook chickpeas until tender but with a slight bite — mushy chickpeas ruin the texture.
- 3Chill both taro and chickpeas completely before assembling to keep the salad cool and crisp.
- 4Remove tomato seeds before chopping to avoid making the salad watery.
- 5Let the dressed salad rest in the fridge for 15–20 minutes so the flavors meld beautifully.
- 6Add green chili gradually and taste as you go — spice levels vary by chili.
- 7Store leftovers in an airtight container in the fridge for up to 2 days; stir before serving.
Adapt it for your goals.
High-protein
Add 100g of crumbled paneer or cubed firm tofu for an extra protein punch — great for post-workout meals or hearty lunches.
low oilLow-oil
Omit the oil entirely (the recipe already uses none), and rely on lemon juice and chaat masala for moisture and zest — perfect for oil-free diets.
jainJain
Skip the onion and green chili; replace with chopped cucumber and a pinch of asafoetida (hing) for a Jain-friendly version that stays refreshing.
veganVegan
This salad is already vegan — simply confirm your chaat masala is plant-based, and you're good to go.
Why this is on our healthy list.
Rich in Fiber
Both taro root and chickpeas provide dietary fiber, which supports healthy digestion and helps keep you full longer.
Good Source of Plant Protein
Chickpeas deliver a solid plant-based protein boost, making this salad a satisfying choice for vegetarian meals.
Packed with Antioxidants
Coriander leaves, cumin, and chaat masala add anti-inflammatory antioxidants that support overall wellness.
Naturally Low in Fat
With no added oil and wholesome ingredients, this salad is naturally low in fat while remaining flavorful.
Frequently asked questions
Yes — use 1.5 cans (about 240g drained) and skip the pressure cooking. Rinse and drain well, then pat dry before adding.