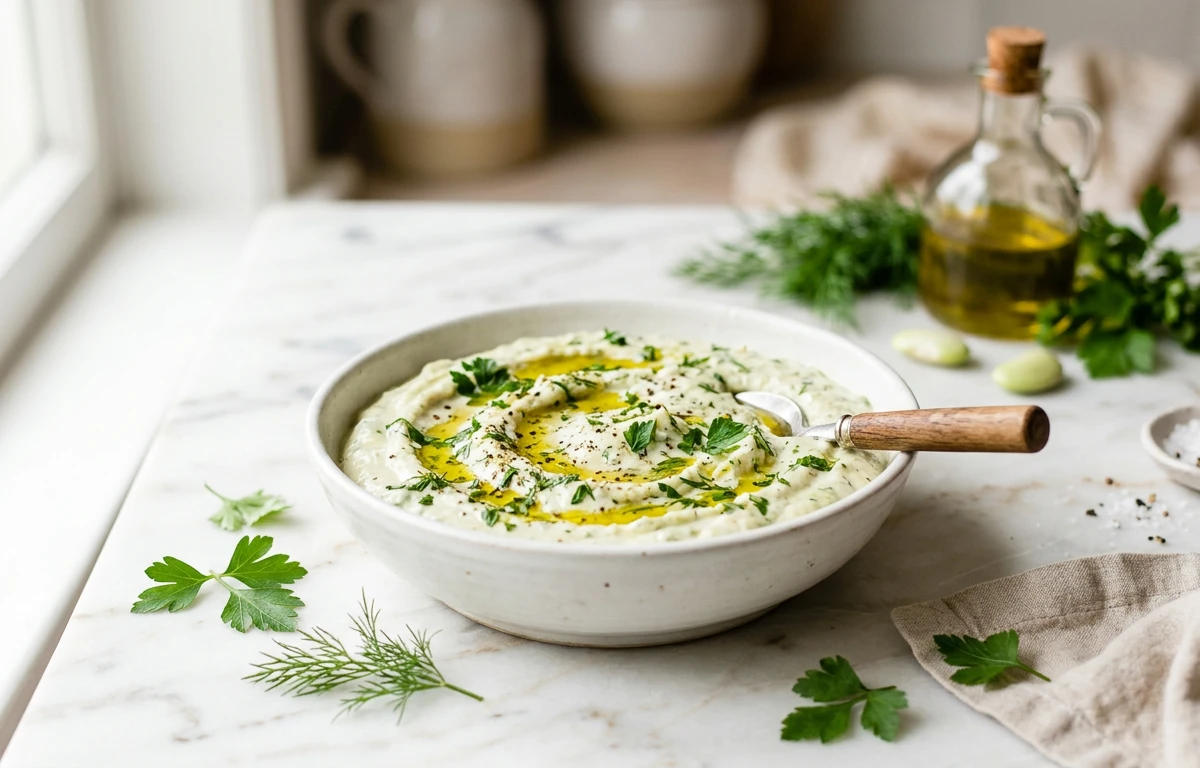
Creamy Lima Bean & Herb Dip
Silky smooth and incredibly fresh, this lima bean dip is blended with bright herbs, garlic, and a squeeze of lemon. It comes together in minutes and makes a perfect spread for crackers, crostini, or crunchy vegetable sticks. An excellent make-ahead appetizer that tastes even better the next day.
For 4 servings
- boil · ~6 min
Cook the lima beans until tender.
Bring a saucepan of water to a boil. Add the thawed lima beans and cook for 5 to 6 minutes until they are bright green and tender but still hold their shape. Drain well in a colander and let cool slightly.
TIPDo not overcook — mushy beans make a watery dip. They're ready when they mash easily between your fingers. - mix · ~2 min
Blend the base until smooth.
In a food processor, combine the drained lima beans, garlic, lemon juice, olive oil, salt, and black pepper. Pulse a few times to break up the beans, then process continuously until the mixture is smooth and creamy, scraping down the sides as needed.
- mix · ~1 min
Add the fresh herbs and zest.
Add the parsley, dill, chives, and lemon zest to the food processor. Pulse 5 to 6 times just until the herbs are finely chopped and evenly distributed throughout the dip. Do not over-process or the dip will turn green and the herbs will lose their bright flavor.
TIPPulsing at the end keeps the herbs distinct and prevents the dip from becoming uniformly green and grassy-tasting. - mix · ~1 min
Adjust the consistency.
Check the texture. If the dip is too thick, add cold water one tablespoon at a time and pulse briefly until you reach a creamy, spreadable consistency. Taste and adjust salt and pepper if needed.
- rest · ~15 min
Chill briefly before serving.
Transfer the dip to a serving bowl. Cover and refrigerate for at least 15 minutes to let the flavors meld. The dip can be made up to 2 days ahead.
TIPThis dip tastes noticeably better after a rest — the garlic and herbs infuse the beans as it chills. - garnish
Garnish with a drizzle of olive oil and serve.
Just before serving, swirl the surface with the back of a spoon and drizzle with extra virgin olive oil. Serve with crackers, toasted baguette slices, or raw vegetable sticks.
What to keep in mind.
7 tips from the recipe — small details that make a real difference to the final dish.
- 1Thaw frozen lima beans completely before cooking to ensure even tenderness.
- 2Blanch the beans just until tender but not mushy — they should mash easily between your fingers.
- 3Reserve a tablespoon of the bean cooking water to thin the dip if needed instead of plain water.
- 4Pulse the herbs at the end to keep their bright green color and fresh flavor intact.
- 5Chill the dip for at least 15 minutes before serving to let the garlic and herb flavors meld.
- 6For a silkier texture, run the food processor continuously for a full minute after the beans are broken down.
- 7Store leftover dip in an airtight container in the fridge for up to 3 days; stir before serving.
Adapt it for your goals.
Spicy
Add 1 small jalapeño (seeded and chopped) when blending the beans, plus a pinch of cayenne. This gives the dip a gentle heat that pairs beautifully with the cool herbs.
high proteinHigh-protein
Swap 100g of the lima beans for cooked edamame or chickpeas. This bumps up the protein content and adds a slightly different earthy flavor.
veganVegan
The recipe is already vegan as written, but for extra richness, swirl in 1 tablespoon of tahini before serving. It adds a nutty depth without any animal products.
dill & mintDill & mint
Replace the parsley with an equal amount of fresh mint. This variation is especially refreshing with cucumbers or pita chips.
Why this is on our healthy list.
Rich in Plant-Based Protein
Lima beans provide a solid plant-based protein boost, making this dip a satisfying and energizing snack.
High in Dietary Fiber
The lima beans are a good source of fiber, which supports healthy digestion and helps you feel full longer.
Packed with Fresh Herbs
Parsley, dill, and chives add antioxidants and vitamins A, C, and K with virtually no calories.
Low in Added Fats
Made with just a modest amount of olive oil and no heavy cream, this dip is a lighter alternative to traditional creamy spreads.
Frequently asked questions
Yes, but you will need to soak them overnight and boil until very tender (about 45-60 minutes) before using. Frozen are much quicker and yield a consistent texture.