Savory Chickpea Flour Waffles
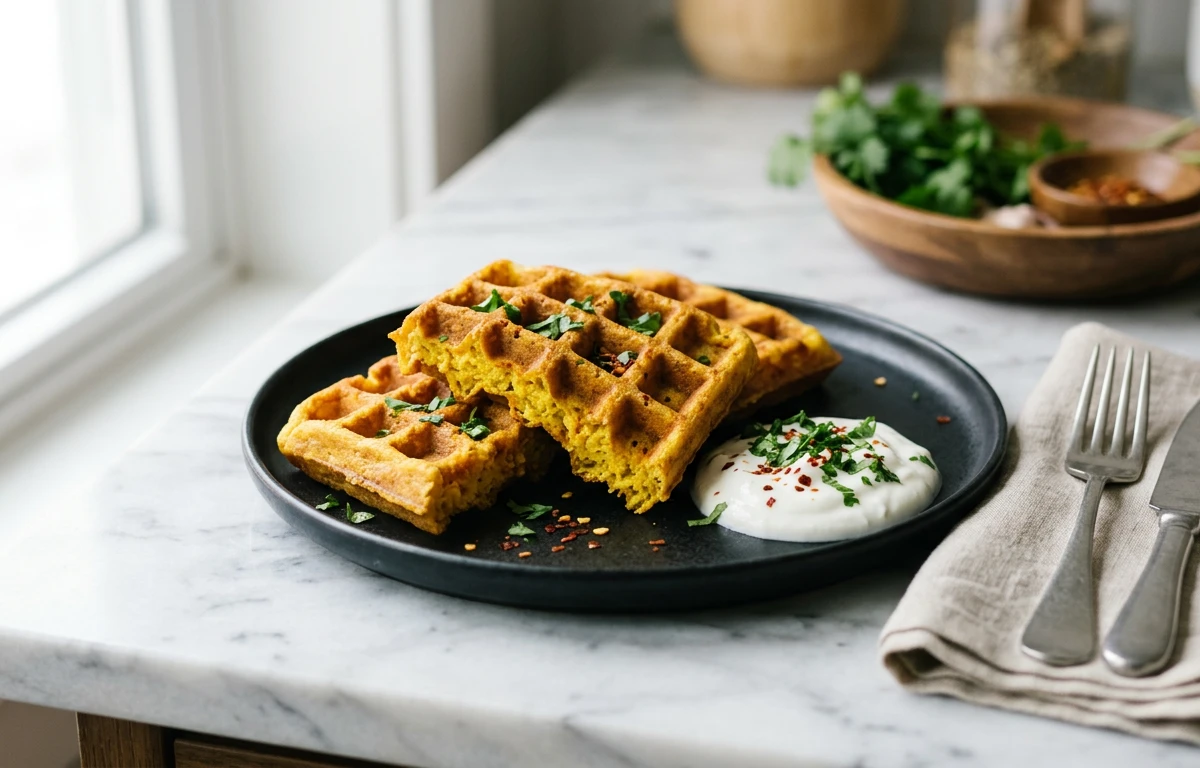
Crispy on the outside, soft and fluffy inside, these savory chickpea flour waffles are packed with fresh herbs, onions, and a hint of spice. A gluten-free twist on classic waffles that works beautifully for breakfast, brunch, or even a quick snack with a dollop of yogurt.
For 4 servings
- prep · ~5 min
Preheat the waffle iron.
Plug in and preheat your waffle iron according to the manufacturer's instructions. A properly hot iron is key to getting crispy waffles.
- mix · ~1 min
Prepare the dry batter mix.
In a large mixing bowl, whisk together the chickpea flour, cumin seeds, turmeric powder, red chili powder, and salt until evenly combined.
TIPSifting the chickpea flour prevents lumps and makes the batter lighter. - mix · ~2 min
Make the batter.
Gradually pour water into the dry ingredients, whisking continuously to create a smooth, lump-free batter. The consistency should be slightly thicker than pancake batter but still pourable. Stir in the whisked yogurt.
TIPLet the batter rest for 5 minutes if you have time — it helps hydrate the chickpea flour fully. - mix · ~1 min
Fold in the fresh ingredients.
Add the finely chopped onion, green chili, deseeded tomato, grated ginger, and fresh coriander leaves to the batter. Fold everything in gently until well distributed.
- bake · ~6 min
Cook the waffles until golden and crisp.
1.Lightly brush the hot waffle iron with oil.2.Pour a ladleful of batter onto the center of the iron, spreading it slightly — don't overfill.3.Close the lid and cook for 4-6 minutes, or until the steaming stops and the waffle is deep golden and crispy.4.Carefully remove the waffle with a silicone or wooden spatula.TIPResist the urge to open the lid too soon — chickpea flour waffles need the full steam cycle to release cleanly. - rest · ~15 min
Repeat with the remaining batter.
Grease the iron lightly between each waffle. Keep cooked waffles on a wire rack so they stay crisp while you finish the batch.
- serve
Serve the waffles immediately.
Serve the hot, crispy waffles with a side of plain yogurt, mint chutney, or ketchup.
What to keep in mind.
6 tips from the recipe — small details that make a real difference to the final dish.
- 1Let the batter rest for 10 minutes after mixing to fully hydrate the chickpea flour for a tender texture.
- 2Deseed the tomato completely to prevent excess moisture from making the waffles soggy.
- 3Use a silicone spatula to remove waffles – metal can scratch the non-stick coating of your iron.
- 4Place cooked waffles on a wire rack, not a plate, so steam escapes and they stay crispy.
- 5Grease the waffle iron lightly with oil between each batch using a pastry brush for even coverage.
- 6For extra crunch, toast the cumin seeds briefly in a dry pan before adding to the batter.
Adapt it for your goals.
Vegan
Replace the yogurt with an equal amount of unsweetened plant-based yogurt or a mixture of 2 tablespoons lemon juice + 2 tablespoons water. This keeps the recipe completely plant-based without sacrificing fluffiness.
low oilLow-oil
Skip greasing the waffle iron between batches if it has a good non-stick surface; the batter itself contains enough moisture to release cleanly. Use a spray oil for minimal coating.
high proteinHigh-protein
Add 2 tablespoons of finely ground flaxseed meal or hemp hearts to the dry mix. This boosts protein and adds omega-3s without altering the savory flavor profile.
jainJain
Omit the onion and green chili. Instead, add 1/4 cup grated carrot and 1/4 cup finely chopped spinach for a mild, colorful variation that adheres to Jain dietary restrictions.
Why this is on our healthy list.
Gluten-Free & Gut-Friendly
Chickpea flour is naturally gluten-free and rich in soluble fiber, which supports healthy digestion and helps maintain steady blood sugar levels.
Plant-Based Protein Power
Chickpea flour provides a solid source of plant protein, making these waffles a filling option for vegetarians and vegans alike.
Anti-Inflammatory Spices
Turmeric and ginger are known for their anti-inflammatory properties, adding a gentle health boost to every bite.
Low in Saturated Fat
This recipe uses minimal oil and no butter, keeping saturated fat low while still delivering a crispy, satisfying texture.
Frequently asked questions
Yes. Let them cool completely on a wire rack, then store in an airtight container in the fridge for up to 3 days. Reheat in a toaster or oven at 350°F for 5 minutes to restore crispness.