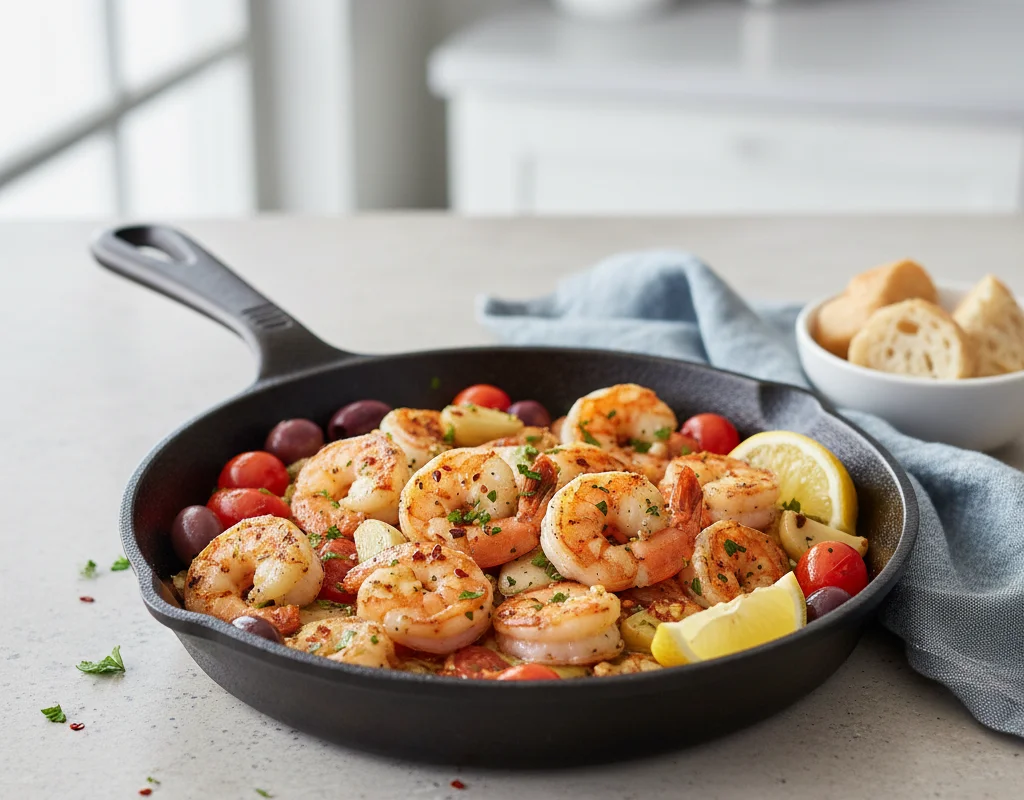
Shrimp Garlic Skillet
Plump, juicy shrimp seared in a hot skillet with loads of garlic, butter, and a bright squeeze of lemon. This quick one-pan dish comes together in under 20 minutes and tastes like a restaurant meal. Serve it with crusty bread or over a bed of rice to soak up every drop of the garlicky pan sauce.
For 4 servings
- prep
Pat the shrimp very dry and season.
1.Rinse shrimp under cold water and pat completely dry with paper towels — this is key for a good sear.2.Season shrimp evenly with salt and black pepper. - fry · ~4 min
Sear the shrimp in batches.
1.Heat olive oil and 1 tablespoon butter in a large skillet over medium-high heat until the butter foams.2.Add shrimp in a single layer — do not crowd the pan. Work in two batches if needed.3.Cook without moving for 2 minutes until golden on the bottom, then flip.4.Cook the second side for 1-2 minutes until just opaque and pink. Transfer to a plate.TIPDon't overcook — shrimp turns rubbery quickly. They should form a loose C shape, not a tight O. - saute · ~2 min
Cook the garlic and chili flakes.
1.Reduce heat to medium-low and add the remaining 2 tablespoons of butter to the skillet.2.Add sliced garlic and cook, stirring constantly, until fragrant and just beginning to turn golden at the edges.3.Add the red chili flakes and stir for 10 seconds.TIPGarlic burns fast and turns bitter. Keep the heat low and watch the color — pale gold is perfect. - assemble · ~1 min
Return shrimp to the pan and finish with lemon.
1.Return the seared shrimp and any accumulated juices back into the skillet.2.Pour lemon juice over the shrimp and toss gently to coat everything in the garlic butter sauce.3.Cook for 1 minute just to warm the shrimp through. - garnish
Garnish with fresh parsley and serve immediately.
Scatter chopped parsley over the shrimp. Spoon the pan juices generously over the top. Serve straight from the skillet with crusty bread, pasta, or steamed rice.
What to keep in mind.
6 tips from the recipe — small details that make a real difference to the final dish.
- 1Pat shrimp bone-dry with paper towels to ensure a proper golden-brown sear, not steamed shrimp.
- 2Cook shrimp in a single layer without crowding the pan—work in batches to prevent steaming.
- 3Watch shrimp shape: a loose 'C' curve means perfectly cooked; a tight 'O' means overdone and rubbery.
- 4Keep garlic on medium-low heat and stir constantly; it burns in seconds and becomes bitter.
- 5Serve immediately after adding lemon juice—shrimp continue cooking from residual heat.
- 6Refrigerate leftovers in an airtight container for up to 2 days; reheat gently in a skillet.
Adapt it for your goals.
Dairy-free
Replace butter with a high-quality extra-virgin olive oil or a dairy-free butter alternative for a lactose-free version that stays rich.
spicySpicy
Double the red chili flakes or add a finely chopped fresh red chili with the garlic for extra heat.
herb swapHerb swap
Substitute parsley with fresh basil, cilantro, or chives for a different herbal note.
low oilLow-oil
Reduce butter to 1 tablespoon and use a non-stick skillet; the shrimp will still pick up good flavor from less fat.
Why this is on our healthy list.
Lean Protein Source
Shrimp provide high-quality, low-calorie protein that supports muscle maintenance and satiety.
Rich in Selenium
Shrimp are a natural source of selenium, an antioxidant mineral that supports immune function and thyroid health.
Garlic's Natural Compounds
Garlic contains allicin and other sulfur compounds linked to heart-healthy benefits and anti-inflammatory effects.
Low in Carbohydrates
This dish is naturally low-carb and keto-friendly, making it a smart choice for blood sugar management.
Frequently asked questions
Yes, but thaw them completely in the refrigerator overnight and pat very dry with paper towels before cooking to avoid excess moisture.