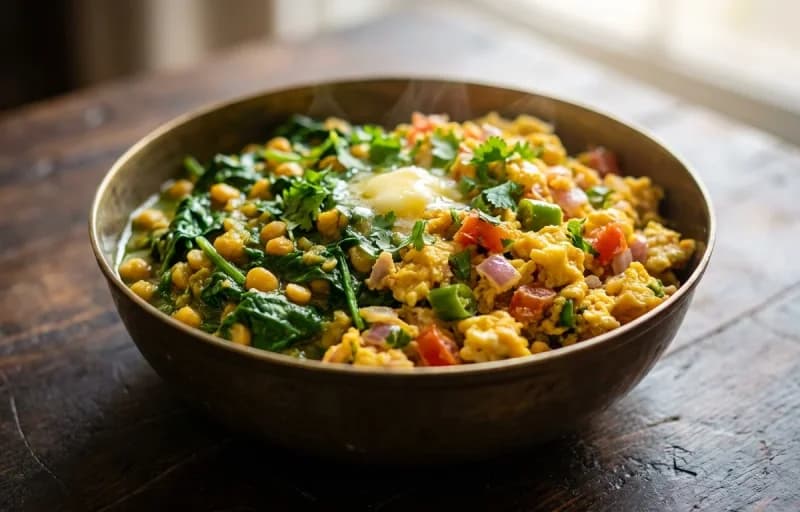
A hearty and nutritious breakfast twist, combining creamy scrambled eggs with the wholesome goodness of Sindhi Sai Bhaji. It's a flavorful, protein-packed meal perfect for any time of day, blending traditional Indian greens with a breakfast classic.
Prep15 min
Cook30 min
Soak30 min
Servings4
Serving size: 1 serving
389cal
21gprotein
28gcarbs
Ingredients
100 g Chana Dal (Rinsed and soaked for at least 30 minutes)
Soft, thin, and light Indian flatbreads made from whole wheat flour. They puff up beautifully on an open flame, making them a perfect, healthy accompaniment to any curry or dal.
Creamy, tangy, and rich homemade yogurt, a staple in every Indian household. This simple recipe uses just two ingredients to create perfect, thick dahi every time, ideal for raitas, curries, or enjoying plain.
About Scrambled Egg with Sai Bhaji, Phulka and Dahi
Homestyle scrambled eggs with iron-boosting Sai Bhaji, phulka, and creamy, gut-friendly dahi. Delicious!
This sindhi dish is perfect for dinner. With 813.8999999999999 calories and 37.61g of protein per serving, it's a nutritious choice for your meal plan.
22gfat
60 ml
Milk
(Optional, for creamier eggs)
2 g Turmeric Powder
2 g Red Chili Powder (Adjust to taste)
3 g Coriander Powder
2 g Cumin Powder
2 g Garam Masala
9 g Salt (Divided, adjust to taste)
2 g Black Pepper Powder (Freshly ground)
360 ml Water (For pressure cooking)
10 g Coriander Leaves (Chopped, for garnish)
Instructions
1
Prepare the Sai Bhaji Base
Heat vegetable oil in a 3-liter pressure cooker over medium heat. Add the chopped onion and sauté for 3-4 minutes until it becomes soft and translucent.
Add the ginger-garlic paste and slit green chilies. Cook for 1 minute until the raw aroma disappears.
Stir in the chopped tomato and cook for 4-5 minutes until it turns soft and mushy.
Add the turmeric powder, red chili powder, coriander powder, and cumin powder. Sauté for 30 seconds until fragrant.
Add the drained chana dal, chopped spinach, 1 tsp of salt, and 360 ml of water. Mix everything well.
2
Pressure Cook and Finish the Bhaji
Secure the lid of the pressure cooker. Cook on high heat for 4-5 whistles, which should take about 15 minutes.
Turn off the heat and allow the pressure to release naturally. This will take about 10 minutes.
Open the cooker and use a potato masher or the back of a ladle to lightly mash the mixture. The consistency should be thick and coarse, not a smooth puree. If it's too watery, cook on high heat for a few minutes to evaporate excess liquid. Set aside.
3
Prepare and Scramble the Eggs
In a large bowl, crack the 8 eggs. Add the milk (if using), the remaining 0.5 tsp of salt, and black pepper powder. Whisk vigorously until the mixture is pale, frothy, and well-combined.
Melt the butter in a large non-stick skillet over medium-low heat.
Pour the whisked egg mixture into the skillet. Let it cook undisturbed for about 30 seconds until the edges just begin to set.
4
Combine and Finish the Dish
Once the eggs start setting, add approximately 2.5 cups of the prepared Sai Bhaji to the skillet.
Using a spatula, gently fold the bhaji into the eggs. Continue to cook, stirring and folding occasionally, for 2-3 minutes until the eggs are cooked to a soft, creamy scramble.
Sprinkle the garam masala over the top and give it one final, gentle mix.
5
Garnish and Serve
Remove the skillet from the heat. Garnish with freshly chopped coriander leaves.
Serve immediately with toasted bread, pav (soft rolls), or hot rotis.
262cal
8gprotein
44gcarbs
8gfat
Ingredients
2 cup Atta (Also known as whole wheat flour)
0.5 tsp Salt
1 cup Lukewarm Water (Adjust as needed to form a soft, pliable dough)
2 tbsp Ghee (For brushing on top, optional)
Instructions
1
Prepare the Dough
In a large mixing bowl, combine 2 cups of atta and salt.
Gradually add lukewarm water, a little at a time, mixing with your fingers until the flour comes together to form a dough.
Knead the dough on a clean, flat surface for 8-10 minutes, pressing and stretching it with the heel of your hand. The final dough should be soft, smooth, and elastic, not sticky.
2
Rest the Dough
Lightly grease the dough with a few drops of oil or ghee to prevent it from drying out.
Cover the bowl with a damp cloth or a lid and let the dough rest for at least 20-30 minutes. This step is crucial for relaxing the gluten, which results in softer phulkas.
3
Divide and Roll
After resting, knead the dough again for one minute.
Divide the dough into 8 equal-sized portions and roll them into smooth balls.
Take one ball, flatten it between your palms, and dip it into the dry atta for dusting.
Place it on a rolling board (chakla) and roll it out evenly into a thin circle, about 6-7 inches in diameter. Use minimal dry flour for dusting to avoid making the phulka hard.
4
Cook on the Tawa (Griddle)
Heat a tawa over medium-high heat. To check if it's ready, sprinkle a pinch of dry flour; it should turn brown in a few seconds.
Place the rolled phulka on the hot tawa. Cook for about 15-20 seconds until you see small bubbles appear on the surface.
Flip the phulka using tongs and cook the other side for 30-40 seconds until light brown spots appear.
5
Puff on Open Flame
Using tongs, carefully lift the phulka off the tawa and place it directly on a high flame.
Within seconds, the phulka will puff up into a ball due to the trapped steam.
Immediately flip it to cook the other side on the flame for just a second or two. Be careful not to burn it.
6
Finish and Serve
Remove the puffed phulka from the flame. If desired, brush the top with a little ghee.
Place the finished phulka in a casserole or a container lined with a clean kitchen towel. This keeps them soft and warm.
Repeat the rolling, cooking, and puffing process for the remaining dough balls. Serve hot with your favorite dal or curry.
1 L Full-Fat Milk (Whole milk provides the creamiest texture. Avoid UHT milk as it may not set well.)
2 tbsp Plain Yogurt (Use a good quality, live culture yogurt as a starter. Ensure it's at room temperature.)
Instructions
1
Boil and Thicken Milk
Pour the milk into a heavy-bottomed saucepan. Bring it to a rolling boil over medium heat, watching carefully to prevent it from boiling over.
Once boiling, reduce the heat to low and let it simmer for 5-7 minutes. Stir occasionally to prevent a skin from forming and to stop it from scorching at the bottom. This step helps thicken the milk, resulting in creamier dahi.
2
Cool Milk to the Right Temperature
Remove the pan from the heat and allow the milk to cool down until it is lukewarm. The ideal temperature is between 40-45°C (105-115°F).
To test without a thermometer, dip a clean finger into the milk. It should feel comfortably warm, not hot. You should be able to hold your finger in for about 10 seconds.
3
Inoculate with Starter
In a small bowl, whisk the starter yogurt (dahi) until it is smooth and lump-free.
Add a few tablespoons of the warm milk to the whisked starter and mix well. This tempers the starter and ensures it mixes evenly without curdling.
Pour this tempered starter mixture into the pot with the rest of the lukewarm milk and stir gently 2-3 times to combine everything.
4
Set the Dahi to Ferment
Transfer the milk mixture into a setting container, such as a clay pot (matka), glass bowl, or steel pot.
Cover the container with a lid and place it in a warm, draft-free place for 6 to 8 hours, or overnight. Do not disturb it during this time.
In colder climates, you can place the container in a preheated (and turned off) oven, a microwave with the light on, or wrap it in a thick towel to maintain warmth.
5
Chill and Serve
After 6-8 hours, check if the dahi is set. It should be firm and not jiggle like a liquid when gently tilted.
Once set, transfer the container to the refrigerator and chill for at least 3-4 hours. Chilling stops the fermentation process (preventing it from becoming too sour) and helps it thicken further.
Serve chilled as a side, use it to make raita, or enjoy it plain.