A rich and aromatic Sindhi mutton curry slow-cooked with a generous amount of caramelized onions and whole spices. The tender meat in a thick, savory gravy is a true delight for any meat lover.
Soft, thin, and light Indian flatbreads made from whole wheat flour. They puff up beautifully on an open flame, making them a perfect, healthy accompaniment to any curry or dal.
Crisp, tangy rings of onion tossed with fresh lemon juice, herbs, and a hint of spice. This classic Indian side salad, known as Laccha Pyaz, is the perfect refreshing accompaniment to rich curries and grilled kebabs.
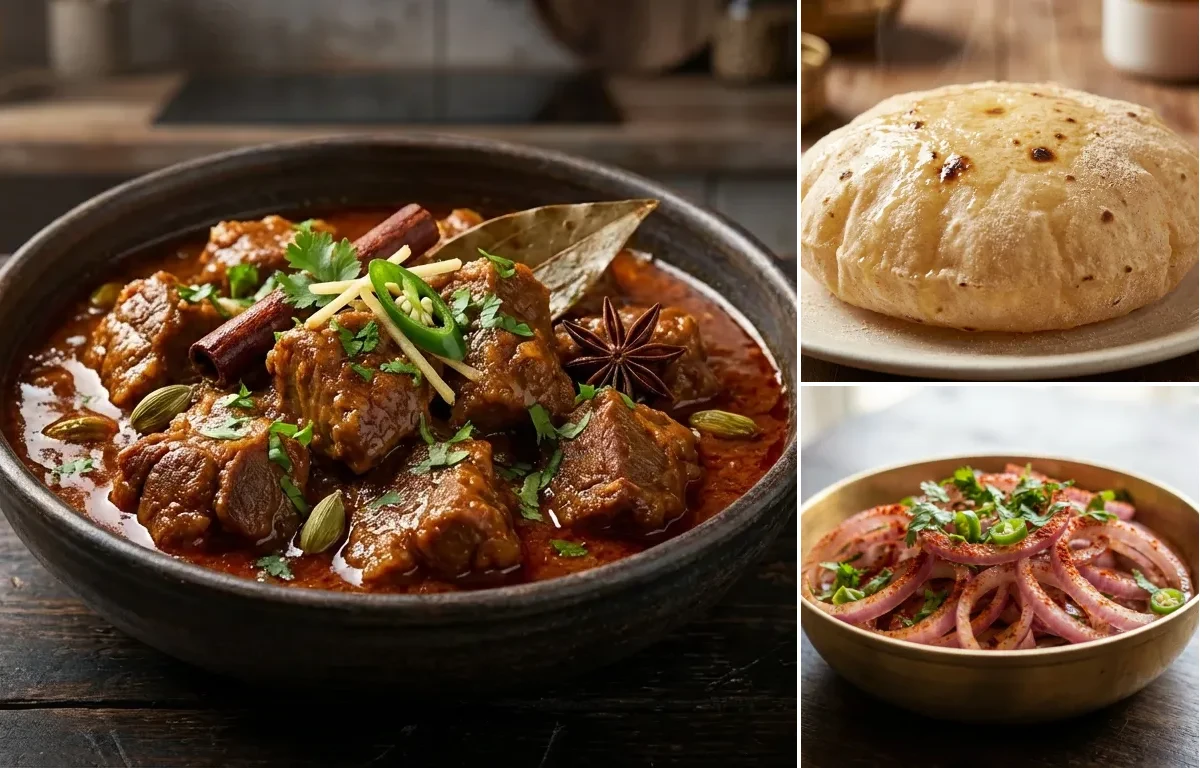
Melt-in-mouth Sindhi Bhugal Gosht with soft phulkas. A perfectly spiced, energy-giving comfort meal!
This sindhi dish is perfect for dinner. With 832.58 calories and 65.33g of protein per serving, it's a nutritious choice for your meal plan.
fat
5 pcs Cloves
0.5 tsp Turmeric Powder
1.5 tsp Red Chili Powder (Adjust to taste)
2 tsp Coriander Powder
1 tsp Garam Masala
1.5 tsp Salt (Or to taste)
2 cup Water (Hot)
3 tbsp Coriander Leaves (Chopped, for garnish)
Instructions
1
Caramelize Onions with Whole Spices
Heat ghee in a heavy-bottomed pressure cooker over medium heat.
Add the bay leaves, green and black cardamoms, cinnamon stick, and cloves. Sauté for about 30 seconds until they release their aroma.
Add the thinly sliced onions. Fry them, stirring frequently, until they turn a deep, even golden brown. This is the most crucial step for the dish's flavor and can take 15-20 minutes. Be patient and avoid burning them.
2
Sear Mutton and Sauté Aromatics
Add the ginger-garlic paste and slit green chilies to the cooker. Sauté for 1-2 minutes until the raw smell disappears.
Increase the heat to high. Add the mutton pieces and sear them on all sides until well-browned, which should take about 5-7 minutes. This step helps to lock in the meat's juices and adds a layer of flavor.
3
Incorporate Spices and Yogurt
Reduce the heat to low. Add the turmeric powder, red chili powder, coriander powder, and salt. Stir well to coat the mutton and cook for one minute.
Add the whisked yogurt, one tablespoon at a time, stirring continuously. This gradual addition on low heat is key to preventing the yogurt from curdling.
Once all the yogurt is incorporated, increase the heat to medium and cook for 5-7 minutes, stirring occasionally, until the oil begins to separate from the masala.
4
Pressure Cook to Tenderness
Pour in 2 cups of hot water and stir everything together, making sure to scrape any flavorful bits from the bottom of the cooker.
Secure the lid of the pressure cooker. Bring to high pressure (wait for the first whistle on a stovetop cooker).
Once at pressure, reduce the heat to low and cook for 25-30 minutes, or until the mutton is tender.
Turn off the heat and allow the pressure to release naturally. Do not force release the pressure, as this ensures the meat remains succulent.
5
Finish and Garnish
Carefully open the cooker lid. Check the consistency of the gravy. If it's too thin for your liking, simmer it uncovered for a few minutes until it thickens.
Check for seasoning and adjust salt if necessary.
Stir in the garam masala powder for a final burst of aroma.
Garnish with freshly chopped coriander leaves and serve hot.
262cal
8gprotein
44gcarbs
8gfat
Ingredients
2 cup Atta (Also known as whole wheat flour)
0.5 tsp Salt
1 cup Lukewarm Water (Adjust as needed to form a soft, pliable dough)
2 tbsp Ghee (For brushing on top, optional)
Instructions
1
Prepare the Dough
In a large mixing bowl, combine 2 cups of atta and salt.
Gradually add lukewarm water, a little at a time, mixing with your fingers until the flour comes together to form a dough.
Knead the dough on a clean, flat surface for 8-10 minutes, pressing and stretching it with the heel of your hand. The final dough should be soft, smooth, and elastic, not sticky.
2
Rest the Dough
Lightly grease the dough with a few drops of oil or ghee to prevent it from drying out.
Cover the bowl with a damp cloth or a lid and let the dough rest for at least 20-30 minutes. This step is crucial for relaxing the gluten, which results in softer phulkas.
3
Divide and Roll
After resting, knead the dough again for one minute.
Divide the dough into 8 equal-sized portions and roll them into smooth balls.
Take one ball, flatten it between your palms, and dip it into the dry atta for dusting.
Place it on a rolling board (chakla) and roll it out evenly into a thin circle, about 6-7 inches in diameter. Use minimal dry flour for dusting to avoid making the phulka hard.
4
Cook on the Tawa (Griddle)
Heat a tawa over medium-high heat. To check if it's ready, sprinkle a pinch of dry flour; it should turn brown in a few seconds.
Place the rolled phulka on the hot tawa. Cook for about 15-20 seconds until you see small bubbles appear on the surface.
Flip the phulka using tongs and cook the other side for 30-40 seconds until light brown spots appear.
5
Puff on Open Flame
Using tongs, carefully lift the phulka off the tawa and place it directly on a high flame.
Within seconds, the phulka will puff up into a ball due to the trapped steam.
Immediately flip it to cook the other side on the flame for just a second or two. Be careful not to burn it.
6
Finish and Serve
Remove the puffed phulka from the flame. If desired, brush the top with a little ghee.
Place the finished phulka in a casserole or a container lined with a clean kitchen towel. This keeps them soft and warm.
Repeat the rolling, cooking, and puffing process for the remaining dough balls. Serve hot with your favorite dal or curry.