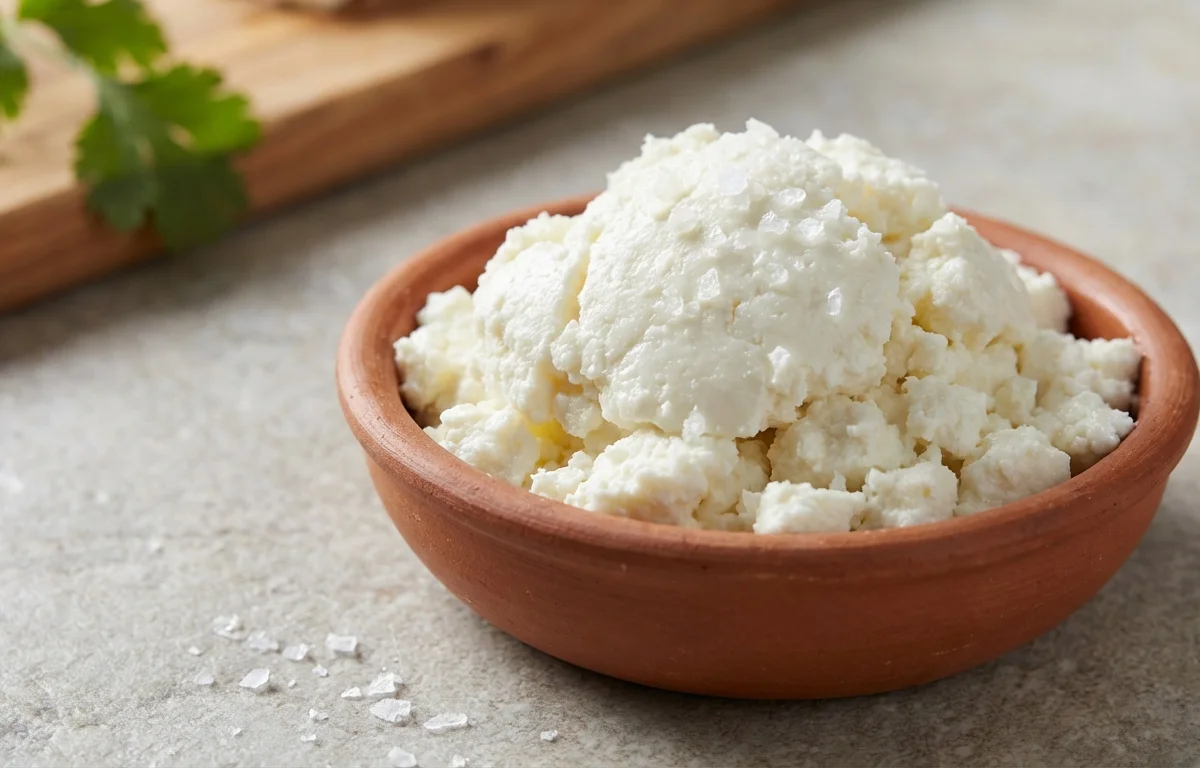
Queso Fresco
A mild, crumbly fresh cheese with a bright, milky flavor. Made with just three simple ingredients, this Mexican staple comes together in under an hour and is perfect for crumbling over tacos, enchiladas, beans, or salads.
For 4 servings
- prep
Line the colander with cheesecloth.
Set a colander in a clean sink or over a large bowl. Line it with a double layer of cheesecloth, leaving enough overhang to gather the corners together later.
TIPDampening the cheesecloth first helps it stay in place and keeps cloth fibers out of the cheese. - boil · ~15 min
Heat the milk slowly to 185°F.
Pour 8 cups of whole milk into a large heavy-bottomed pot. Warm over medium heat, stirring occasionally to prevent scorching on the bottom. Heat until the milk reaches 185°F on a thermometer. Small bubbles will appear around the edge and the surface will look foamy.
TIPStir gently and scrape the bottom of the pot with a spatula every few minutes. Scorched milk ruins the flavor. - mix · ~10 min
Add vinegar and stir gently until curds form.
Remove the pot from the heat. Pour in 3 tablespoons of white vinegar and stir gently just once or twice to distribute. Let the pot sit undisturbed for 10 minutes. The milk will separate into white curds and a clear yellowish whey.
TIPDon't over-stir after adding the vinegar — you want large, tender curds, not tiny broken ones. - prep · ~1 min
Strain the curds through the cheesecloth.
Slowly ladle the curds into the cheesecloth-lined colander. Let the whey drain for a minute, then sprinkle 1 pinch of salt evenly over the curds and fold gently to incorporate.
- assemble · ~20 min
Press the cheese and chill.
Gather the corners of the cheesecloth and twist gently to form a tight bundle around the curds. Place a small plate on top and set a heavy can or weight on it to press. Let it drain and press for 15 to 20 minutes at room temperature.
TIPThe longer you press, the firmer and crumblier the cheese becomes. For a softer, spreadable cheese, press for only 10 minutes. - serve
Unwrap and enjoy or refrigerate.
Unwrap the cheese, transfer to a plate, and use immediately. Or wrap tightly in plastic and refrigerate for up to 5 days. The flavor is best after a few hours of chilling.
TIPSave the whey — it's great for smoothies, baking, or feeding plants.
What to keep in mind.
6 tips from the recipe — small details that make a real difference to the final dish.
- 1Use whole milk that is not ultra-pasteurized for the best curd formation and creamy texture.
- 2Heat the milk slowly to 185°F; stirring and scraping the bottom prevents scorching that ruins flavor.
- 3Do not over-stir after adding the vinegar — gentle mixing yields large, tender curds.
- 4Press the cheese longer (20+ minutes) for a firmer, crumblier texture; press only 10 minutes for a softer cheese.
- 5Chill the finished queso fresco for a few hours before serving; the flavor and texture improve as it sets.
- 6Save the leftover whey for smoothies, soups, or baking — it's nutritious and adds a mild tang.
Adapt it for your goals.
Herb & spice
Stir in 1–2 teaspoons of dried oregano or crushed red pepper flakes with the salt for a flavorful twist on classic queso fresco.
low fatLow-fat
Replace whole milk with 2% milk for a slightly lower-fat cheese, though the texture will be less creamy and yield less curd.
jain (vegetarian friendly)Jain (vegetarian-friendly)
Substitute white vinegar with lemon juice if vinegar is restricted; the acid reaction works identically for a mild, citrusy fresh cheese.
extra firmExtra firm
Press the cheese for 30–40 minutes under a heavier weight to create a drier, firmer cheese ideal for grating over dishes.
Why this is on our healthy list.
High in Calcium
Made from whole milk, queso fresco provides a good source of calcium, essential for strong bones and teeth.
Rich in Protein
This fresh cheese offers a solid amount of protein from milk, supporting muscle repair and satiety.
Low in Sodium
With just a pinch of salt, homemade queso fresco can be much lower in sodium than many commercial cheeses.
No Preservatives
Homemade queso fresco contains no added preservatives, gums, or artificial ingredients, making it a clean, whole-food option.
Frequently asked questions
It's not recommended; ultra-pasteurized milk has denatured proteins that may not form firm curds, resulting in a softer or grainy cheese.