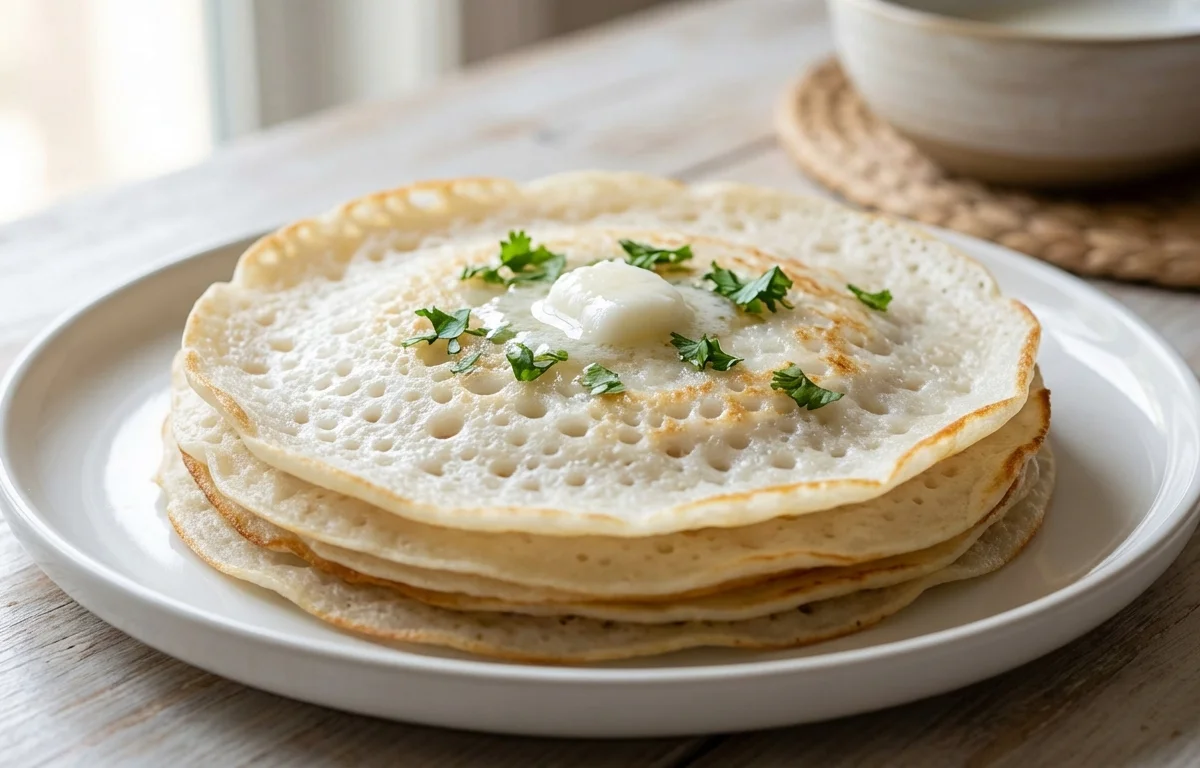
Soru Chakuli Pitha
A soft, home-style rice pancake from Odisha made with soaked rice and urad dal batter. It cooks up tender with light golden spots and is lovely with jaggery, chutney, or a simple vegetable side.
For 8 servings
- prep · ~6 min
Soak the rice and dal.
1.Wash the rice well until the water runs mostly clear.2.Soak the rice in enough water for 6 hours.3.Wash the urad dal and fenugreek seeds together.4.Soak the urad dal and fenugreek seeds in enough water for 6 hours. - mix · ~15 min
Grind the batter.
1.Drain the soaked urad dal and fenugreek seeds.2.Grind them with a little water to a smooth, light batter.3.Drain the soaked rice and grind it with a little water to a slightly grainy batter.4.Mix both batters in a large bowl until smooth and thick.TIPKeep the batter thick but pourable. Too much water makes the pitha thin and flat. - rest · ~480 min
Ferment the batter overnight.
Cover the bowl and leave the batter in a warm place for about 8 hours, or until it looks slightly risen and airy.
- mix · ~2 min
Season and loosen the batter.
Stir the fermented batter gently. Add salt and a little water if needed to make a thick pourable batter, similar to pancake batter.
- fry · ~20 min
Cook the soru chakuli pitha.
1.Heat a flat pan or tawa over medium heat and lightly grease it with a little oil.2.Pour a ladleful of batter onto the center and spread it gently into a small thick round.3.Cover and cook until the surface sets and the bottom gets light golden spots, 2 to 3 minutes.4.Drizzle a few drops of oil around the edges, flip, and cook the second side for 1 to 2 minutes.TIPCook on medium heat so the center turns soft and cooked through before the outside browns too much. - serve · ~5 min
Serve hot.
Repeat with the remaining batter to make 8 pithas. Serve hot with jaggery, chutney, or a simple side of potato curry if you like.
What to keep in mind.
7 tips from the recipe — small details that make a real difference to the final dish.
- 1Grind the urad dal very smooth and fluffy, but keep the rice slightly grainy so the pitha stays soft with a traditional bite.
- 2After fermentation, stir the batter gently; vigorous mixing knocks out the air that helps Soru Chakuli turn tender.
- 3If the batter spreads too fast on the tawa, it is too thin; add a spoonful of rice flour or rest it briefly before cooking.
- 4Cook covered on medium heat so the thick center steams through before the bottom gets too dark.
- 5Wipe and lightly re-grease the pan between batches if batter starts sticking or browning unevenly.
- 6For make-ahead use, refrigerate the fermented batter and let it sit at room temperature for 20 to 30 minutes before cooking.
- 7Leftover pitha reheats best on a covered pan with a few drops of water, which brings back its soft texture.
Adapt it for your goals.
Low-oil
Use a well-seasoned cast-iron or nonstick tawa and brush on oil instead of drizzling, for a lighter everyday version.
veganVegan
This recipe is naturally vegan; serve it with coconut chutney or vegetable curry instead of dairy-based sides.
jaggery sweetJaggery-sweet
Serve with melted jaggery or a jaggery-coconut mixture for a sweeter breakfast or festive-style plate.
savory breakfastSavory-breakfast
Pair with potato curry, ghuguni, or spicy chutney to turn the mild pitha into a more filling savory meal.
Why this is on our healthy list.
Fermented and Gentle
The overnight fermentation can make the rice and urad dal batter feel lighter and gives the pitha its airy texture.
Plant Protein from Urad Dal
Urad dal adds plant protein and makes this rice-based pitha more balanced than a batter made from rice alone.
Lightly Oiled Cooking
Because the pitha is cooked with only a little oil on the tawa, it stays soft without needing deep frying.
Frequently asked questions
The batter was likely too thin, under-fermented, or overmixed after rising. Keep it thick and pourable, ferment until airy, and stir gently before cooking.