Crispy Pan-Fried Bacon
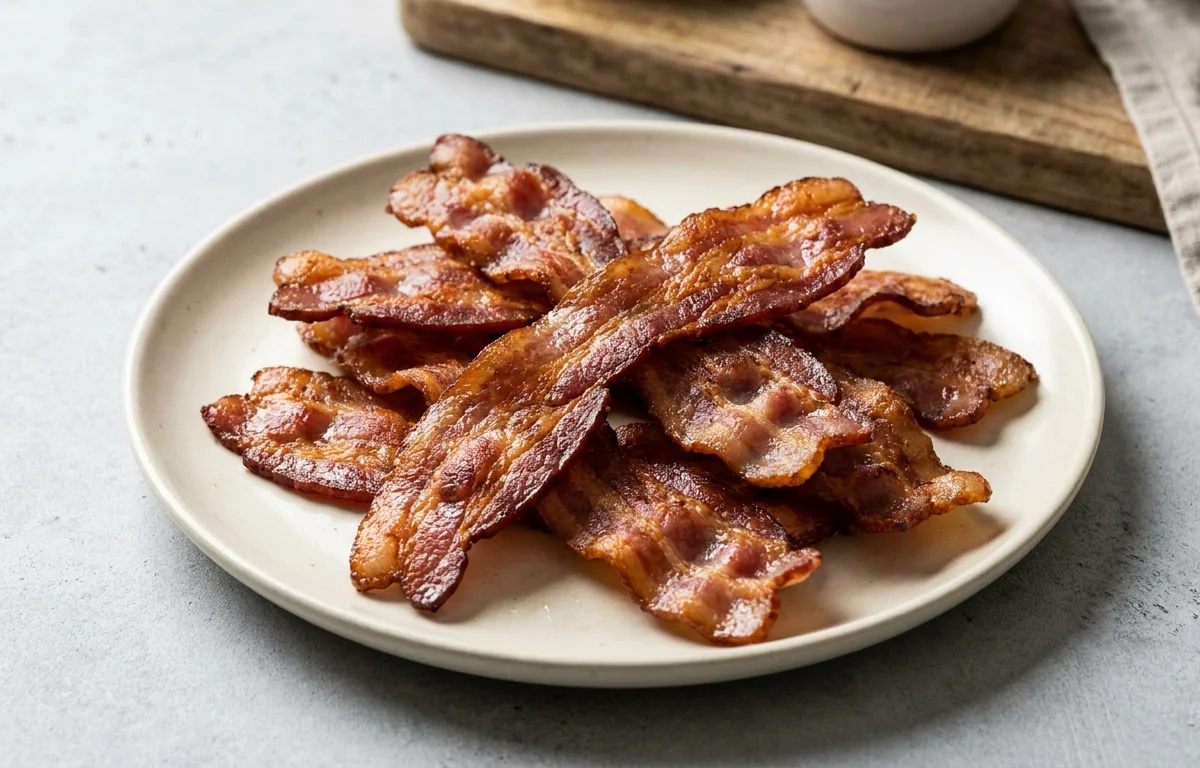
Perfectly crispy bacon with golden, rendered fat and a satisfying crunch. No oven required — just a skillet, a little patience, and the right technique. This stovetop method gives you flat, evenly-crisped strips every time, with none of the curling or chewy spots you get from rushed cooking.
For 4 servings
- prep
Arrange the bacon in a cold skillet.
Lay the bacon strips flat in a single layer in a cold cast iron skillet. The strips can touch but should not overlap. Starting with a cold pan allows the fat to render slowly and evenly.
TIPCold pan, cold bacon — this is the secret to flat, evenly-crisped strips. Never start bacon in a hot pan. - fry · ~8 min
Cook over medium-low heat until fat renders.
Set the burner to medium-low heat. Let the bacon cook undisturbed for 6-8 minutes as the fat slowly renders and pools in the pan. You will hear a gentle sizzle, not aggressive popping.
TIPLow and slow wins here. High heat will scorch the lean parts before the fat fully renders. - fry · ~6 min
Flip the bacon and finish crisping.
Using tongs, flip each strip. The cooked side should be golden and starting to crisp. Continue cooking for another 4-6 minutes, flipping occasionally to promote even browning, until the bacon reaches your desired level of crispiness.
TIPThe bacon will continue to crisp as it cools. Pull it from the pan just before it looks fully done. - other
Drain on paper towels and serve immediately.
Transfer the cooked bacon to a plate lined with paper towels to drain excess grease. Let it rest for 1 minute — it crisps up as it cools slightly. Serve hot.
TIPReserve the rendered bacon fat in the pan for frying eggs, roasting potatoes, or sautéing greens.
What to keep in mind.
7 tips from the recipe — small details that make a real difference to the final dish.
- 1Use a cold cast iron skillet to render fat slowly and prevent curling.
- 2Avoid overcrowding — strips can touch but must not overlap for even cooking.
- 3Cook over medium-low heat; high heat scorches lean spots before fat renders.
- 4Flip occasionally with tongs for uniform browning and crispness.
- 5Remove bacon just before it reaches desired crispness — it crisps further as it cools.
- 6Reserve rendered bacon fat in a jar for future cooking; it adds rich flavor to eggs, potatoes, or greens.
- 7Pat bacon dry with paper towels before cooking if it's wet from packaging to improve browning.
Adapt it for your goals.
Candied bacon
Sprinkle each bacon strip with a light dusting of brown sugar and a pinch of cayenne before cooking for a sweet-spicy glaze. Flip carefully so the sugar caramelizes without burning. Perfect for topping salads, burgers, or brunch boards.
low sodiumLow-sodium
Use a low-sodium or uncured bacon, and cook with a splash of water in the pan (about 1 tablespoon). The water helps regulate the heat and pulls some salt from the meat, resulting in a milder, less salty finish.
smoky pepper baconSmoky pepper bacon
Sprinkle freshly cracked black pepper and a pinch of smoked paprika onto the bacon strips before cooking. The spices toast gently in the rendered fat, adding a deep, smoky kick that complements eggs or BLTs.
Why this is on our healthy list.
Rich in High-Quality Protein
Bacon provides a complete source of animal protein with all essential amino acids, supporting muscle maintenance and satiety in a small serving.
Source of B Vitamins
Bacon contains B vitamins including B12, niacin, and B6, which aid energy metabolism and nervous system function.
Contains Essential Minerals
Bacon offers minerals such as selenium, phosphorus, and zinc, which play roles in immune function, bone health, and antioxidant defense.
Controlled Cooking Reduces Fat Absorption
The slow rendering method allows excess fat to melt away into the pan rather than being absorbed back into the meat, resulting in a leaner final product.
Frequently asked questions
Bacon curls when placed in a hot pan and cooked too quickly. Starting with a cold pan and low heat allows the fat to render evenly, keeping strips flat.