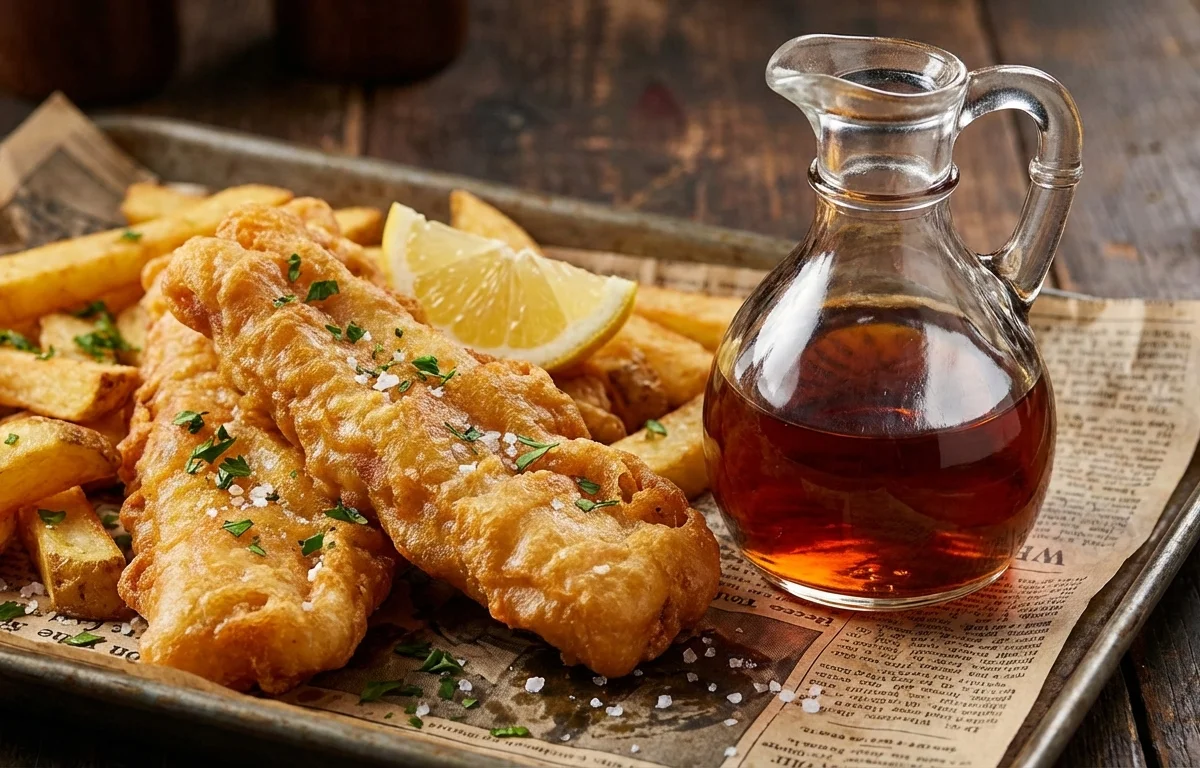
Malt Vinegar
A robust, tangy vinegar made from malted barley, commonly served with classic fish and chips. This traditional British condiment develops deep malty notes through a two-stage fermentation process, rewarding patience with a complex, full-bodied flavor that store-bought versions rarely match.
For 16 servings
- boil · ~60 min
Mash the malted barley.
1.Pour 4 L of water into a large stockpot and heat to 70°C (158°F).2.Add the crushed malted barley gradually while stirring to prevent clumps.3.Maintain the mash at 65–68°C (149–154°F) and let it steep for 60 minutes, stirring occasionally.TIPWrap the pot in towels to hold the temperature steady. If it drops below 63°C, apply gentle heat. - prep · ~30 min
Sparge and drain the wort.
1.Line a colander with cheesecloth and set it over the cleaned fermentation bucket.2.Ladle the grain mash into the strainer and let the liquid drain through.3.Heat an additional 2 L of water to 75°C (167°F) and pour it slowly over the grains to rinse out remaining sugars.TIPDon't press hard on the grains — squeezing extracts harsh tannins that make the vinegar taste sharp. - boil · ~30 min
Boil the barley wort.
1.Transfer the collected liquid to a clean stockpot.2.Bring to a rolling boil and let it bubble gently for 10 minutes.3.Remove from heat and cool the pot in an ice bath until the liquid reaches 25°C (77°F).TIPCooling quickly minimizes the risk of wild bacteria taking hold before you pitch the yeast. - mix · ~10 min
Transfer the cooled wort and pitch the yeast.
1.Pour the cooled wort carefully into the fermentation bucket, leaving behind the sediment.2.Sprinkle the brewer's yeast over the surface and stir gently with a sanitized spoon.3.Seal the bucket, fit the airlock filled with a little water, and place in a dark spot at 20–22°C (68–72°F).TIPEverything that touches the cooled wort must be sanitized. A quick rinse with boiling water just before use does the job. - other · ~10080 min
Ferment into barley ale.
1.Let the bucket sit undisturbed for 5 to 7 days until the airlock stops bubbling.2.Taste the liquid — it should be a flat, mildly alcoholic barley ale (about 4–5% ABV).TIPIf the airlock still bubbles after 7 days, give it another day or two. A slow finish is fine; a stuck fermentation is not. - mix · ~5 min
Inoculate the ale for acetification.
1.Siphon or carefully pour the barley ale into a glass jug, leaving the yeast sediment behind.2.Add the 2 tablespoons of unpasteurized apple cider vinegar and stir gently.3.Cover the jug opening with a double layer of cheesecloth secured with a rubber band — vinegar bacteria need oxygen.TIPThe raw vinegar contains acetobacter — the same bacteria that will convert the alcohol in your ale into acetic acid. - other · ~40320 min
Acetify the ale into vinegar.
1.Place the jug in a warm, dark place (25–30°C / 77–86°F) for 3 to 4 weeks.2.A jelly-like layer called the vinegar mother will form on the surface — this is a good sign.3.Taste after 3 weeks; the sharp, tangy flavour of malt vinegar should be fully developed.TIPDon't move or agitate the jug while the mother forms. Breaking the surface can slow acidification. - prep · ~15 min
Strain, bottle, and store the malt vinegar.
1.Line a funnel with fresh cheesecloth and strain the vinegar into sterilized dark glass bottles.2.Seal the bottles and store in a cool, dark pantry. The vinegar keeps for 12 months or more.3.Reserve the mother to jumpstart your next batch of vinegar.TIPIf you want a crystal-clear vinegar, let the filled bottles settle for a week, then decant off the sediment.
What to keep in mind.
7 tips from the recipe — small details that make a real difference to the final dish.
- 1Wrap the mash pot in towels to maintain a steady 65–68°C during the hour-long steep.
- 2Do not press on the grains when sparging; squeezing releases harsh tannins that ruin the vinegar's flavor.
- 3Cool the boiled wort quickly in an ice bath to minimize the risk of wild bacteria contamination.
- 4Sanitize all equipment that touches the cooled wort—boiling water rinse just before use works well.
- 5Let the ale ferment undisturbed until the airlock stops bubbling; a stuck fermentation is rare but possible.
- 6Do not move or agitate the jug while the vinegar mother forms, as breaking the surface slows acidification.
- 7For crystal-clear vinegar, let the bottled vinegar settle for a week, then decant off the sediment.
Adapt it for your goals.
Smoked Malt Vinegar
Replace half the malted barley with smoked malted barley for a rich, smoky flavor that pairs beautifully with grilled meats or roasted vegetables.
Herb Infused Malt VinegarHerb-Infused Malt Vinegar
Add a sprig of fresh rosemary, thyme, or tarragon to the bottle during the final week of acetification for a fragrant, herbal twist perfect for salads or marinades.
Spiced Malt VinegarSpiced Malt Vinegar
Add 1 cinnamon stick, 3 cloves, and a star anise to the jug during the acetification stage for a warm, spiced vinegar ideal for chutneys or glazes.
High ABV Malt VinegarHigh-ABV Malt Vinegar
Use a champagne yeast instead of ale yeast and extend the ale fermentation to 10–14 days for a slightly higher alcohol content, resulting in a stronger, more pungent vinegar.
Why this is on our healthy list.
Naturally Fermented
Malt vinegar is produced through natural fermentation, which introduces beneficial bacteria (acetobacter) and enzymes that support digestive health.
Low in Sodium
Malt vinegar contains minimal sodium, making it a flavorful, heart-friendly alternative to salty condiments like soy sauce or table salt.
Contains Barley Nutrients
Malted barley provides small amounts of B vitamins, minerals like magnesium and phosphorus, and dietary fiber from the grain's bran.
May Aid Blood Sugar Control
Acetic acid in vinegar has been shown in studies to help moderate blood sugar spikes after meals, supporting balanced energy levels.
Frequently asked questions
No, malted barley is essential because it has been germinated and dried, activating enzymes that convert starches into fermentable sugars. Regular barley will not produce enough sugars for fermentation.