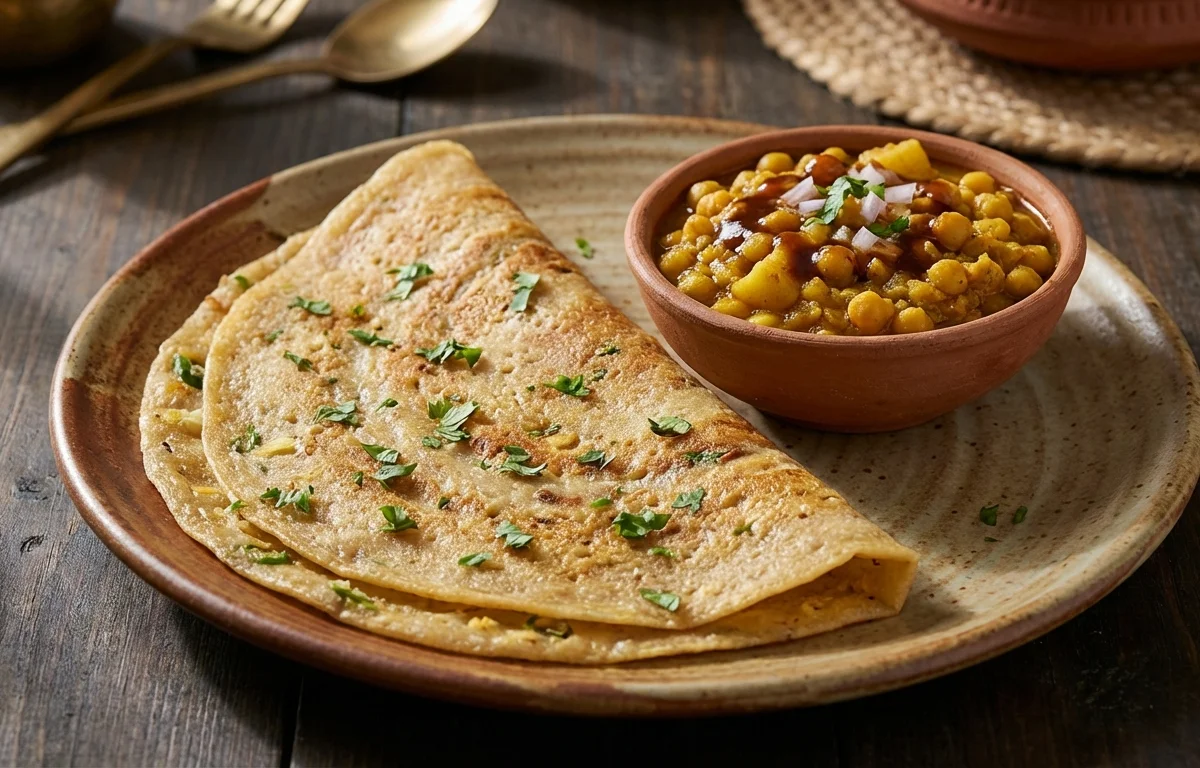
Biri Chakuli Pitha
A soft, savory Odia rice and urad dal pancake with a gentle fermented tang and tender bite. It cooks up thicker than a dosa and is lovely with ghuguni, chutney, or a little jaggery on the side.
For 8 servings
- prep · ~360 min
Soak the rice and dal.
1.Rinse the rice well until the water runs mostly clear.2.Rinse the urad dal and fenugreek seeds together.3.Soak the rice in enough water in one bowl for 6 hours.4.Soak the urad dal and fenugreek seeds in enough water in another bowl for 6 hours.TIPA long soak helps the batter grind smooth and gives the pitha a softer texture. - mix · ~15 min
Grind the batter.
1.Drain the soaked urad dal and fenugreek seeds.2.Grind them first with a little water to a light, smooth batter.3.Drain the rice and grind it separately with a little water to a smooth batter with a faint grainy feel.4.Combine both batters in a deep bowl and mix well with your hand for 1 to 2 minutes.TIPKeep the batter thick but pourable. Batter that is too thin will spread like dosa instead of making soft chakuli. - rest · ~480 min
Ferment the batter.
Cover the bowl and leave the batter in a warm spot for about 8 hours or overnight, until it looks slightly airy and smells mildly tangy.
- mix · ~2 min
Season and loosen the batter.
Add salt and stir gently. If needed, add a little water to make a thick pouring batter that spreads lightly when ladled but still holds some body.
- fry · ~25 min
Cook the biri chakuli pitha.
1.Heat a flat tawa or skillet over medium heat and brush it lightly with oil.2.Pour a ladle of batter onto the center and spread it gently into a small thick round, about 5 to 6 inches wide.3.Drizzle a little oil around the edges, cover, and cook until the top looks set and the bottom turns light golden.4.Flip and cook the other side for 1 to 2 minutes until lightly spotted and cooked through.5.Repeat with the remaining batter, brushing the pan lightly with oil as needed.TIPCook on medium heat. High heat browns the outside too fast and leaves the middle undercooked. - serve
Serve hot.
Serve the pitha hot or warm. It goes well with ghuguni, coconut chutney, potato curry, or a little jaggery.
What to keep in mind.
8 tips from the recipe — small details that make a real difference to the final dish.
- 1Grind urad dal first until fluffy; that trapped air helps the pitha stay soft instead of dense.
- 2Keep the rice slightly grainy while grinding, so the chakuli gets its characteristic tender bite.
- 3Mixing the combined batter with your hand helps kick-start fermentation and improves the rise.
- 4After fermentation, stir gently; overmixing can knock out the airy bubbles you worked to build.
- 5Spread the batter only lightly on the tawa; this pitha should stay thicker than a dosa.
- 6Cover while cooking the first side so the center steams through before the bottom gets too dark.
- 7If the batter spreads too fast, add a spoonful of rice flour or let it rest a bit to thicken.
- 8Leftover pitha reheats well on a covered pan over low heat, which brings back softness better than high heat.
Adapt it for your goals.
Low-oil
Use a well-seasoned cast-iron or nonstick pan and brush with minimal oil; you still get soft chakuli with less greasiness.
instantInstant
Skip long fermentation in cool weather by resting the batter in a warm spot for a shorter time; the flavor will be milder but still pleasant.
stuffedStuffed
Add a thin layer of lightly spiced mashed potato or paneer before folding for a more filling breakfast version.
millet mixMillet-mix
Replace part of the rice with little millet or foxtail millet for a more earthy flavor and a slightly heartier texture.
Why this is on our healthy list.
Balanced Grain and Lentil Base
Rice and urad dal together make the dish more satisfying and give a better mix of carbohydrates and plant protein.
Fermented for Easier Digestion
The overnight fermentation can make the batter lighter and often easier to digest than an unfermented rice-lentil batter.
Good Plant Protein Source
Urad dal adds plant protein, making these pithas more nourishing than a pancake made from rice alone.
Naturally Vegetarian and Simple
With basic pantry ingredients and no heavy fillings, this dish stays wholesome while pairing easily with chutney or ghuguni.
Frequently asked questions
The urad dal may not have been ground fluffy enough, the batter may have under-fermented, or it may have been spread too thick on a pan that was too hot.