Kashmiri Girda
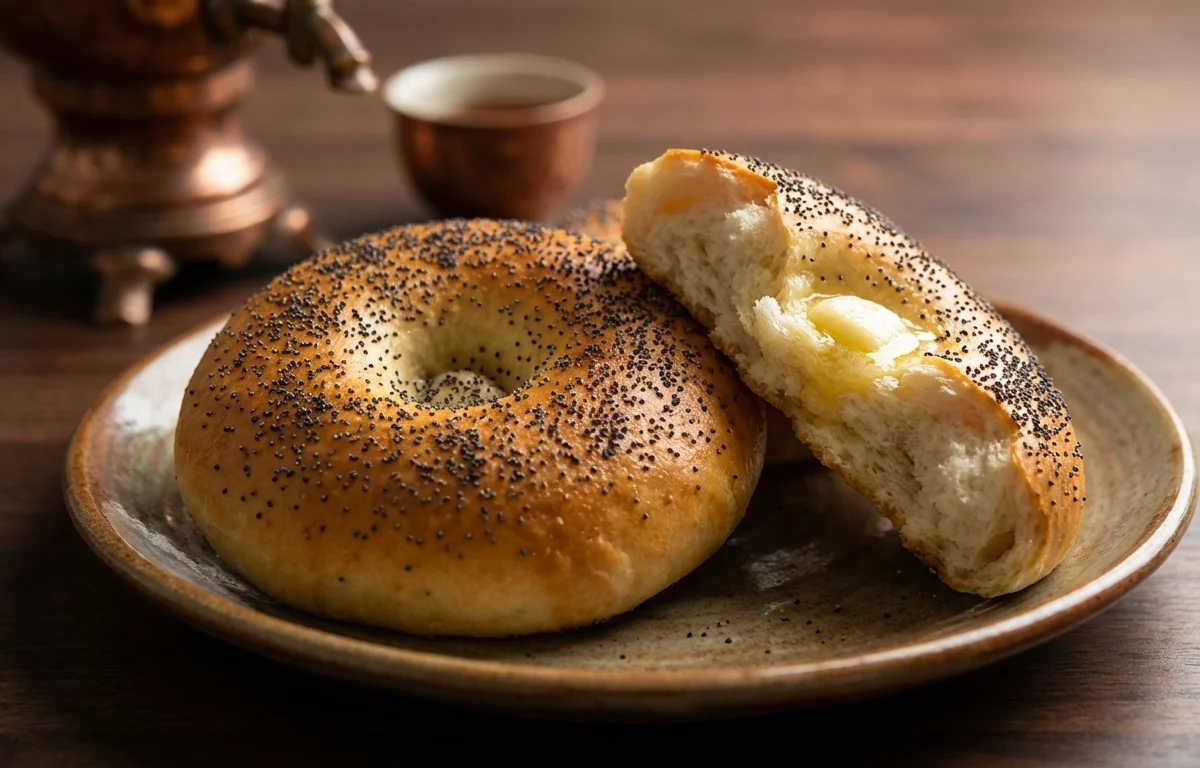
A traditional Kashmiri bakery bread with a chewy middle, lightly crisp edges, and the signature dimpled top. It is simple to make at home and tastes wonderful warm with noon chai, kahwa, or a hearty curry.
For 4 servings
- mix · ~10 min
Bloom the yeast.
1.Combine lukewarm milk, sugar, and yeast in a bowl.2.Stir once and leave it undisturbed until slightly foamy.3.If the mixture does not foam in 10 minutes, start again with fresh yeast.TIPThe liquid should feel warm, not hot, or the yeast can weaken. - knead · ~10 min
Knead the dough.
1.Add all-purpose flour and salt to a large bowl and mix well.2.Pour in the yeast mixture, water, and oil.3.Mix to form a soft dough, then knead for 8 to 10 minutes until smooth and slightly tacky.TIPGirda dough should be soft. Add the last splash of water only if the dough feels tight. - rest · ~90 min
Let the dough rise.
Place the dough in a lightly greased bowl, cover, and leave it in a warm place until doubled in size.
- assemble · ~8 min
Shape the girdas.
1.Punch down the dough gently and divide it into 4 equal portions.2.Shape each portion into a ball, then flatten into a thick round disc about 5 to 6 inches wide.3.Press the center with your fingertips to make the traditional dimples, leaving the edge slightly thicker.TIPThe dimples help the bread bake evenly and give girda its classic look. - rest · ~15 min
Rest the shaped bread.
Place the shaped discs on a tray, cover loosely, and let them puff slightly before cooking.
- bake · ~18 min
Cook the girdas on a hot surface.
1.Heat a heavy tawa or skillet over low-medium heat until evenly hot.2.Place one shaped girda on the dry hot surface and cook until the bottom gets light golden spots.3.Flip and cook the other side until golden with a cooked center.4.Repeat with the remaining dough rounds.TIPKeep the heat moderate so the bread cooks through without burning the outside. - serve
Serve warm.
Serve the Kashmiri girda warm with noon chai, kahwa, butter, or a simple curry.
What to keep in mind.
7 tips from the recipe — small details that make a real difference to the final dish.
- 1Keep the dough slightly tacky, not stiff; a firmer dough makes girda dense instead of chewy.
- 2Let the skillet heat fully before the first bread, or the surface will dry out before it gets golden spots.
- 3Press the center dimples deeply enough that they stay visible after the second rise and cooking.
- 4Cook on low-medium heat so the thicker rim and dimpled center finish at the same time.
- 5If the bread puffs too much, press lightly with a cloth or spatula so the center stays flat and evenly cooked.
- 6Stack cooked girdas in a cloth-lined basket to keep the crust soft while the edges stay lightly crisp.
- 7For make-ahead use, cool completely and reheat on a dry tawa for a minute per side to revive the texture.
Adapt it for your goals.
Whole-wheat
Replace part of the all-purpose flour with whole wheat flour for a nuttier, heartier girda; add a little extra water to keep the dough soft.
veganVegan
Use lukewarm water instead of milk and brush with oil instead of butter or ghee for a fully dairy-free version.
sesame toppedSesame-topped
Sprinkle white sesame seeds over the shaped discs before resting for extra aroma and a lightly nutty finish.
oven bakedOven-baked
Bake on a preheated heavy tray or pizza stone if you want to cook several girdas at once while keeping the classic dimpled look.
Why this is on our healthy list.
Fermented Dough Benefits
Yeast-risen dough develops flavor naturally and can be gentler in texture than an unleavened flatbread.
Moderate Ingredient List
This bread uses a short list of pantry ingredients with only a small amount of oil, keeping it simple and versatile.
Provides Quick Energy
The flour-based dough offers carbohydrates that pair well with tea or curries for a satisfying meal.
Frequently asked questions
Usually the yeast did not bloom properly, the dough was too dry, or it did not rise enough. The dough should be soft and slightly tacky before proofing.