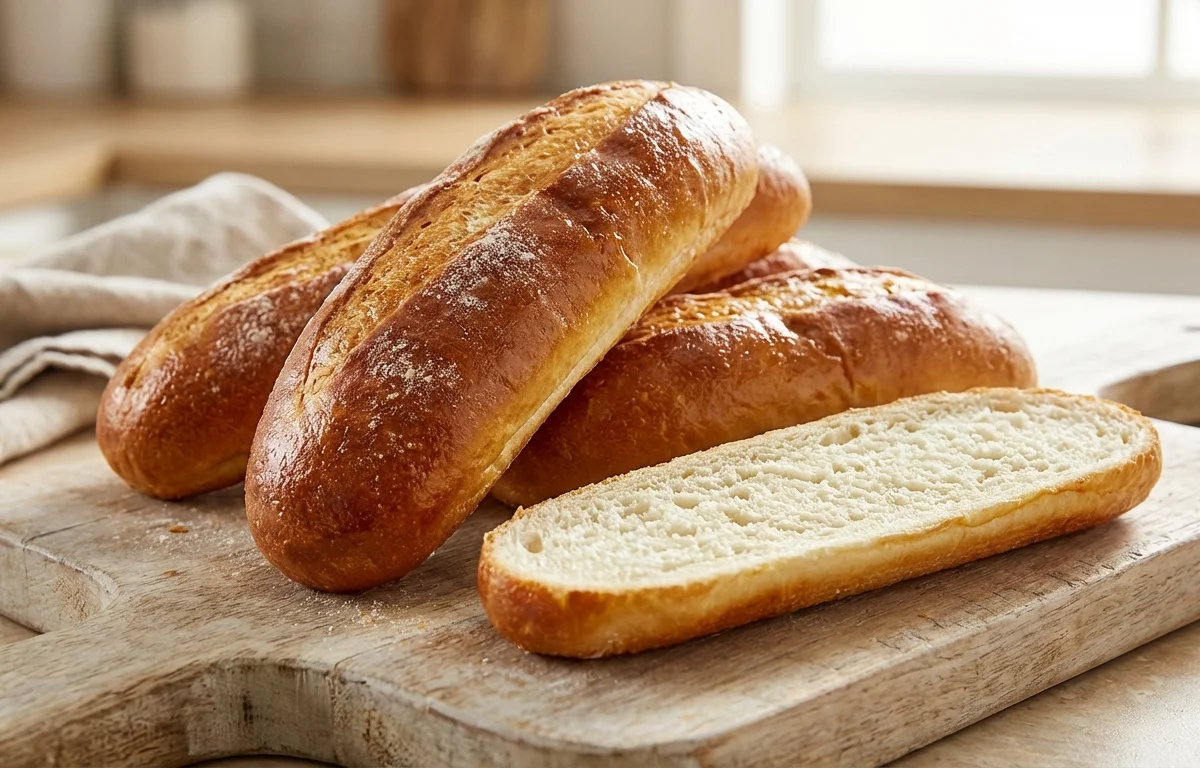
Sub Rolls
Soft, airy, and slightly chewy homemade sub rolls with a golden, flour-dusted crust. These classic sandwich rolls are perfect for loading up with meats, cheeses, and crisp vegetables. The dough comes together simply and bakes up with that unmistakable bakery-fresh aroma and taste.
For 4 servings
- mix · ~10 min
Activate the yeast.
In a small bowl, combine lukewarm water, sugar, and active dry yeast. Stir gently and let it sit for 5-10 minutes until the mixture becomes frothy and bubbly.
TIPWater temperature should be around 105-110°F. Too hot will kill the yeast. - mix · ~2 min
Combine the dry ingredients.
In a large mixing bowl or the bowl of a stand mixer, whisk together the all-purpose flour and salt.
- knead · ~10 min
Knead the dough.
Add the yeast mixture and olive oil to the flour. Mix until a shaggy dough forms, then knead for 8-10 minutes by hand on a lightly floured surface, or 6-7 minutes with a dough hook on medium speed. The dough should be smooth, elastic, and slightly tacky but not sticky.
TIPResist adding too much extra flour. A slightly tacky dough yields softer rolls. - rest · ~60 min
Let the dough rise.
Place the dough in a lightly oiled bowl, turning once to coat. Cover with a damp kitchen towel and let it rise in a warm, draft-free spot for about 1 hour, or until doubled in size.
TIPAn oven with just the light on provides an excellent warm proofing environment. - prep · ~5 min
Shape the sub rolls.
Punch down the risen dough gently to release the air. Divide it into 4 equal portions. Roll each portion into a 6-inch long, slightly flattened oval log. Place them seam-side down on a parchment-lined baking sheet, leaving 3 inches between each roll.
TIPFor a classic sub shape, taper the ends slightly so they are not completely rectangular. - rest · ~45 min
Proof the shaped rolls.
Cover the shaped rolls loosely with oiled plastic wrap or a kitchen towel. Let them proof for 30-45 minutes until noticeably puffy and nearly doubled.
TIPPress a finger lightly into the dough. If the indentation springs back slowly, it's ready to bake. - prep
Preheat the oven and prepare for steam.
Preheat the oven to 400°F (200°C). Place an empty metal baking pan on the bottom rack of the oven. This will be used to create steam.
- bake · ~1 min
Score and mist the rolls before baking.
Using a sharp lame or knife, make one long, shallow diagonal slash down the center of each roll. Mist the rolls lightly with water from a spray bottle. Dust lightly with flour if desired for a rustic look.
TIPMisting and creating steam prevents the crust from setting too quickly, allowing for maximum oven spring. - bake
Bake the sub rolls with steam.
Place the baking sheet with the rolls on the middle rack. Carefully pour 1 cup of hot water into the empty hot pan on the bottom rack. Quickly close the oven door to trap the steam.
TIPThe steam creates that classic thin, crispy, and chewy artisan crust. Be careful of the burst of steam when opening the oven. - bake · ~20 min
Bake until golden brown.
Bake for 18-22 minutes, rotating the pan halfway through, until the rolls are a deep golden brown and sound hollow when tapped on the bottom.
TIPInternal temperature should read around 190°F for a perfectly baked roll. - rest · ~60 min
Cool the rolls completely.
Transfer the baked rolls to a wire rack. Let them cool completely before slicing. This allows the crumb to set properly.
TIPSlicing a warm roll can result in a gummy interior.
What to keep in mind.
7 tips from the recipe — small details that make a real difference to the final dish.
- 1Use a kitchen scale for precise flour measurement; it ensures consistent dough hydration every time.
- 2For the best oven spring, make sure your yeast mixture is frothy before adding to the flour—dead yeast yields dense rolls.
- 3Resist adding extra flour during kneading; the dough should be slightly tacky for a soft, airy crumb.
- 4Shape the rolls with tapered ends to mimic classic bakery-style sub rolls and help them bake evenly.
- 5Create steam by pouring hot water into the preheated pan; this gives the crust a thin, crackly finish.
- 6Wait until the rolls cool completely on a wire rack before slicing to avoid a gummy interior.
- 7Store leftover rolls in a paper bag at room temperature for up to 2 days; do not refrigerate or they'll stale faster.
Adapt it for your goals.
Whole Wheat Sub Rolls
Replace half the all-purpose flour with whole wheat flour and increase the water by 2-3 tablespoons for a nuttier, more nutritious roll that still stays soft.
Herb & Garlic Sub RollsHerb & Garlic Sub Rolls
Add 1 teaspoon dried oregano and 1 teaspoon garlic powder to the dry ingredients for an Italian-American twist that pairs beautifully with cold cuts and cheese.
Seeded Sub RollsSeeded Sub Rolls
Brush the shaped rolls with milk and sprinkle with sesame seeds, poppy seeds, or everything bagel seasoning before baking for extra crunch and visual appeal.
Vegan Sub RollsVegan Sub Rolls
This recipe is already vegan as written; just ensure your sugar is vegan-friendly and use a plant-based wash like aquafaba for the optional flour dusting.
Why this is on our healthy list.
Good Source of Energy
All-purpose flour provides complex carbohydrates that fuel your body and brain, making these rolls a great base for balanced meals.
Low in Saturated Fat
With only two tablespoons of olive oil and no butter or eggs, these rolls are low in saturated fat compared to many enriched breads.
Simple, Clean Ingredients
The recipe uses no artificial preservatives, dough conditioners, or high-fructose sweeteners—just flour, water, yeast, oil, salt, and a touch of sugar.
Contains Heart-Healthy Olive Oil
Olive oil adds monounsaturated fats, which are known to support heart health when used as part of a balanced diet.
Frequently asked questions
The water may have been too hot (killing the yeast) or too cold (not activating it). Aim for 105-110°F, and check the expiration date on your yeast.