Beer Can Chicken
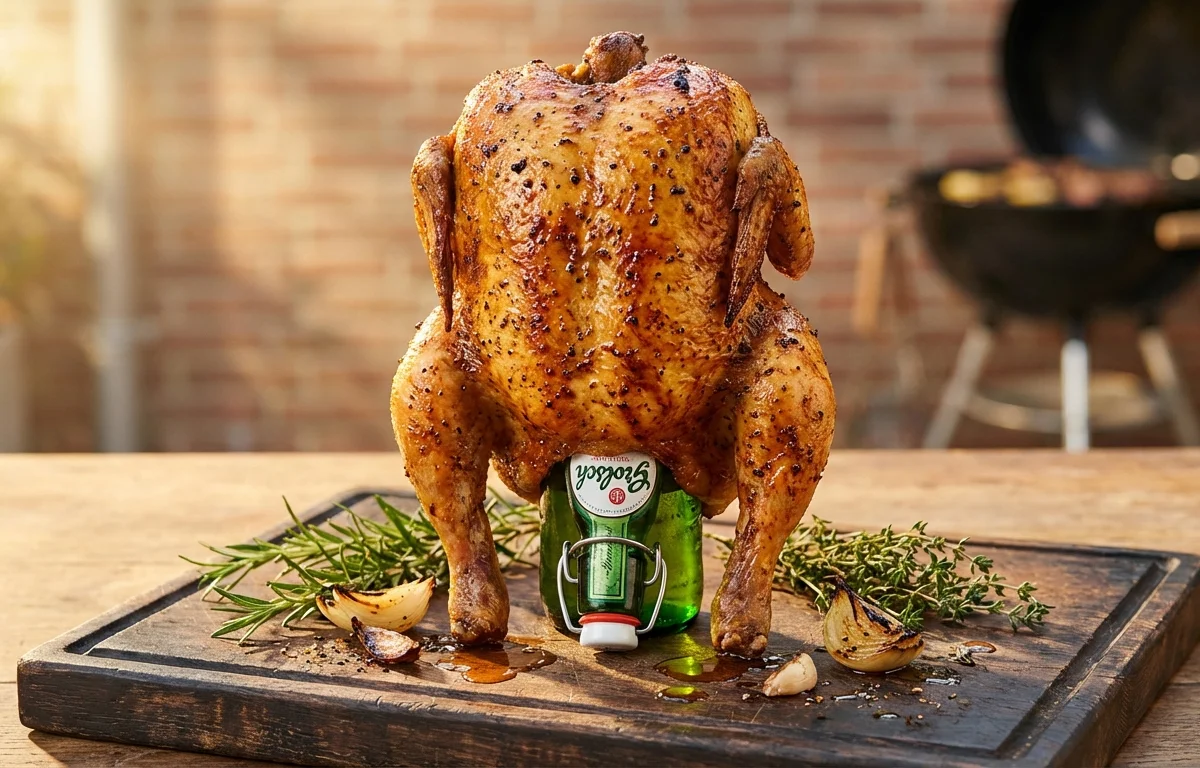
A whole chicken seasoned with a smoky-spiced dry rub, then propped upright on an open beer can and slow-grilled until the skin is crackling-crisp and the meat is impossibly juicy. The beer steams from inside while the grill works its magic outside, giving you tender, flavorful chicken that pulls right off the bone. Perfect for backyard cookouts and tailgating.
For 4 servings
- prep · ~2 min
Prepare the dry rub.
1.In a small bowl, combine garlic powder, onion powder, smoked paprika, brown sugar, salt, black pepper, and cayenne pepper.2.Mix thoroughly until evenly blended and no lumps remain. - prep · ~5 min
Prep the chicken and beer can.
1.Remove chicken from packaging, discard giblets, and pat completely dry inside and out with paper towels.2.Open the beer can and pour out (or drink) half the beer, leaving about 6 oz in the can.3.Make a couple extra holes in the top of the can with a church key for more steam release.TIPRoom-temperature beer steams better than cold. Pull the can from the fridge 30 minutes ahead. - prep · ~3 min
Season the chicken.
1.Rub the entire chicken with olive oil, coating evenly.2.Sprinkle the dry rub all over the chicken, including inside the cavity.3.Gently loosen the skin over the breast and rub some seasoning directly onto the meat. - assemble · ~2 min
Mount chicken onto the beer can.
1.Hold the chicken upright with the cavity facing down.2.Slide the chicken cavity down over the beer can until the can is fully inserted and the chicken stands on its own like a tripod (two legs + can).3.Tuck the wing tips behind the back so they don't burn.TIPIf the chicken wobbles, adjust the legs forward slightly until it's stable. It should stand securely. - grill · ~10 min
Set up the grill for indirect heat.
1.For charcoal: bank hot coals on opposite sides of the grill. Place a drip pan in the center.2.For gas: light only the outside burners, leaving the middle burner(s) off. Place a drip pan under the center grate.3.Aim for a steady grill temperature of 350°F. - grill · ~75 min
Grill the beer can chicken.
1.Carefully transfer the chicken-on-a-can to the grill, placing it over the drip pan on the unlit center section.2.Close the lid and cook for 1 hour 15 minutes. Do not open the lid frequently — keep heat consistent.3.At the 60-minute mark, start checking the internal temperature.TIPResist peeking. Every time you lift the lid, you lose heat and add 5-10 minutes to the cook. - grill · ~1 min
Check for doneness.
1.Insert an instant-read thermometer into the thickest part of the thigh without touching bone.2.Chicken is done when it reaches 165°F in the thigh and juices run clear.3.If the breast is browning too fast but the thigh hasn't hit temp, loosely tent with foil. - rest · ~10 min
Remove and rest the chicken.
1.Using tongs in one hand and a spatula under the can in the other, carefully lift the chicken off the grill.2.Set it on a cutting board and let it rest upright for 10 minutes.3.After resting, carefully twist and lift the can out of the cavity (use a folded towel — the can is hot).TIPResting lets the juices redistribute. Skipping this step means dry meat. - serve
Carve and serve.
Carve the chicken into pieces — legs, thighs, wings, and sliced breast. Serve over white rice with the pan drippings and extra gravy spooned on top.
What to keep in mind.
6 tips from the recipe — small details that make a real difference to the final dish.
- 1Pat the chicken extremely dry with paper towels — any moisture on the skin will prevent it from crisping up.
- 2Tuck the wing tips behind the back so they don't burn or catch fire over the long cook.
- 3If the chicken wobbles on the beer can, spread the drumsticks forward into a stable tripod stance.
- 4Use a disposable aluminum drip pan under the chicken to catch drippings and prevent flare-ups.
- 5Loosen the breast skin gently with your fingers and rub seasoning directly onto the meat for deeper flavor.
- 6Let the chicken rest upright for a full 10 minutes after grilling — this reabsorbs juices and makes carving easier.
Adapt it for your goals.
Citrus-Herb Beer Can Chicken
Replace half the beer with orange juice and stuff the cavity with lemon halves, garlic cloves, and fresh rosemary. The citrus steam brightens the poultry and pairs beautifully with the smoky paprika.
Spicy Buffalo Beer Can ChickenSpicy Buffalo Beer Can Chicken
Add 1 tbsp hot sauce and 1/2 tsp extra cayenne to the dry rub, then toss the finished shredded chicken in Buffalo sauce for game-day wings-style meat without the frying.
No Oil VersionNo-Oil Version
Skip the olive oil and instead spritz the chicken with cooking spray every 20 minutes during grilling. Reduces fat while still achieving a crisp, seasoned skin.
Soda Can (Non Alcoholic) VariationSoda Can (Non-Alcoholic) Variation
Substitute the beer with a 12 oz can of root beer, ginger ale, or cola (still half-emptied). The sugar in the soda caramelizes and adds a subtle sweetness and deeper browning to the skin.
Smoked Beer Can ChickenSmoked Beer Can Chicken
Add a handful of soaked wood chips (hickory or apple) to the charcoal or a smoker box on a gas grill. Smoke at 300°F for 1.5-2 hours for a deep, barbecue-house flavor.
Why this is on our healthy list.
High-Quality Lean Protein
Chicken breast and thighs provide complete protein essential for muscle repair and satiety, without excess saturated fat when skin is eaten in moderation.
Rich in B Vitamins
Chicken is a natural source of niacin, vitamin B6, and vitamin B12, which support energy metabolism and nervous system health.
Smoked Paprika's Antioxidants
Smoked paprika contains capsaicin and carotenoids that have anti-inflammatory properties and may support eye health.
Low-Carb Friendly
This recipe contains no added starches or sugars beyond a teaspoon of brown sugar in the rub, making it suitable for low-carb and keto-style eating patterns.
Frequently asked questions
Yes. Place the chicken-on-a-can in a roasting pan and bake at 375°F for 60–75 minutes, or until the thigh reaches 165°F. Use a baking sheet lined with foil to catch drips.