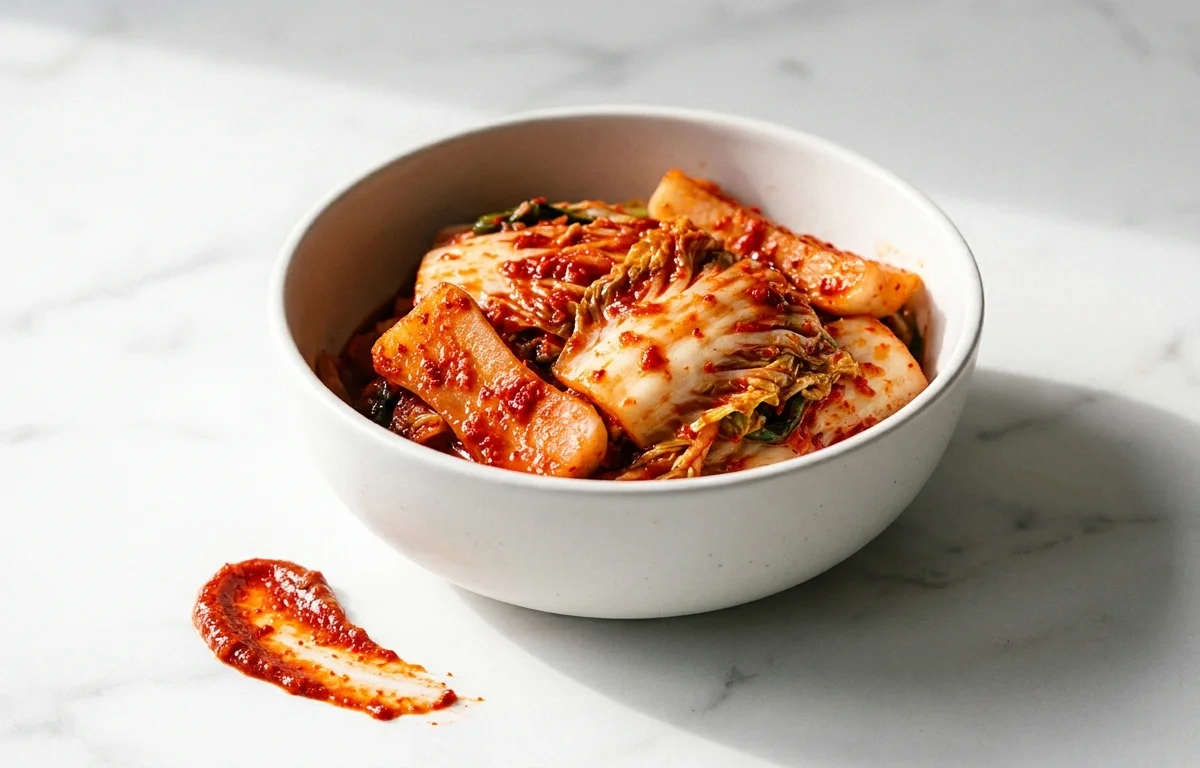
Kimchi
A quintessential Korean staple, this napa cabbage kimchi delivers a bold, spicy, tangy, and umami-packed punch. Each crunchy bite is layered with gochugaru, garlic, ginger, and fish sauce, then fermented to develop its signature deep, sour complexity. Enjoy it as a banchan, in stews, or folded into fried rice.
For 8 servings
- prep · ~120 min
Salt the cabbage.
1.Slice the cabbage lengthwise into quarters, then remove the core.2.Chop across into 2-inch pieces and place in a large bowl.3.Toss with coarse sea salt, making sure it gets between the leaves.4.Cover with cold water and let it sit at room temperature for 2 hours, turning occasionally.TIPProperly salted cabbage leaves should be flexible enough to bend without snapping. - prep · ~5 min
Rinse and drain the cabbage.
1.Drain the salted cabbage in a colander and rinse thoroughly under cold running water to remove excess salt.2.Squeeze gently to remove as much water as possible without crushing the leaves.3.Set aside to drain further while preparing the paste. - simmer · ~10 min
Make the rice flour paste.
1.In a small saucepan, whisk 2 tbsp sweet rice flour into 1 cup water until smooth.2.Place over medium heat and stir constantly until it thickens and starts to bubble, about 3-5 minutes.3.Remove from heat and stir in the sugar. Let the paste cool completely.TIPThe rice paste acts as a binder to help the seasoning adhere to the cabbage. - mix · ~5 min
Mix the kimchi seasoning paste.
1.In a large bowl, combine the cooled rice paste, gochugaru, fish sauce, minced garlic, and minced ginger.2.Mix well until a vibrant, uniform red paste forms.3.Add the julienned carrot and sliced green onions.4.Fold them into the paste to coat evenly. - mix · ~5 min
Combine the cabbage with the seasoning.
1.Wear kitchen gloves to protect your hands from the chili.2.Add the drained cabbage to the bowl with the seasoning paste.3.Massage the paste into every leaf, working in batches to ensure thorough, even coating.TIPPack the mixture firmly; removing air pockets is key to successful fermentation. - assemble · ~5 min
Pack the kimchi into jars.
1.Pack the seasoned cabbage tightly into clean glass jars, pressing down firmly to remove air bubbles.2.Leave at least 1 inch of headspace at the top of each jar to allow for expansion during fermentation.3.Seal the jars loosely. Place them on a tray to catch any overflow. - rest · ~2880 min
Ferment the kimchi.
1.Leave the jars at cool room temperature (60-70°F), away from direct sunlight, for 1 to 2 days.2.You will see bubbles and liquid may seep out; this is a sign of active fermentation.3.After the initial room-temperature ferment, tighten the lids and transfer the jars to the refrigerator.TIPRefrigerating slows fermentation dramatically. The flavor will continue to develop and sour over weeks.
What to keep in mind.
7 tips from the recipe — small details that make a real difference to the final dish.
- 1Use coarse sea salt for salting the cabbage; fine salt can make it overly salty.
- 2Wear kitchen gloves when handling the seasoning paste to avoid chili burns and stained hands.
- 3Press the cabbage down firmly when packing jars to eliminate air pockets and prevent mold.
- 4Taste the brine after rinsing; if it's too salty, soak the cabbage in fresh water for 10 minutes.
- 5For a funkier flavor, add a splash of saeujeot (salted shrimp) along with the fish sauce.
- 6Always leave at least an inch of headspace in jars; fermentation produces gas and can cause overflow.
- 7Store longer-fermented kimchi in the back of the fridge where temperature is most stable.
Adapt it for your goals.
Vegan
Replace fish sauce with 3 tbsp soy sauce or tamari and 1 sheet of toasted, crumbled kelp for umami. Ideal for plant-based diets.
low sodiumLow-sodium
Reduce salt to 2 tbsp and skip the fish sauce; use 2 tbsp miso paste dissolved in water for savory depth. Great for those watching their salt intake.
extra crunchyExtra-crunchy
Add 1 cup of cubed Korean radish (mu) or daikon with the cabbage. The radish stays crunchy and adds a refreshing bite.
spicy sweetSpicy-sweet
Increase sugar to 2 tbsp and add 1/2 cup of peeled, julienned Asian pear. The natural sweetness balances intense heat.
Why this is on our healthy list.
Probiotic-Rich Fermented Food
The natural fermentation process creates live lactic acid bacteria that support gut health and digestion.
Low in Calories
Napa cabbage is naturally low-calorie, making this kimchi a guilt-free way to add flavor to meals.
Source of Vitamin C and K
Napa cabbage provides vitamin C for immune support and vitamin K for bone health.
Contains Capsaicin from Gochugaru
Gochugaru chili flakes contain capsaicin, which may help boost metabolism and reduce inflammation.
Rich in Antioxidants
Garlic and ginger in the seasoning offer antioxidant compounds that support overall wellness.
Frequently asked questions
You likely salted the cabbage for too long or didn't rinse thoroughly enough. Next time, reduce salting time to 1.5 hours and rinse in two changes of cold water.