vegetariansoy-free
gujarati
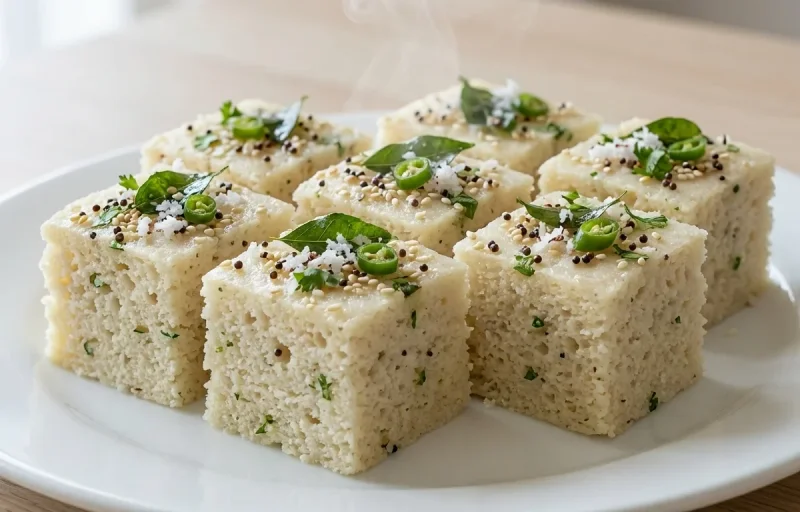
Rava Dhokla
15 min
277 cal
8gProtein
36gCarbs
11gFat
1Recipes
Loading...
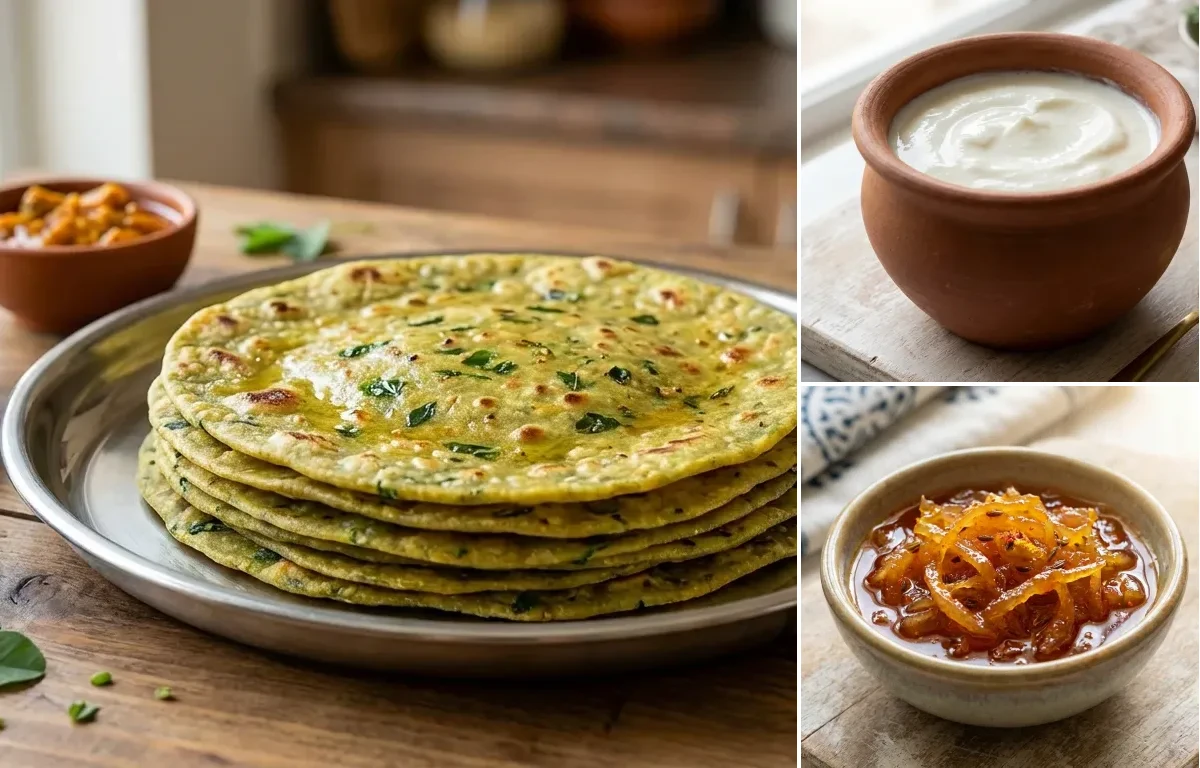
Fiber-rich Methi Thepla with cool curd and tangy chundo – perfect for busy mornings!

A soft, savory flatbread from Gujarat made with whole wheat flour and fresh fenugreek leaves. Lightly spiced and incredibly versatile, these are perfect for breakfast, lunchboxes, or as a travel snack.
Serving size: 1 serving

Creamy, tangy, and light homemade curd (dahi), a staple in every Indian household. This simple recipe uses just two ingredients to create a probiotic-rich food perfect for raita, lassi, or enjoying on its own. Note that this recipe requires 6-12 hours of inactive time for fermentation.

A classic Gujarati sweet and tangy raw mango pickle, cooked to a perfect jam-like consistency. This instant stovetop version captures the traditional sun-dried flavor in under an hour and is a perfect side for theplas, rotis, or parathas.
Serving size: 1 serving
Fiber-rich Methi Thepla with cool curd and tangy chundo – perfect for busy mornings!
This gujarati dish is perfect for lunch. With 495.40999999999997 calories and 17.64g of protein per serving, it's a nutritious choice for your meal plan.
Discover authentic meals from cuisines around the world.
Find meals that fit your dietary preferences.
Find meals optimized for your goal.
Prepare the Dough (5 minutes)
Knead and Rest the Dough (30 minutes)
Roll the Theplas (10 minutes)
Cook the Theplas (20 minutes)
Serve
Serving size: 1 serving
Boil the Milk
Cool to Lukewarm Temperature
Inoculate with Starter
Ferment and Set the Curd
Chill and Serve
Prepare the Mangoes
Macerate the Mango
Cook the Chundo
Thicken to One-String Consistency
Add Finishing Spices
Cool and Store

Luxurious, protein-packed Lobster Masala with soft rotli - a perfectly spiced, aromatic treat!

Aromatic Vaghareli Machhi with soul-satisfying khichdi & tangy kadhi. A homestyle delight!

Crispy, protein-packed Baida Roti with tangy mint chutney - a quick, satisfying dinner!

Melt-in-mouth Nalli Nihari, rich and aromatic, with tandoori roti. Pure soul-satisfying comfort!

Protein-packed Surti Keema Ghotala with soft pav - a perfectly spiced, homestyle treat!