Thalipeeth
A rustic Maharashtrian flatbread made with mixed flours, onion, herbs, and spices. It cooks up earthy, savory, and lightly crisp at the edges, making it a filling breakfast or snack with yogurt or pickle.
For 4 servings
- prep
Chop the onion, chili, and coriander.
Finely chop the onion, green chili, and coriander leaves so they mix evenly into the dough and help the flatbread cook through without tearing.
- mix · ~3 min
Mix the flour, vegetables, and spices.
1.Add bhajani flour to a wide bowl.2.Mix in onion, green chili, coriander leaves, cumin seeds, and sesame seeds.3.Add red chili powder, turmeric powder, asafoetida, and salt.4.Stir everything well so the onion and spices are evenly distributed. - knead · ~4 min
Make a soft dough.
Add yogurt and enough water to bring the mixture together into a soft, pliable dough. Knead gently just until smooth; the onion will release a little more moisture as it rests.
- rest · ~10 min
Rest the dough for 10 minutes.
- assemble · ~7 min
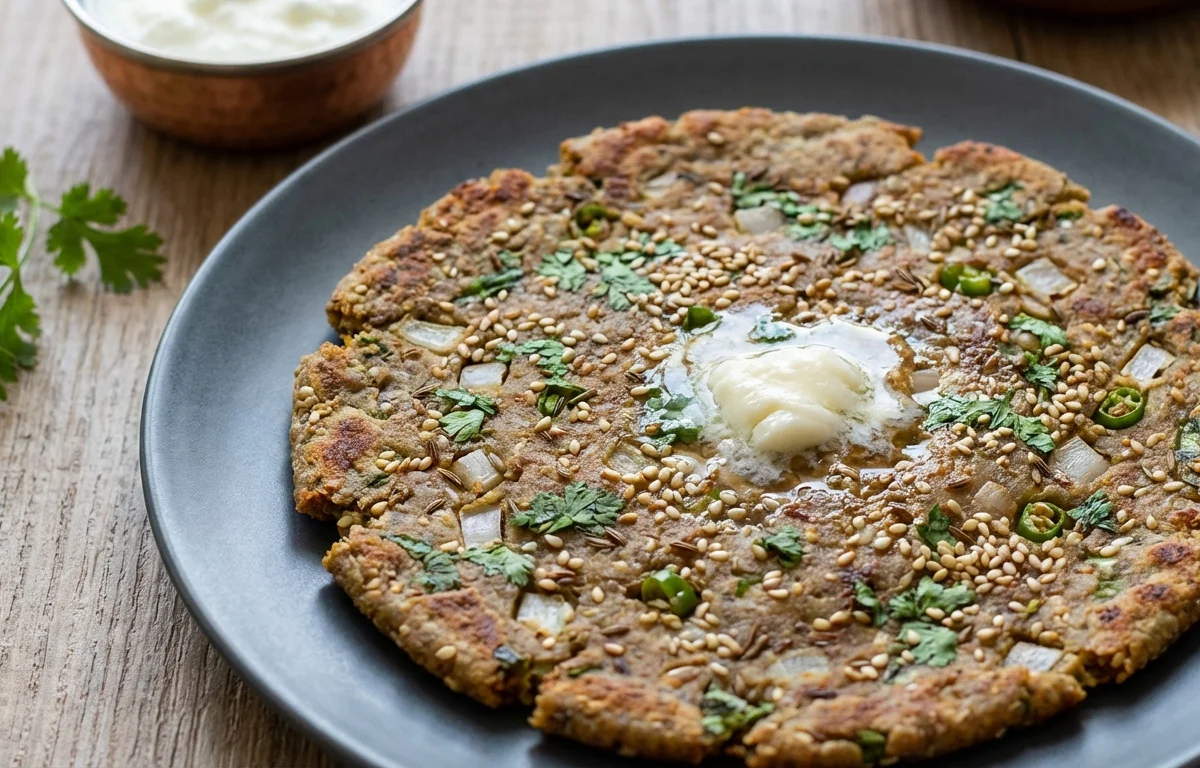
Shape the thalipeeth.
1.Divide the dough into 4 equal portions.2.Place one portion on a sheet of parchment paper or a clean damp cloth.3.Pat it gently with wet fingers into a round about 5 to 6 inches wide.4.Make 3 small holes in the center and around the surface to help it cook evenly. - fry · ~4 min
Cook the first thalipeeth on a hot pan.
1.Heat a tawa or skillet over medium heat.2.Carefully place the shaped thalipeeth on the pan.3.Drizzle 1 tsp oil around the edges and into the holes.4.Cook until the bottom is golden and lightly crisp, about 3 to 4 minutes.TIPMedium heat cooks the inside properly without burning the flour on the outside. - fry · ~3 min
Flip and cook the other side.
Turn the thalipeeth over and cook the second side for 2 to 3 minutes until brown spots appear and the center feels set.
- fry · ~12 min
Cook the remaining thalipeeth.
Shape and cook the remaining dough portions the same way, using 1 tsp oil for each one.
- serve
Serve hot.
What to keep in mind.
7 tips from the recipe — small details that make a real difference to the final dish.
- 1Let the mixed dough rest the full 10 minutes; the onion releases moisture and makes patting easier.
- 2If the dough feels sticky after resting, dust in a little more bhajani flour rather than adding lots of oil.
- 3Pat the thalipeeth directly on parchment or a damp cloth with wet fingers to prevent cracking at the edges.
- 4Do not skip the small holes; they let steam escape and carry oil inward so the center cooks through.
- 5Keep the tawa at medium heat only, since roasted multigrain flour can brown fast before the inside sets.
- 6Flip only after the first side looks golden and releases easily, or the thalipeeth may break.
- 7Serve straight off the pan for the best contrast of crisp edges and soft, savory middle.
Adapt it for your goals.
Low-oil
Cook on a well-seasoned tawa with less oil, adding just a few drops in the holes for a lighter version that still cooks evenly.
spicierSpicier
Increase green chili and red chili powder for a sharper, hotter thalipeeth that pairs especially well with plain yogurt.
no onionNo-onion
Skip the onion for a simpler texture and adjust water slightly; useful for fasting-style preferences or longer storage.
veganVegan
Replace yogurt with a little extra water or plant-based yogurt to keep the dough soft while making the dish fully dairy-free.
Why this is on our healthy list.
Multigrain Goodness
Bhajani flour is made from roasted mixed grains and pulses, making this flatbread more varied and sustaining than a single-flour bread.
Fiber-Rich Ingredients
The multigrain flour, onion, and herbs contribute fiber, which helps make thalipeeth a filling breakfast or snack.
Plant-Based Nutrients
Sesame seeds, cumin, coriander, and chili add minerals, aroma, and antioxidant-rich plant compounds in small but flavorful amounts.
Frequently asked questions
It is usually too dry or too thin. Add a little water, pat it with wet fingers, and flip only after the first side has fully set.