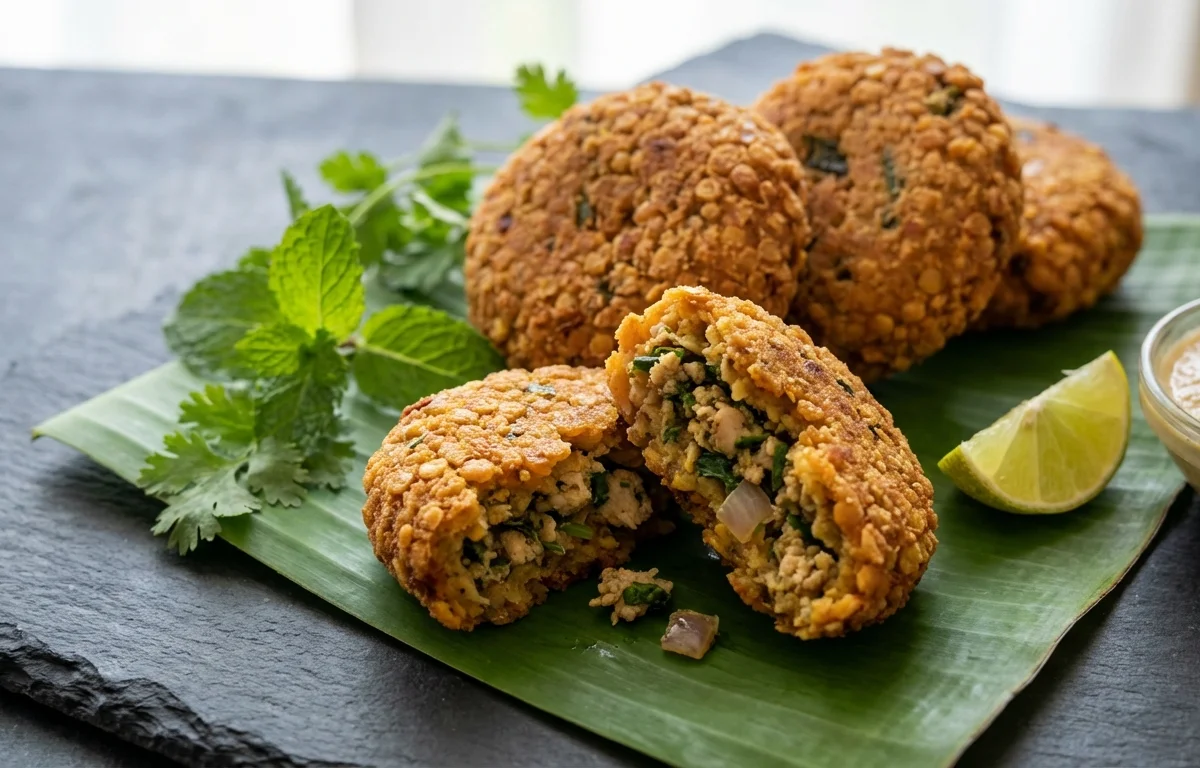
Chicken Keema Vada
Crisp outside and juicy inside, these chicken keema vadas are packed with ginger, garlic, herbs, and warm spices. They make a satisfying Indian snack with plenty of flavor in every bite.
For 8 servings
- prep · ~7 min
Prepare the keema mixture.
1.Add chicken keema, onion, green chili, ginger, garlic, coriander leaves, and mint to a large bowl.2.Add chickpea flour, rice flour, fennel seeds, garam masala, red chili powder, turmeric powder, black pepper, and salt.3.Add lemon juice and egg, then mix well until the mixture looks sticky and holds together.TIPIf the mixture feels loose, let it sit for 5 minutes so the flours absorb moisture. - rest · ~10 min
Rest the mixture.
Cover the bowl and rest the mixture for 10 minutes. This helps the seasoning spread evenly and makes shaping easier.
- prep · ~5 min
Shape the vadas.
1.Divide the mixture into 8 equal portions.2.Wet your palms lightly with water.3.Shape each portion into a small flat round vada so it cooks evenly.TIPKeep the vadas slightly thin in the center so the chicken cooks through before the outside gets too dark. - fry · ~15 min
Heat the oil and fry the vadas.
1.Heat oil in a deep pan over medium heat until moderately hot.2.Slide in 3 to 4 vadas at a time without crowding the pan.3.Fry until deep golden on one side, then turn and cook the other side until crisp and the chicken is fully cooked.4.Lift out and drain briefly before frying the next batch.TIPUse medium heat throughout; very hot oil browns the outside too quickly and leaves the center undercooked. - serve
Serve the chicken keema vada hot.
What to keep in mind.
7 tips from the recipe — small details that make a real difference to the final dish.
- 1Squeeze excess moisture from the chopped onion if your keema mixture feels loose before shaping.
- 2Resting the mixture is important here; the chickpea and rice flour absorb juices and help the vadas hold.
- 3Shape the patties evenly and slightly thinner at the center so the chicken cooks through at the same time as the crust browns.
- 4Fry one small tester vada first to check salt and spice before cooking the whole batch.
- 5Keep the oil at medium heat; these chicken vadas need time to cook inside without the outside turning too dark.
- 6Drain on a rack instead of paper towels if you want the crust to stay crisp for longer.
- 7You can shape the vadas ahead and chill them briefly; colder patties are easier to lower into the oil.
Adapt it for your goals.
Low-oil
Shallow-fry in less oil or air-fry after brushing lightly with oil for a lighter version with less mess.
high spiceHigh-spice
Increase green chili and red chili powder for a hotter snack that pairs well with chai or mint chutney.
herb forwardHerb-forward
Add extra mint and coriander for a fresher, brighter keema vada with a more pronounced street-food style taste.
gluten freeGluten-free
This recipe is naturally gluten-free as written, using chickpea flour and rice flour instead of breadcrumbs or wheat flour.
Why this is on our healthy list.
Protein-Rich Snack
Ground chicken and egg make these vadas filling and satisfying, helping turn a snack into something more substantial.
Herbs and Aromatics
Mint, coriander, ginger, garlic, and green chili add flavor depth along with plant compounds from fresh aromatics.
Legume-Based Binder
Chickpea flour helps bind the patties while adding some fiber and extra body compared with using only refined starch.
Frequently asked questions
The onion and chicken can release extra moisture. Let the mixture rest longer, or add a little more chickpea flour or rice flour until it holds.