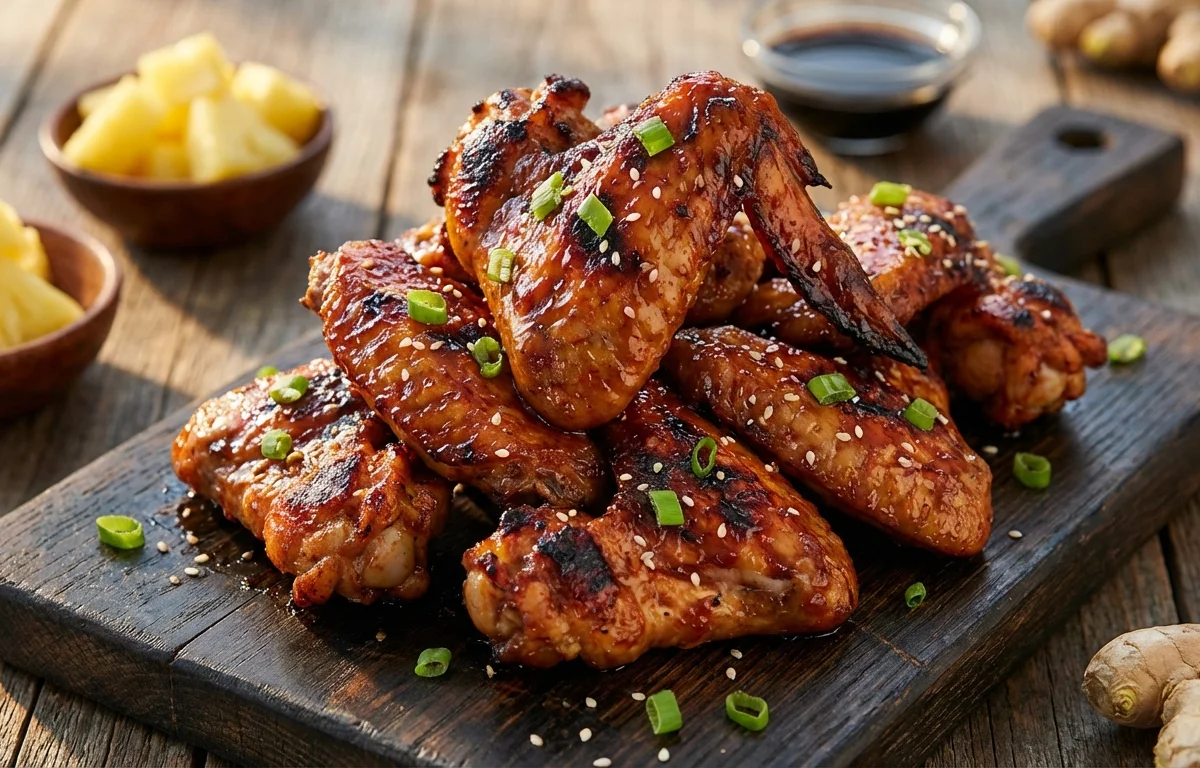
Huli Huli Chicken Wings
Sticky, sweet, and savory chicken wings with a glossy pineapple-soy glaze. This Hawaiian classic gets its name from "huli" meaning "turn" in Hawaiian, as the wings are constantly turned over the grill to build a caramelized, charred crust without burning. Perfect for backyard parties and game day.
For 4 servings
- prep · ~2 min
Season the chicken wings.
1.Pat chicken wings dry with paper towels.2.Season wings with salt and black pepper, tossing to coat evenly.TIPDrying the wings helps the skin crisp up on the grill. - simmer · ~12 min
Make the huli huli glaze.
1.Combine pineapple juice, ketchup, soy sauce, brown sugar, ginger, garlic, rice vinegar, and sesame oil in a small saucepan.2.Bring to a boil over medium-high heat, then reduce heat to low.3.Simmer for 10-12 minutes, stirring occasionally, until thickened and syrupy.TIPThe glaze should coat the back of a spoon. It will thicken more as it cools. - prep · ~1 min
Reserve glaze for basting and serving.
Pour half the glaze into a small bowl for basting. Keep the remaining glaze in the saucepan for a final toss or dipping sauce.
- grill · ~15 min
Grill the wings over medium heat.
1.Preheat grill to medium heat, about 375-400°F.2.Place wings on the grill and cook for 15 minutes, turning every 5 minutes.3.Internal temperature should reach 165°F.TIPKeep the lid closed between turns for even cooking. - grill · ~4 min
Baste and caramelize the wings.
1.Brush wings generously with the reserved basting glaze.2.Grill for another 3-4 minutes, turning once, until the glaze is sticky and lightly charred.3.Watch carefully so the sugar glaze does not burn.TIPApply glaze in the last few minutes only. Brushing too early will cause burning. - assemble · ~1 min
Toss wings in remaining glaze.
Transfer the hot wings to a large mixing bowl. Pour the reserved saucepan glaze over the wings and toss until well coated.
- garnish · ~1 min
Garnish and serve immediately.
Transfer wings to a serving platter. Sprinkle with sliced green onions and toasted sesame seeds.
What to keep in mind.
7 tips from the recipe — small details that make a real difference to the final dish.
- 1Pat the wings thoroughly dry before seasoning to ensure crispy skin on the grill.
- 2Simmer the glaze until it coats the back of a spoon — it will thicken further as it cools.
- 3Reserve half the glaze for basting and the rest for a final toss to avoid cross-contamination.
- 4Grill wings over medium heat (375-400°F) and turn every 5 minutes for even cooking.
- 5Only brush glaze on during the last 3-4 minutes to prevent the sugar from burning.
- 6Use an instant-read thermometer to confirm wings reach an internal temperature of 165°F.
- 7Toss hot grilled wings in the reserved glaze just before serving for maximum stickiness.
Adapt it for your goals.
Oven-baked
Bake wings at 425°F on a wire rack over a baking sheet for 40-45 minutes, basting with glaze in the last 10 minutes — ideal for rainy days or when you don't have a grill.
Spicy Huli HuliSpicy Huli Huli
Add 1-2 tablespoons of sriracha or a minced red chili to the glaze for a sweet-heat kick that balances the pineapple.
Air FryerAir Fryer
Cook wings in an air fryer at 400°F for 20-22 minutes, tossing halfway, then glaze and cook 2 more minutes — yields crispy skin with less oil.
Gluten FreeGluten-Free
Substitute tamari or coconut aminos for soy sauce to make the dish gluten-free without sacrificing umami.
Smoky GrilledSmoky Grilled
Add 1/2 teaspoon smoked paprika to the glaze and use a charcoal grill with lump charcoal for an extra layer of smoky flavor.
Why this is on our healthy list.
Rich in Protein
Chicken wings provide high-quality protein that supports muscle maintenance and repair.
Source of Vitamin C
Pineapple juice contributes vitamin C, which aids immune function and collagen production.
Contains Gingerol
Fresh ginger in the glaze offers anti-inflammatory compounds called gingerols.
Low in Processed Ingredients
This homemade glaze uses simple pantry staples like ketchup and soy sauce instead of bottled marinades with preservatives.
Frequently asked questions
Yes, prepare the glaze up to 3 days in advance and store it in the refrigerator — reheat gently before using.