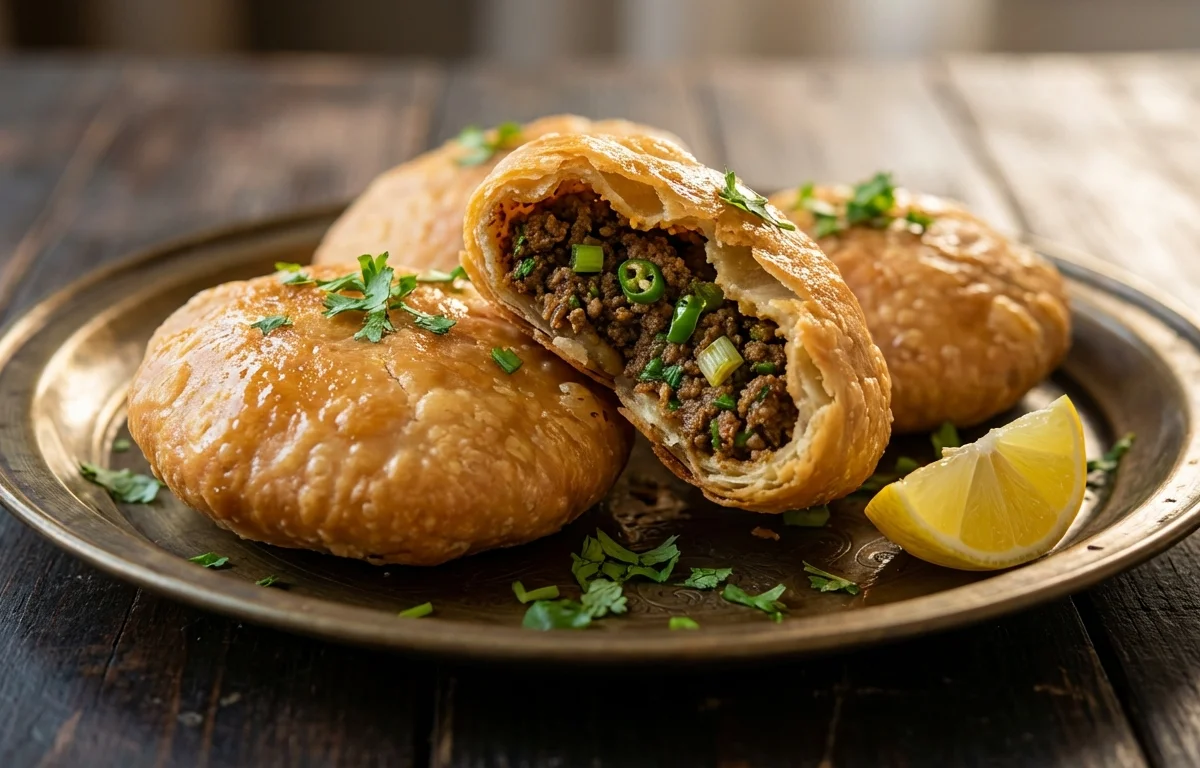
Keema Kachori
Crispy, golden-brown fried pastry shells stuffed with a richly spiced minced meat filling. A beloved Rajasthani street food where the flaky, crunchy exterior gives way to a savory, aromatic keema mixture that bursts with flavor from whole spices, ginger, and green chilies.
For 4 servings
- prep · ~25 min
Prepare the dough for the kachoris.
1.In a large bowl, mix 2 cups of flour with a pinch of salt.2.Pour 3 tbsp of melted ghee into the flour and rub it in with your fingertips until the mixture resembles coarse breadcrumbs.3.Gradually add cold water, a little at a time, and knead for about 5 minutes to form a stiff, smooth dough.4.Cover the dough with a damp cloth and let it rest for 20 minutes.TIPA stiff dough ensures the kachoris turn out flaky and crispy; avoid adding too much water. - saute · ~30 min
Cook the minced meat filling.
1.Heat 1 tbsp ghee in a heavy-bottomed pan over medium heat.2.Add finely chopped onions and sauté until they turn deep golden brown, about 7-8 minutes.3.Stir in ginger paste and garlic paste, cooking for 1 minute until the raw smell goes away.4.Add green chilies and chopped tomatoes, cooking until the tomatoes turn soft and mushy.5.Mix in turmeric powder, red chili powder, and cumin powder, stirring for 30 seconds until fragrant.6.Add the minced mutton and salt, breaking up any lumps, and sauté on high heat for 2-3 minutes until the meat is sealed.7.Reduce the heat to low, cover the pan, and cook for 15 minutes, stirring once or twice, until the mixture is completely dry.TIPMake sure the keema mixture is completely dry; any moisture will make the kachori soggy when frying. - mix · ~15 min
Finish the keema filling.
1.Turn off the heat and let the cooked keema cool down to room temperature.2.Once cooled, mix in the garam masala powder, fresh coriander leaves, and lemon juice.3.Check the seasoning and adjust if needed.TIPCooling the filling completely prevents the dough from becoming sticky when stuffing. - assemble · ~15 min
Stuff and shape the kachoris.
1.Divide the rested dough into 8 equal portions and roll them into smooth balls.2.Gently flatten a dough ball into a small disc of about 3 inches in diameter.3.Place a generous spoonful of the cooled keema filling in the center of the disc.4.Gather the edges of the dough towards the top to seal the filling inside completely, pinching off any excess dough.5.Flatten the stuffed ball very gently with your palm or rolling pin into a round, 3-inch wide kachori. Repeat for all portions.TIPSeal the edges perfectly to prevent any filling from leaking out into the oil while frying. - fry · ~10 min
Deep fry the kachoris to golden perfection.
1.Heat oil in a deep frying pan over medium-low heat. The oil should be moderately hot, not smoking.2.Carefully slide 2-3 kachoris into the hot oil, depending on the size of your pan.3.Fry them gently on low to medium heat for about 6-8 minutes, flipping occasionally, until puffed and golden brown.4.Use a slotted spoon to remove the fried kachoris and drain them on paper towels to remove excess oil.TIPFrying on low heat ensures the kachori cooks through and becomes ultra-crispy without burning the crust. - serve · ~1 min
Serve the keema kachoris hot.
1.Arrange the hot, crispy kachoris on a serving plate alongside green chutney and tamarind chutney.2.Garnish with sliced onions and a sprinkle of fresh coriander if desired.
What to keep in mind.
6 tips from the recipe — small details that make a real difference to the final dish.
- 1Rub the ghee into the flour thoroughly until it resembles breadcrumbs for that signature flaky crust.
- 2Use cold water to knead a stiff dough; a soft dough will absorb oil and turn greasy.
- 3Cook the keema until bone-dry — any leftover moisture will steam the pastry from within and ruin crispiness.
- 4Cool the filling completely before stuffing; a hot filling will soften the dough and make sealing difficult.
- 5Fry kachoris over low-medium heat; high heat browns the outside too quickly while the inside stays raw.
- 6Drain fried kachoris on paper towels immediately; stack them only after they cool to preserve crunch.
Adapt it for your goals.
Chicken Keema Kachori
Swap mutton mince with chicken mince for a lighter, quicker-cooking filling. Cook the chicken until dry to avoid sogginess, and add a pinch of black pepper for extra warmth.
Spicy Keema KachoriSpicy Keema Kachori
Double the green chilies and add 1 teaspoon of crushed black pepper or a dash of cayenne to the filling. Perfect for heat lovers who want a fiery bite.
Keema Kachori with MintKeema Kachori with Mint
Stir 1 tablespoon of finely chopped fresh mint into the cooled filling along with the coriander. Mint adds a bright, cooling contrast to the warm spices.
Low Oil Baked KachoriLow-Oil Baked Kachori
Instead of deep frying, brush each assembled kachori with ghee or oil and bake at 200°C (400°F) for 20-25 minutes, flipping once, for a lighter, less greasy version.
Why this is on our healthy list.
High-Quality Animal Protein
Mutton mince is packed with complete protein and essential amino acids, which support muscle repair and growth. Goat meat is also leaner than many red meats.
Rich in Iron
The red meat in keema provides heme iron, the form most easily absorbed by the body, helping combat fatigue and maintain healthy blood cells.
Anti-Inflammatory Spices
Turmeric, ginger, and garlic in the filling contain natural anti-inflammatory compounds such as curcumin and gingerol, which may support joint health and immunity.
Good Source of B Vitamins
Mutton is naturally rich in B vitamins like B12 and niacin, which are essential for energy metabolism and nervous system function.
Frequently asked questions
Yes, you can knead the dough up to a day in advance. Wrap it tightly in plastic wrap and refrigerate; let it come to room temperature for 20 minutes before rolling.