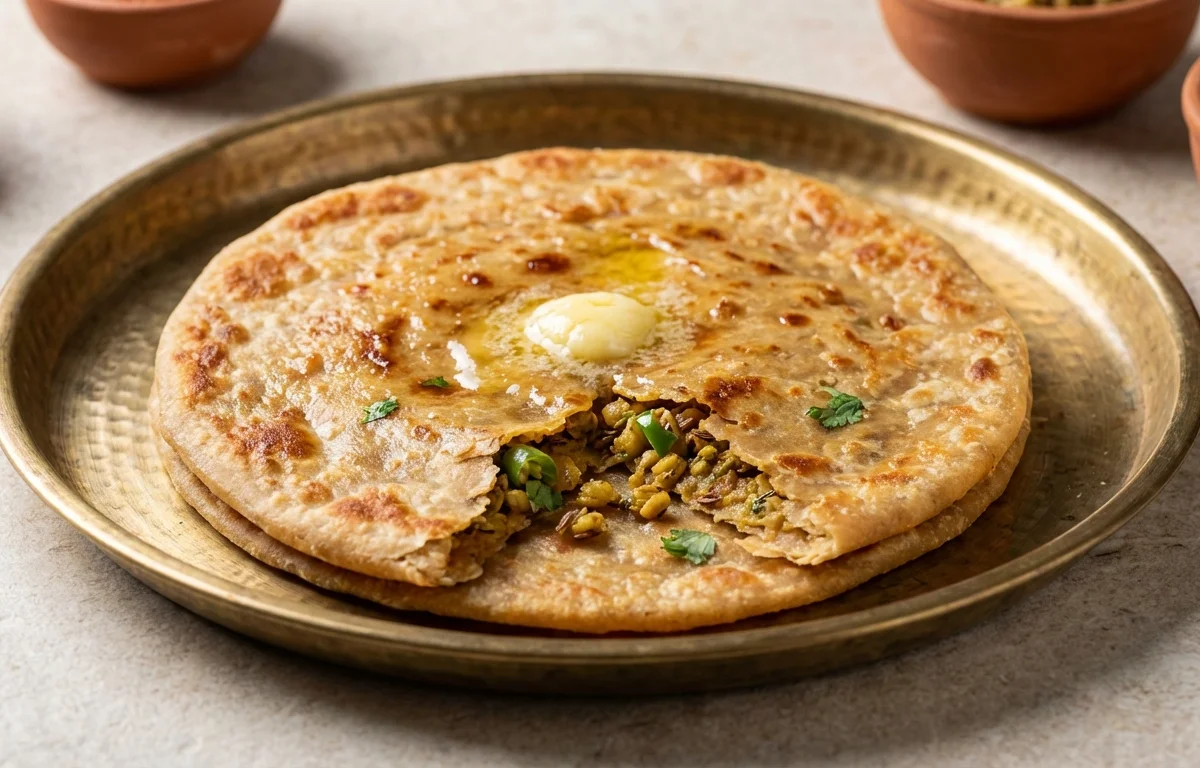
Moth Dal Paratha
Nutty moth dal and warm spices make a hearty filling for these rustic parathas. Crisp brown spots on the outside and a savory, soft center make them especially good with plain yogurt or pickle.
For 4 servings
- prep · ~240 min
Soak the moth dal.
Wash the moth dal well and soak it in plenty of water for 4 hours. Drain before cooking.
- boil · ~15 min
Boil the moth dal until just tender.
Add the soaked moth dal and 2 cups water to a pan. Cook until the dal is tender but not mushy, then drain any extra water and lightly mash it.
TIPKeep the dal fairly dry, or the filling will make the parathas hard to roll. - knead · ~20 min
Knead the dough.
Mix the whole wheat flour with 0.25 tsp salt. Add water little by little and knead into a soft, smooth dough. Cover and rest 15 minutes.
TIPA soft dough seals better around the filling and gives softer parathas. - saute · ~8 min
Make the moth dal filling.
1.Heat oil in a pan over medium heat.2.Add cumin seeds and let them sizzle for 20 to 30 seconds.3.Add onion, green chili, and ginger, then cook until the onion softens, 3 to 4 minutes.4.Add coriander powder, red chili powder, garam masala, turmeric powder, and the remaining salt.5.Add the boiled moth dal and cook, stirring, until the mixture looks dry and comes together, 3 to 4 minutes.6.Turn off the heat and mix in coriander leaves. Cool the filling completely.TIPCool filling is easier to stuff and helps prevent tearing. - assemble · ~10 min
Stuff and roll the parathas.
1.Divide the dough into 4 equal balls.2.Divide the filling into 4 equal portions.3.Roll one dough ball into a small disc and place one portion of filling in the center.4.Bring the edges together and seal well.5.Dust lightly with flour and roll gently into a medium paratha. - fry · ~12 min
Cook the parathas on a hot tawa.
1.Heat a tawa over medium heat.2.Place one rolled paratha on the hot tawa and cook until light bubbles appear.3.Flip it, spread a little ghee, and cook until brown spots form.4.Flip again, spread a little more ghee, and cook the other side until golden and crisp in places.5.Repeat with the remaining parathas.TIPCook on medium heat so the dough cooks through before the outside gets too dark. - serve
Serve the moth dal parathas hot.
What to keep in mind.
7 tips from the recipe — small details that make a real difference to the final dish.
- 1Boil the moth dal only until just tender; overcooked dal turns pasty and makes the stuffing heavy.
- 2After mashing, cook the filling until it looks dry and leaves the pan easily before cooling.
- 3Let the stuffing cool completely before filling, or steam will soften the dough and cause tears.
- 4Seal the stuffed dough tightly at the top and flatten gently with your fingers before rolling.
- 5Use only a light dusting of flour while rolling so the paratha stays soft and cooks evenly.
- 6Roast on medium heat for crisp brown spots; high heat can char the outside before the center cooks.
- 7Keep cooked parathas wrapped in a cloth-lined container so they stay soft until serving.
Adapt it for your goals.
Low-oil
Dry-roast the parathas or use minimal ghee on the tawa for a lighter version that still keeps the spiced moth dal filling.
veganVegan
Replace ghee with oil for roasting to make the parathas fully plant-based without changing the filling.
spicierSpicier
Add an extra green chili or a little more red chili powder if you want a hotter, more robust North Indian-style stuffing.
no onionNo-onion
Skip the onion and increase ginger and coriander leaves for a simpler filling that still tastes warm and aromatic.
Why this is on our healthy list.
Plant Protein from Moth Dal
Moth dal adds satisfying plant-based protein and makes these parathas more filling than plain stuffed flatbreads.
Whole Grain Goodness
Whole wheat flour brings bran and fiber, making the paratha more wholesome and hearty.
Digestive Spice Support
Ginger, cumin, and coriander are classic spices that add flavor while making a rich stuffed paratha feel more balanced.
Frequently asked questions
The filling is usually too wet or still warm. Cook it until dry, cool it fully, and seal the dough well before rolling gently.

.webp)