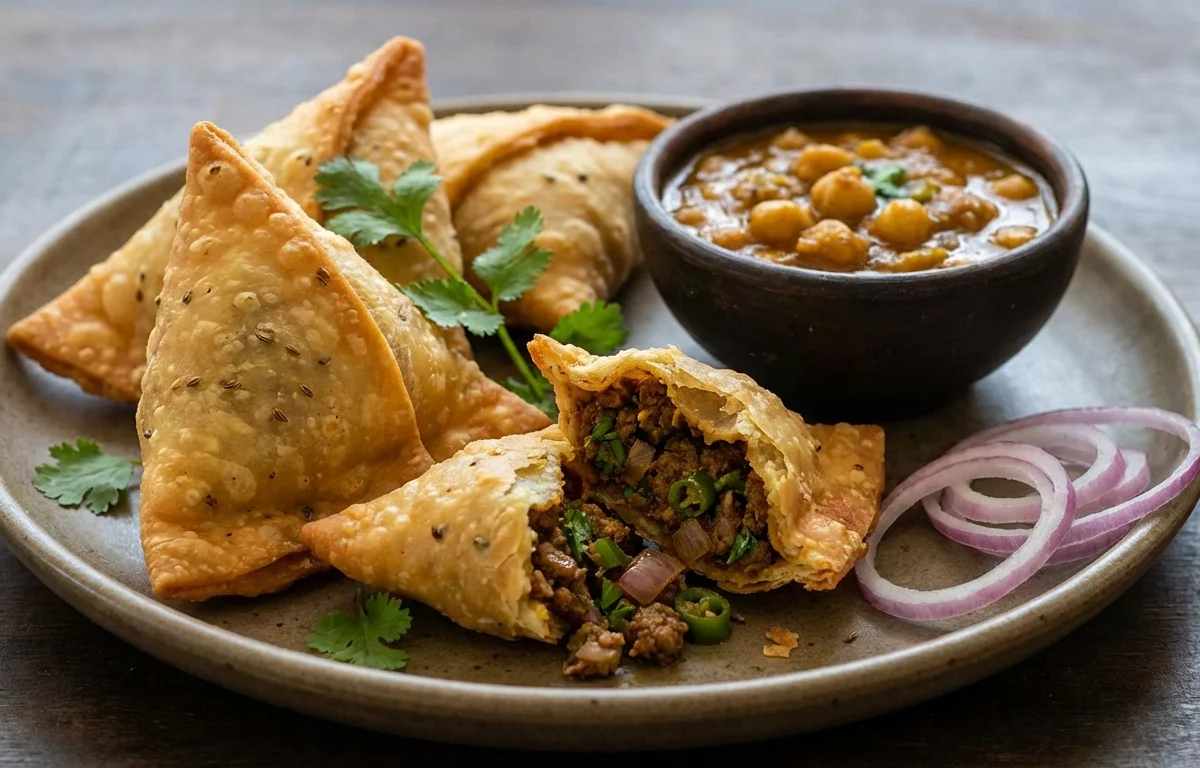
Mansa Singada
Crispy, golden fried pastry pockets stuffed with a richly spiced minced mutton filling. A beloved Bengali snack, these flaky singadas are best enjoyed hot with a side of kasundi or tangy tomato chutney on a rainy afternoon.
For 4 servings
- prep · ~20 min
Prepare the dough.
1.Mix 1.5 cups all-purpose flour, 1 pinch salt, and 2 tbsp oil in a bowl until crumbly.2.Add water little by little and knead into a stiff, smooth dough (5-7 min).3.Cover with a damp cloth and rest for 20 minutes.TIPA stiff dough ensures the singadas turn out flaky, not soft. - saute · ~20 min
Cook the mutton filling.
1.Heat 1 tbsp oil in a frying pan over medium heat.2.Add chopped onion and sauté until golden brown (5-7 min).3.Add ginger paste and garlic paste; cook until raw smell disappears (1 min).4.Add mutton mince, green chili, turmeric powder, red chili powder, and cumin powder.5.Cook on medium heat, stirring frequently, until mince is browned and dry (8-10 min).6.Sprinkle garam masala and 0.25 tsp salt; stir well.7.Mix in the boiled mashed potato until fully incorporated.TIPBreak up any lumps in the mince with the back of your spoon for an even filling. - rest · ~10 min
Cool the filling completely.
Spread the cooked filling on a plate and let it cool to room temperature. This prevents the dough from getting soggy.
- prep · ~15 min
Shape the singadas.
1.Divide the dough into 8 equal balls.2.Roll each ball into a thin oval shape, about 5 inches long.3.Cut the oval in half to form two semi-circles.4.Take one semi-circle, apply water along the straight edge, and form a cone by overlapping the edges.5.Fill the cone with about 1.5 tbsp of the cooled mutton mixture, leaving space at the top.6.Apply water on the inner edges of the open end and press firmly to seal. - fry · ~10 min
Fry the singadas.
1.Heat 2 cups oil in a kadai over medium-low heat.2.Once oil is moderately hot, gently slide in 3-4 singadas.3.Fry on low heat until golden and crisp on all sides (8-10 min).4.Drain on paper towels.TIPFry on low heat to ensure the crust turns crispy and cooks through without burning. - serve
Serve hot with kasundi or tomato chutney.
Arrange the hot singadas on a serving plate. Serve immediately alongside Bengali kasundi or sweet and tangy tomato chutney.
What to keep in mind.
5 tips from the recipe — small details that make a real difference to the final dish.
- 1Rest the dough for at least 20 minutes so the gluten relaxes and the pastry becomes flaky.
- 2Cool the filling completely before stuffing — warm filling will make the dough soggy and hard to seal.
- 3Seal the cone edges with a dab of water and press firmly to prevent the singadas from bursting open while frying.
- 4Fry over medium-low heat so the crust turns deep golden and crisp without burning the outer layer.
- 5Make extra filling and freeze it in portions; you can assemble fresh singadas later for a quick snack.
Adapt it for your goals.
Chicken Singada
Replace mutton mince with ground chicken or turkey for a lighter, leaner filling. Cook the same way, but reduce the initial sauté time since poultry cooks faster.
Vegetarian SingadaVegetarian Singada
Omit the meat and use a mix of crumbled paneer, boiled peas, and extra spices (like chaat masala) to replicate the texture. Great for vegetarians who want the same flaky pastry bite.
Low Oil Baked SingadaLow-Oil Baked Singada
Brush the assembled cones with oil instead of deep-frying, then bake at 200°C (400°F) for 18-20 minutes. This reduces fat while keeping a crisp crust.
Why this is on our healthy list.
Good Source of Protein
The mutton mince provides high-quality animal protein, which helps build and repair tissues and keeps you feeling full longer.
Iron-Rich Filling
Mutton is naturally rich in heme iron, which supports healthy blood oxygen transport and helps prevent fatigue.
Contains Anti-Inflammatory Spices
Turmeric and ginger in the filling may help reduce inflammation and support digestion, adding mild health benefits beyond flavor.
Frequently asked questions
The filling was likely too warm or too moist, or the edges weren’t sealed tightly enough. Always cool the filling completely and press the seams firmly with a dab of water.