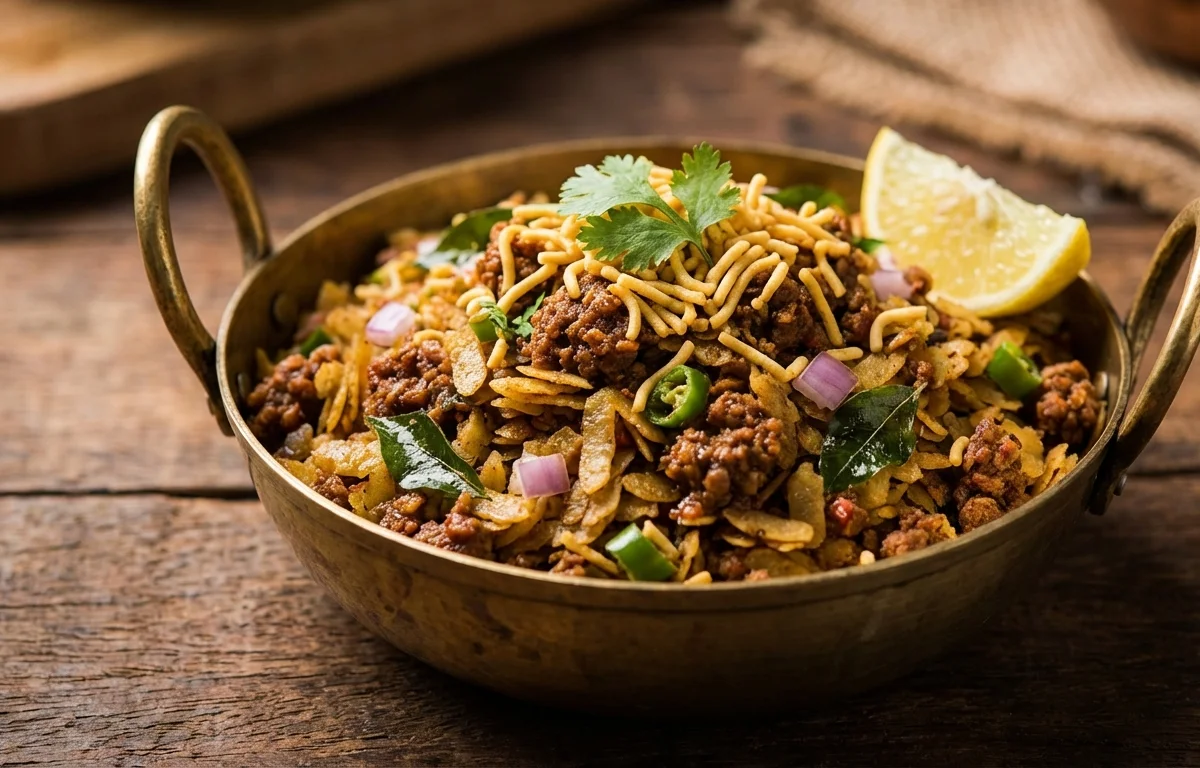
Mutton Keema Poha
Light, fluffy poha tossed with warmly spiced mutton keema makes a filling breakfast or supper with plenty of savory flavor in every bite. The meat stays juicy while the flattened rice soaks up the masala beautifully.
For 4 servings
- prep · ~5 min
Rinse the poha and set it aside.
Place the poha in a colander, rinse it quickly under running water, and let it rest for 5 minutes until softened but still separate.
TIPDo not soak the poha in a bowl of water or it can turn mushy. - temper · ~2 min
Make the tempering.
1.Heat oil in a pressure cooker or deep pan over medium heat.2.Add mustard seeds and let them splutter.3.Add cumin seeds and curry leaves and cook for 15 seconds.4.Add green chili and stir briefly. - saute · ~11 min
Cook the onion base.
1.Add the chopped onion and cook until soft and light golden, 5 to 6 minutes.2.Add ginger-garlic paste and sauté for 1 minute.3.Stir in the chopped tomato and cook until it breaks down, 4 to 5 minutes. - saute · ~6 min
Season and brown the keema.
1.Add turmeric powder, red chili powder, coriander powder, garam masala, and salt.2.Mix well for 30 seconds so the spices bloom.3.Add the mutton keema and cook, breaking up lumps, until it changes color, 4 to 5 minutes.TIPBreak the keema well with a spoon so it cooks evenly and stays crumbly. - pressure cook · ~15 min
Cook the keema until tender.
Pour in the water, stir, and lock the cooker. Pressure cook on medium heat for 10 minutes. Let the pressure drop naturally, then open and cook off any extra moisture if needed.
- mix · ~3 min
Fold in the poha.
Add the softened poha to the cooked keema and toss gently until the masala coats the flakes evenly. Cook on low heat for 2 to 3 minutes so everything warms through.
TIPUse a light hand while mixing so the poha stays fluffy. - garnish
Finish with lemon juice and coriander leaves.
Sprinkle the lemon juice and coriander leaves over the poha and mix once more.
- serve
Serve the mutton keema poha hot.
What to keep in mind.
7 tips from the recipe — small details that make a real difference to the final dish.
- 1Use thick poha only; thin poha will break when tossed with the keema masala.
- 2Rinse the poha briefly and rest it in a colander so the flakes soften without turning pasty.
- 3Cook the onions to light golden before adding tomatoes for a sweeter, deeper base.
- 4Break up the mutton keema thoroughly while browning so you get a loose, crumbly texture throughout.
- 5After pressure cooking, dry off excess liquid before adding poha or the dish can become soggy.
- 6Fold the poha in on low heat and stop as soon as it is coated and warmed, not fried.
- 7Add lemon juice only at the end to keep the finish bright and to cut through the richness of the mutton.
Adapt it for your goals.
Low-oil
Reduce the oil slightly and cook the onion-tomato base a bit longer; the dish stays flavorful but feels lighter for everyday breakfasts.
spicierSpicier
Increase green chilies and red chili powder for a hotter version that pairs especially well with the rich minced mutton.
egg toppedEgg-topped
Serve with a fried or soft-scrambled egg on top for a heartier breakfast and extra protein.
chicken keemaChicken-keema
Swap the mutton for chicken keema if you want a milder, quicker-cooking version with a lighter taste.
Why this is on our healthy list.
Protein-Rich Meal
Mutton keema makes this poha more filling and satisfying, helping turn a simple rice-based dish into a substantial meal.
Balanced With Aromatics
Onion, tomato, ginger, garlic, green chili, and coriander add flavor depth along with plant compounds from fresh ingredients and spices.
Comforting Energy Source
Poha provides easy-to-digest carbohydrates, making this a practical breakfast or light supper with steady comfort and substance.
Frequently asked questions
Yes. Cook the keema covered in a deep pan with the water until tender, then uncover and reduce any extra moisture before adding the poha.