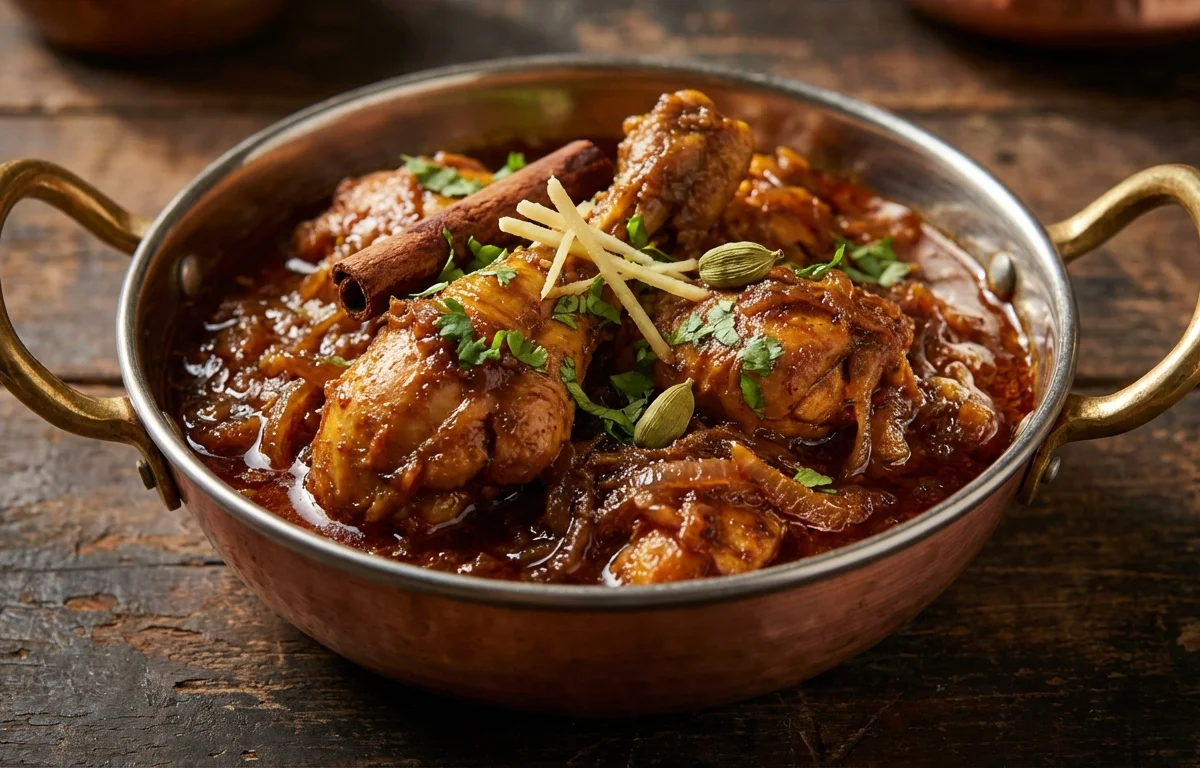
Bhuna Kukda
Bhuna Kukda is a rustic, home-style chicken dish where the masala is cooked down slowly until it clings to every piece. Deep onion flavor, warm spices, and a rich bhuna finish make it perfect with roti or rice.
For 4 servings
- prep · ~10 min
Prepare the chicken and masala ingredients.
1.Wash the chicken pieces and drain well.2.Slice the onions finely and chop the tomatoes.3.Whisk the yogurt until smooth.4.Keep the ginger-garlic paste, green chili, and spices ready. - saute · ~10 min
Cook the whole spices and onions.
1.Heat oil in a heavy pan over medium heat.2.Add cumin seeds and bay leaf and let them sizzle for 20 to 30 seconds.3.Add the sliced onions and cook until deep golden, stirring often.4.Add green chili and mix well.TIPCook the onions patiently; this gives Bhuna Kukda its deep color and rich taste. - saute · ~8 min
Build the masala base.
1.Add ginger-garlic paste and cook until the raw smell fades, about 1 minute.2.Add chopped tomatoes and cook until soft and pulpy.3.Add turmeric powder, red chili powder, coriander powder, and salt.4.Cook the masala until the oil starts separating at the edges.TIPKeep the heat medium so the spices cook without burning. - saute · ~10 min
Bhuna the chicken with the masala.
1.Add the chicken pieces to the pan and coat them well in the masala.2.Cook on medium-high heat for 6 to 8 minutes, stirring often.3.Add the whisked yogurt little by little, mixing continuously.4.Keep cooking until the masala thickens and clings to the chicken.TIPAdd the yogurt gradually to prevent splitting. - simmer · ~20 min
Cover and cook until the chicken is tender.
Add hot water, mix well, cover, and cook on low heat until the chicken is tender and the gravy turns semi-dry. Stir once or twice so the masala does not stick to the pan.
TIPChicken is done when the meat is tender and the juices run clear. - garnish
Finish with garam masala and coriander leaves.
- serve
Serve hot with roti, paratha, or rice.
What to keep in mind.
7 tips from the recipe — small details that make a real difference to the final dish.
- 1Drain the chicken well before cooking so the masala bhunas instead of steaming.
- 2Slice the onions evenly and take them to a deep golden color for the dish's signature richness.
- 3Lower the heat before adding yogurt and stir constantly to keep the sauce smooth.
- 4Use a heavy-bottomed pan so the onion-tomato masala cooks down without scorching.
- 5Add only enough hot water to loosen the masala; Bhuna Kukda should finish semi-dry, not runny.
- 6Let the cooked chicken rest for 5 to 10 minutes before serving so the masala clings better.
- 7This tastes even better the next day after the onion, yogurt, and spice flavors meld.
Adapt it for your goals.
Low-oil
Use less oil and a splash of hot water while browning onions; the dish will be lighter but still keep its bhuna style.
spicierSpicier
Increase red chili powder or add extra slit green chilies for a hotter, more robust home-style version.
bonelessBoneless
Use boneless chicken thigh pieces for faster cooking and easier serving, though bone-in gives deeper flavor.
dahi heavyDahi-heavy
Add a little extra whisked yogurt for a tangier masala with a slightly softer, richer finish.
Why this is on our healthy list.
Protein-Rich Main
Chicken makes this a satisfying, protein-forward dish that pairs well with simple roti or rice.
Digestive Spice Base
Ginger, garlic, cumin, and coriander bring classic aromatic flavor along with traditionally valued digestive support.
Fermented Dairy Tang
Yogurt adds creaminess and gentle tang while contributing dairy-based nourishment to the masala.
Frequently asked questions
This usually happens if the pan is too hot or the yogurt is added all at once. Lower the heat, whisk the yogurt well, and add it gradually while stirring.