Mamsam Vepudu
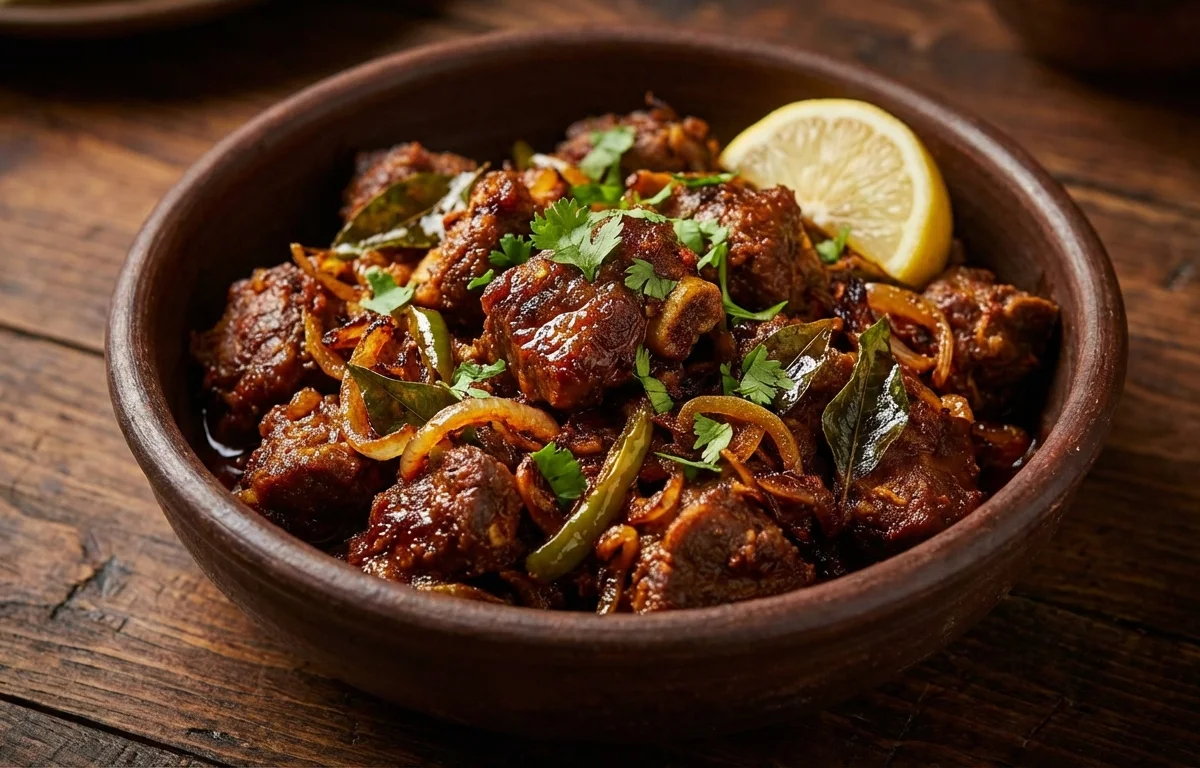
This Andhra-style mutton fry is packed with bold spices, onions, and curry leaves. The meat is pressure cooked until tender, then finished in a hot pan until the masala clings to every piece with a rich, deeply savory flavor.
For 4 servings
- prep · ~15 min
Mix the mutton with the first seasonings.
1.Place the mutton in a bowl.2.Add turmeric powder, half of the ginger-garlic paste, and 0.25 tsp salt.3.Mix well and set aside for 15 minutes.TIPA short rest helps the seasoning cling better to the meat. - pressure cook · ~25 min
Pressure cook the mutton until tender.
1.Transfer the seasoned mutton to a pressure cooker.2.Add 0.5 cup water and cook on medium heat for 4 to 5 whistles.3.Let the pressure drop naturally, then open and check that the meat is tender.TIPIf the mutton is still firm, cook for 1 to 2 more whistles with a splash of water. - saute · ~10 min
Cook the onion base.
1.Heat oil in a wide pan over medium heat.2.Add cumin seeds and curry leaves and let them sizzle for a few seconds.3.Add sliced onions and green chili, then cook until the onions turn light golden.4.Add the remaining ginger-garlic paste and cook until the raw smell fades.TIPUse a wide pan so the final fry reduces quickly instead of steaming. - saute · ~7 min
Cook the tomatoes and ground spices.
1.Add chopped tomato and cook until soft and pulpy.2.Add red chili powder, coriander powder, cumin powder, black pepper, garam masala, and the remaining 0.25 tsp salt.3.Mix well and cook for 2 minutes so the spices lose their raw taste. - simmer · ~15 min
Add the mutton and reduce the masala.
1.Add the pressure-cooked mutton along with its cooking juices to the pan.2.Mix well so every piece is coated in the masala.3.Cook uncovered on medium heat until the liquid reduces and the masala clings to the meat.TIPStir every couple of minutes to prevent the masala from catching at the bottom. - fry · ~7 min
Fry until the mutton turns semi-dry.
Once most of the moisture is gone, keep stirring over medium-low heat for 5 to 7 minutes until the oil lightly separates and the mutton looks glossy and well roasted.
- garnish
Finish with lemon juice and cilantro.
Turn off the heat, sprinkle in the lemon juice and chopped cilantro, and toss once.
- serve
Serve hot.
Serve Mamsam Vepudu hot with plain rice, pulao, dosa, or chapati.
What to keep in mind.
6 tips from the recipe — small details that make a real difference to the final dish.
- 1Use a wide, heavy pan for the final fry so the mutton roasts instead of steaming.
- 2Do not rush the onion stage; light golden onions give the vepudu its savory depth.
- 3After pressure cooking, keep only enough stock to coat the meat while frying, or the masala will stay wet.
- 4The right finish is semi-dry: oil lightly separates and the masala clings tightly to each piece.
- 5Add lemon juice only after switching off the heat so its sharpness stays bright.
- 6Bone-in mutton gives better flavor, but make sure each piece is tender before starting the final roast.
Adapt it for your goals.
Spicier-andhra
Increase green chilies and red chili powder for a fiercer, more traditional heat if you like a hotter vepudu.
bonelessBoneless
Use boneless mutton for easier eating and faster cooking, though bone-in pieces give a richer gravy and fry.
dry roast styleDry-roast-style
Reduce the added cooking stock further and fry a little longer for a drier, roastier version that pairs well with drinks or chapati.
pepper forwardPepper-forward
Add extra freshly crushed black pepper near the end for a sharper, warmer finish without relying only on chili heat.
Why this is on our healthy list.
Protein-Rich Main Dish
Mutton provides substantial protein, making this fry filling and satisfying when served with rice or flatbread.
Aromatic Spice Benefits
Ginger, garlic, cumin, coriander, turmeric, and black pepper add flavor along with plant compounds commonly used in traditional cooking.
Herb-Forward Finish
Curry leaves, cilantro, green chili, and lemon juice add freshness and aroma, which helps balance the richness of the meat.
Frequently asked questions
It should be tender enough to pierce easily with a fork but still hold its shape. If it feels firm, cook for 1 to 2 more whistles with a little water.



.webp)