Poha Chivda
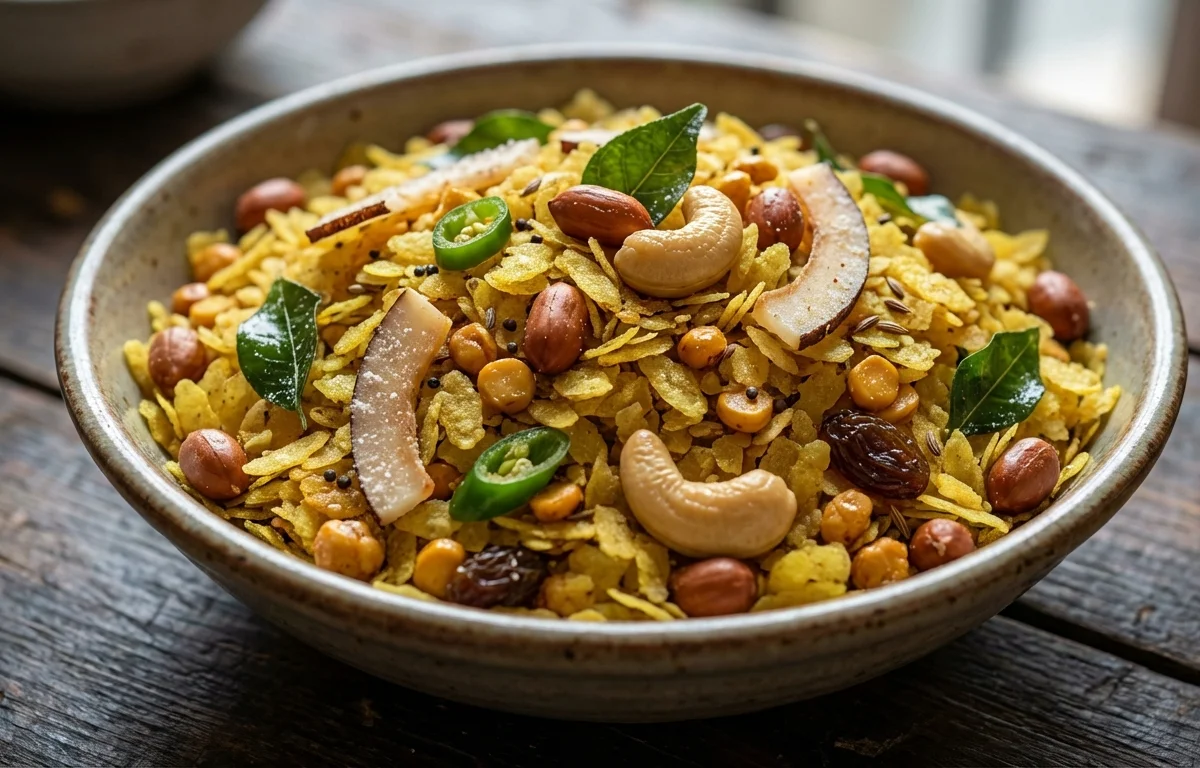
A classic Maharashtrian snack that's crispy, savory, and slightly sweet. This addictive mix of flattened rice, nuts, and spices is perfect for tea time or festive celebrations like Diwali.
For 8 servings
Fry the Poha
- Heat 2 cups of oil in a kadai or deep pan over medium-high heat. To test if the oil is ready, drop a single poha flake; it should puff up and rise to the surface immediately.
- Working in small batches, place a handful of thin poha in a large metal sieve and lower it into the hot oil. The poha will puff up in 3-5 seconds.
- Immediately lift the sieve out, shake off excess oil, and transfer the fried poha to a very large mixing bowl lined with paper towels.
- Repeat this process until all the poha is fried. Frying in a sieve prevents small bits from burning in the oil.
Fry the Nuts and Add-ins
- Using the same sieve method and hot oil, fry the raw peanuts until they are crisp and golden, about 1-2 minutes. Add them to the bowl with the poha.
- Next, fry the cashews until they turn a light golden brown, which takes about 30-40 seconds. Add them to the bowl.
- Fry the dry coconut slices until they are golden, about 15-20 seconds. Be quick as they burn easily. Add to the bowl.
- Briefly fry the roasted chana dal for about 10-15 seconds to make them extra crisp. Add to the bowl.
- Add the raisins directly to the bowl without frying.
Prepare the Tempering (Tadka)
- In a small, separate pan, heat 3 tbsp of oil over medium heat.
- Once the oil is warm, add the mustard seeds and let them crackle completely.
- Add the cumin seeds and sauté for a few seconds until they sizzle.
- Add the asafoetida, slit green chilies, and curry leaves. Be careful as they will splutter. Sauté for 30-40 seconds until the curry leaves become crisp.
- Turn off the heat, then immediately add the turmeric powder and stir well to combine. This prevents the turmeric from burning.
Combine and Season the Chivda
- Carefully pour the hot tempering mixture over the fried poha and nuts in the large bowl.
- Sprinkle the powdered sugar, salt, red chili powder, and amchur powder evenly over the top.
- Using two large spoons or your hands (once it's cool enough to handle), gently toss everything together. Mix from the bottom up to ensure the spices are evenly distributed without crushing the delicate poha flakes.
Cool and Store
- Spread the prepared chivda on large trays or plates in a single layer to cool down completely. This step is crucial for ensuring it stays crispy.
- Once at room temperature, transfer the Poha Chivda to a clean, dry, airtight container. It can be stored for up to 4 weeks.
What to keep in mind.
6 tips from the recipe — small details that make a real difference to the final dish.
- 1Always use thin (paper/nylon) poha for the crispiest result. Thick poha will become hard and chewy.
- 2Ensure your oil is at the right temperature. If it's not hot enough, the poha will absorb too much oil and become greasy.
- 3Fry in small batches to maintain the oil temperature and ensure even cooking.
- 4Let the chivda cool completely before storing. Any residual warmth will create condensation and make it soggy.
- 5Adjust the sugar, salt, and chili powder to your personal taste for a perfect balance of sweet, savory, and spicy.
- 6For a healthier version, you can roast the poha in a dry pan until crisp instead of deep-frying.
Adapt it for your goals.
Healthier Baked Version
Toss the thin poha with 1-2 tbsp of oil and bake at 180°C (350°F) for 8-10 minutes until crisp. Roast the nuts separately and then mix everything with the tempering.
Sweet ChivdaSweet Chivda
Increase the amount of powdered sugar and raisins, and reduce the chili powder for a sweeter version of the snack.
With Sev and BoondiWith Sev and Boondi
After the chivda has cooled, mix in store-bought sev, boondi, or fried lentils (masoor) for added texture and flavor.
Garlic ChivdaGarlic Chivda
Thinly slice 4-5 cloves of garlic and fry them until golden and crisp along with the nuts. Add them to the chivda for a pungent, savory flavor.
Why this is on our healthy list.
Provides Quick Energy
Poha (flattened rice) is a good source of carbohydrates, which provides a quick boost of energy, making this an excellent snack to combat mid-day slumps.
Source of Healthy Fats
The inclusion of peanuts and cashews provides monounsaturated and polyunsaturated fats, which are beneficial for heart health.
Plant-Based Protein
Ingredients like peanuts and roasted chana dal contribute to the protein content, which is essential for muscle repair and overall body function.
Light on Digestion
Poha is known to be light on the stomach and easy to digest, making this snack a suitable option for many people.
Frequently asked questions
The key to crispy chivda is using thin poha, ensuring the oil is very hot before frying, frying in small batches, and allowing the final mixture to cool completely before storing it in an airtight container.