Keema Pav
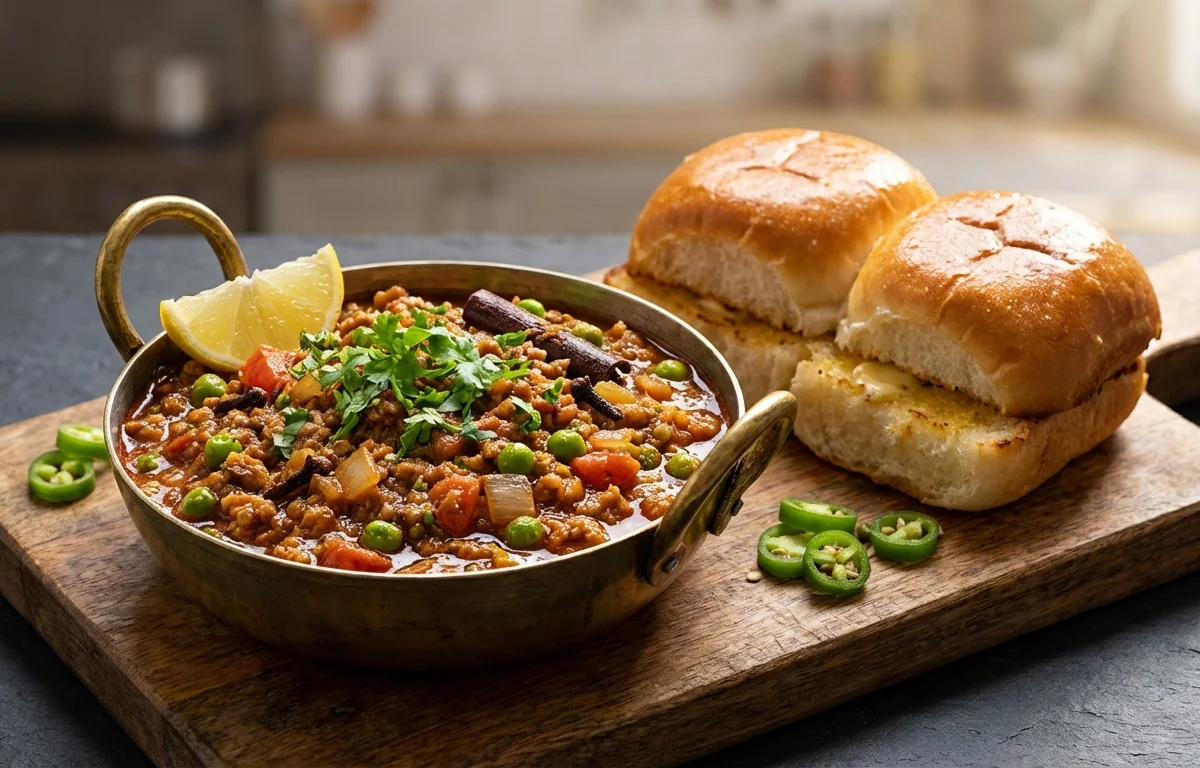
Spiced minced mutton cooked with onions, tomatoes, and warming whole spices until rich and savory, then served with soft toasted pav. It is a comforting Mumbai favorite that works beautifully for lunch, dinner, or a hearty weekend brunch.
For 4 servings
- prep · ~10 min
Prepare the mince and vegetables.
1.Finely chop the onion, tomato, and green chili.2.Chop the coriander leaves and cut the lime into wedges.3.Keep the mutton mince ready at room temperature for 10 minutes before cooking.TIPLoosen the mince with your fingers so it cooks evenly and does not clump in the pan. - saute · ~10 min
Cook the whole spices and onions.
1.Heat oil in a wide pan over medium heat.2.Add cumin seeds, bay leaf, cinnamon, and cloves; cook until fragrant (30 seconds).3.Add the chopped onion and cook until lightly golden (6-8 minutes).4.Add green chili and ginger-garlic paste, then sauté until the raw smell goes away (1 minute).TIPKeep the heat medium so the onions turn sweet and golden without burning the spices. - saute · ~6 min
Build the masala base.
1.Add the chopped tomato and mix well.2.Add turmeric powder, red chili powder, coriander powder, and salt.3.Cook until the tomatoes soften and the masala looks thick and glossy (5-6 minutes). - saute · ~8 min
Cook the mince.
1.Add the mutton mince to the pan.2.Break it up well with a spoon and mix it into the masala.3.Cook on medium-high heat until the mince changes color and starts releasing its juices (6-8 minutes).TIPKeep stirring and breaking the mince for the first few minutes so the texture stays loose, not chunky. - simmer · ~15 min
Simmer the keema until rich and thick.
Add water and garam masala, then bring to a gentle simmer. Cover and cook for 12-15 minutes, stirring once or twice, until the mince is tender and the gravy is thick but still spoonable.
TIPIf the pan dries out too fast, add a splash of water; keema pav tastes best with a little masala to scoop up with the bread. - garnish
Finish with coriander leaves.
- saute · ~2 min
Toast the pav with butter.
Heat a tawa or skillet, add butter, and place the slit pav cut side down. Toast for 1-2 minutes until warm and lightly golden.
- serve
Serve the keema hot with pav and lime wedges.
What to keep in mind.
7 tips from the recipe — small details that make a real difference to the final dish.
- 1Use a wide pan so the mutton mince sears instead of steaming when it hits the masala.
- 2Brown the onions to light golden only; very dark onions can make the keema taste bitter.
- 3Mash the tomatoes slightly as they cook so the masala coats every bit of mince evenly.
- 4After adding the mince, keep breaking lumps for the first few minutes for the classic loose keema texture.
- 5Stop simmering when the gravy is thick but still spoonable, so it soaks nicely into the pav.
- 6Toast the pav just before serving; if done too early, the buttered surface loses its crisp edges.
- 7Keema tastes even better after a short rest, so let it sit 5 minutes before serving with lime.
Adapt it for your goals.
High-protein
Serve the keema without pav or with fewer rolls for a meat-forward plate that suits lower-carb, higher-protein meals.
spicierSpicier
Add an extra green chili or a little more red chili powder if you want a sharper Mumbai-style heat.
dry keemaDry-keema
Simmer uncovered a little longer for a drier keema filling that works well in pav, wraps, or stuffed buns.
egg toppedEgg-topped
Top each serving with a fried egg for a richer brunch-style keema pav that feels more substantial.
chicken keemaChicken-keema
Swap mutton mince for chicken mince for a lighter, faster-cooking version with the same masala profile.
Why this is on our healthy list.
Rich in Protein
Mutton mince provides satisfying protein that makes this dish filling and suitable for a hearty meal.
Aromatic Spice Benefits
Ginger, garlic, cumin, cloves, and cinnamon add depth while bringing traditional warming spices to the dish.
Includes Fresh Herbs
Coriander leaves and lime add freshness and brightness, helping balance the richness of the keema.
Frequently asked questions
Loosen it before cooking and keep breaking it with a spoon during the first few minutes in the pan while it changes color.