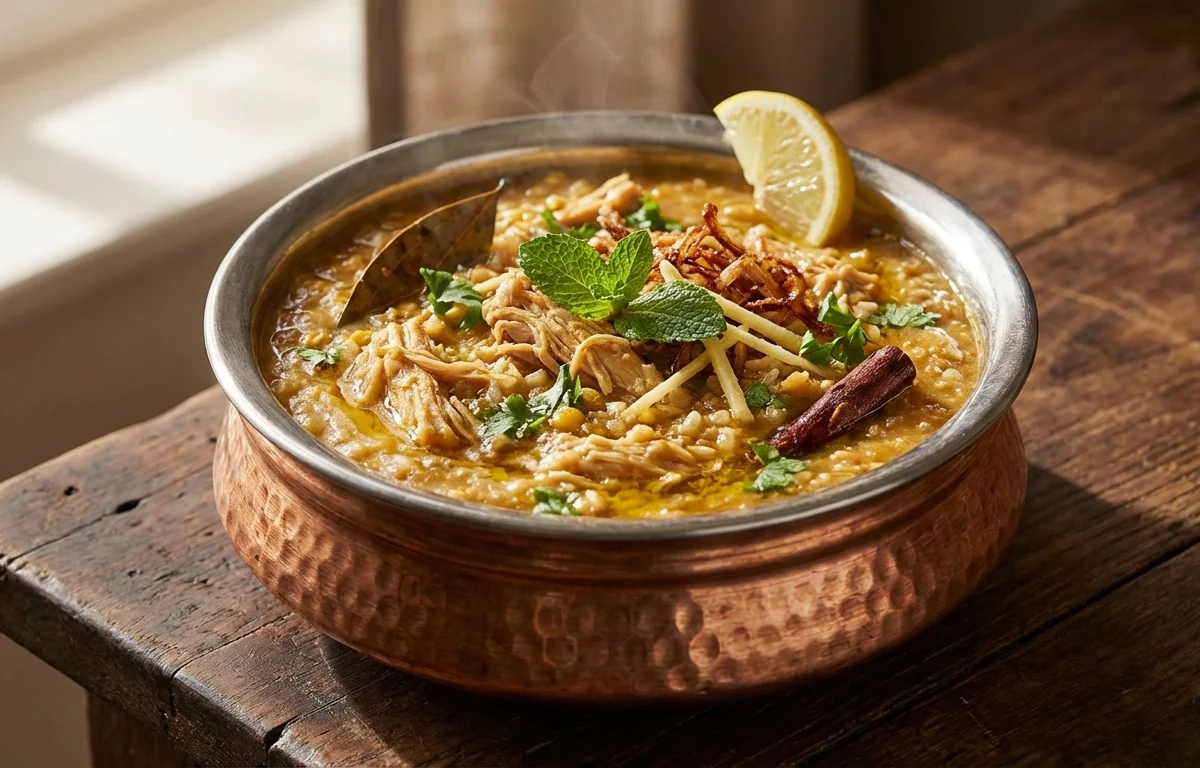
Chicken Khichda
A slow-cooked mix of chicken, lentils, wheat, and rice that turns rich, hearty, and deeply savory. This one-pot dish is comforting and filling, with warm spices, soft grains, and a texture that sits somewhere between haleem and khichdi.
For 4 servings
- prep · ~10 min
Soak the grains and lentils.
Wash the broken wheat, toor dal, moong dal, masoor dal, and chana dal well. Soak them together overnight. Wash the rice separately and soak it for 30 minutes before cooking.
TIPA long soak helps the wheat and lentils break down into the thick, soft texture khichda needs. - pressure cook · ~40 min
Cook the grains, lentils, and chicken.
1.Drain the soaked broken wheat and lentils, then add them to a pressure cooker with the soaked rice.2.Add chicken, black peppercorns, cloves, green cardamom, cinnamon, bay leaf, salt, and 5 cups water.3.Pressure cook on medium heat for 25 to 30 minutes, until the chicken is very tender and the grains are completely soft. - rest · ~10 min
Let the pressure release naturally.
- prep · ~8 min
Shred the chicken and mash the mixture.
Open the cooker, remove the chicken pieces, and discard the large bones. Shred the meat and return it to the cooker. Lightly mash the wheat and lentil mixture with the back of a ladle until thick and porridge-like.
TIPLeave a little texture in the pot so the khichda does not turn pasty. - saute · ~15 min
Cook the masala base.
1.Heat oil and ghee in a pan over medium heat.2.Add cumin seeds and let them sizzle for 30 seconds.3.Add sliced onion and cook until golden brown, 6 to 8 minutes.4.Add ginger-garlic paste and green chili, then cook for 1 minute.5.Add chopped tomato and cook until soft and pulpy, 4 to 5 minutes.TIPGolden onions give the dish its deep flavor, so do not rush this step. - mix · ~3 min
Add the spices and yogurt.
Lower the heat and mix in turmeric powder, red chili powder, coriander powder, and garam masala. Add yogurt and stir until the masala looks smooth and slightly glossy.
TIPKeep the heat low when adding yogurt so it blends in without splitting. - simmer · ~15 min
Combine the masala with the khichda.
Pour the cooked masala into the cooker with the chicken and grain mixture. Stir well and simmer on low heat for 12 to 15 minutes, adding a splash of water only if it looks too thick.
- garnish · ~1 min
Finish with herbs and lemon juice.
Stir in coriander leaves, mint, and lemon juice just before taking the khichda off the heat.
- serve
Serve the chicken khichda hot.
What to keep in mind.
7 tips from the recipe — small details that make a real difference to the final dish.
- 1Soak the broken wheat and dals overnight so they collapse into the signature thick, spoon-coating texture.
- 2Use bone-in chicken for a deeper broth-like flavor; the meat also shreds more softly after pressure cooking.
- 3After pressure cooking, remove whole spices like bay leaf, cardamom, and cloves if you want a smoother eating texture.
- 4Mash only lightly after shredding the chicken; some visible grain and dal texture keeps khichda from turning gluey.
- 5Brown the onions properly to a deep golden color, not just soft, or the masala will taste flat.
- 6Add the yogurt on low heat and keep stirring so it emulsifies into the masala instead of splitting.
- 7Khichda thickens as it sits, so loosen leftovers with hot water while reheating and simmer until creamy again.
Adapt it for your goals.
Spicier
Increase green chilies and red chili powder for a hotter Hyderabadi-style finish without changing the dish's hearty texture.
bonelessBoneless
Use boneless chicken thighs for easier shredding and serving, especially if making it for children or a crowd.
richerRicher
Top with extra ghee-fried onions and a little more mint at serving for a more festive, restaurant-style khichda.
lighterLighter
Reduce the ghee and use less oil in the masala if you want the same comforting dish with a less rich finish.
Why this is on our healthy list.
Balanced Protein Base
Chicken plus mixed lentils create a more varied protein profile, making this one-pot meal especially filling and sustaining.
Fiber From Grains and Dals
Broken wheat and the combination of dals add fiber and body, which helps make the dish hearty and satisfying.
Gentle Energy Release
The mix of wheat, rice, and lentils provides steady nourishment, while the slow-cooked texture makes it easy to eat.
Herb and Spice Benefits
Mint, coriander, ginger, garlic, and whole spices add aroma and plant compounds while keeping the dish flavorful without relying only on fat.
Frequently asked questions
Yes. Simmer it covered in a heavy pot until the chicken is very tender and the wheat and dals are fully broken down; it will just take much longer.