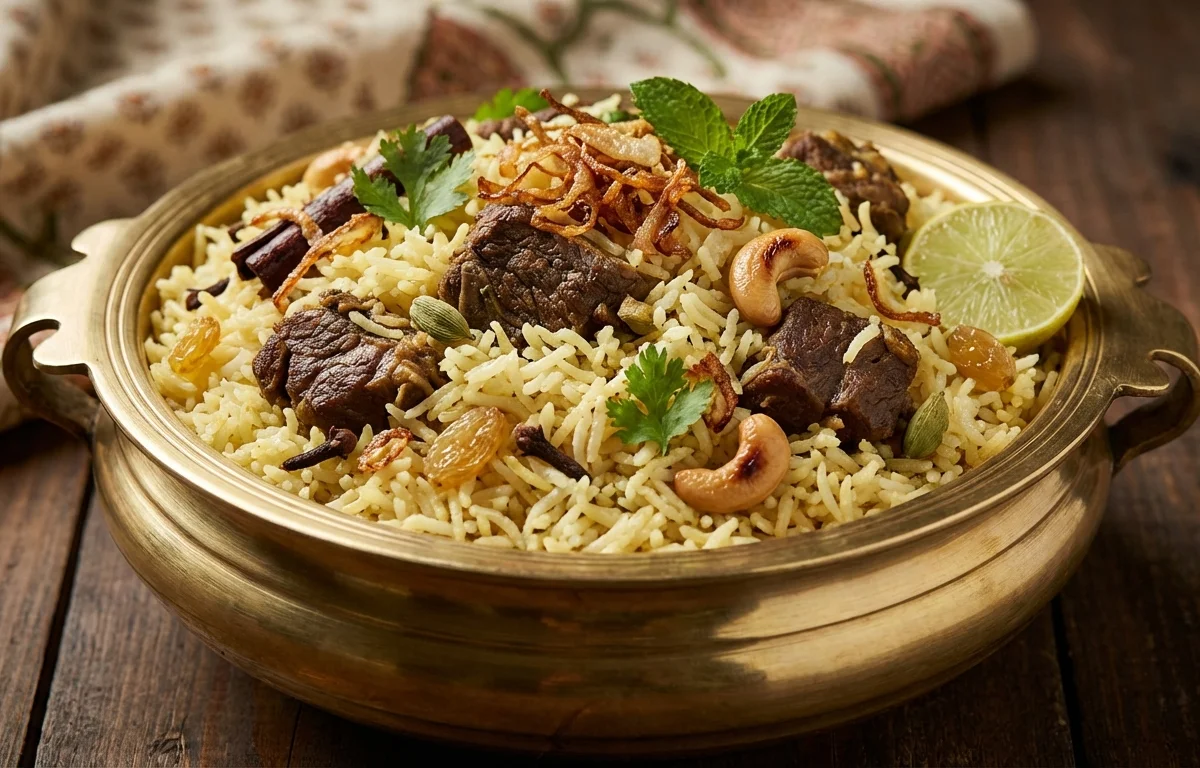
Malabar Beef Biryani
Fragrant Kerala-style biryani with tender beef, warm whole spices, herbs, and lightly sweet fried onions layered with short-grain rice. Rich but balanced, this special-occasion dish is deeply savory and beautifully aromatic.
For 4 servings
- prep · ~20 min
Soak the rice and prep the biryani ingredients.
1.Wash the kaima rice until the water runs mostly clear.2.Soak the rice in fresh water for 20 minutes, then drain well.3.Slice the onions, chop the tomatoes, crush the ginger and garlic, and slit the green chilies.4.Pick the mint leaves and chop the coriander leaves.TIPDrain the soaked rice well so the grains stay separate later. - pressure cook · ~30 min
Cook the beef until tender.
1.Place the beef in a pressure cooker with 0.5 cup water, turmeric powder, red chili powder, black pepper, and 0.25 tsp salt.2.Mix well and close the cooker.3.Pressure cook on medium heat until the beef is tender, about 20 to 25 minutes after full pressure.4.Let the pressure drop naturally and keep the cooked beef with its juices aside.TIPThe beef should be tender but not falling apart, since it cooks again during dum. - saute · ~15 min
Fry the onions, cashews, and raisins.
1.Heat 1 tbsp ghee and 1 tbsp oil in a heavy pan over medium heat.2.Add the sliced onions and cook until deep golden and sweet, 10 to 12 minutes.3.Lift out about one-third of the fried onions for layering and garnish.4.In the same pan, fry the cashews and raisins for 30 to 40 seconds, then remove.TIPKeep the heat medium and stir often so the onions brown evenly without burning. - saute · ~12 min
Make the masala for the beef.
1.Add the remaining 1 tbsp ghee to the same pan.2.Add bay leaf, cardamom, cloves, cinnamon, star anise, and fennel seeds; cook until fragrant, about 30 seconds.3.Add the crushed ginger, garlic, and green chilies; sauté for 1 minute.4.Add the chopped tomatoes and cook until soft and pulpy, 4 to 5 minutes.5.Stir in yogurt, garam masala, mint, coriander leaves, lemon juice, and the cooked beef with its juices.TIPCook the tomatoes down properly so the masala tastes rich instead of sharp. - simmer · ~10 min
Simmer the beef masala until thick.
Cook the beef masala over low to medium heat for 8 to 10 minutes, stirring now and then, until the gravy turns thick and clings to the meat. Stir in the remaining 0.25 tsp salt and turn off the heat.
- boil · ~17 min
Cook the rice until just done.
1.Heat 2.5 cups water in a heavy pot and bring it to a boil.2.Add the drained rice and cook on low heat, covered, until the water is absorbed and the rice is just cooked, about 10 to 12 minutes.3.Turn off the heat and let the rice stand covered for 5 minutes.4.Fluff gently with a fork or flat spoon.TIPDo not overcook the rice; slightly firm grains hold up best during layering. - assemble · ~5 min
Layer the rice and beef masala.
1.Spread half of the beef masala in a heavy pot if needed, or keep it in the same pan if large enough.2.Top with half of the rice.3.Scatter some reserved fried onions, cashews, raisins, mint, and coriander leaves over the rice.4.Add the remaining beef masala and then the remaining rice.5.Finish with the rest of the fried onions, cashews, raisins, mint, and coriander leaves. - rest · ~25 min
Cover and dum the biryani.
Cover the pot tightly and keep it on very low heat for 15 minutes so the layers warm through and the flavors blend. Rest off the heat for 10 minutes before opening.
TIPUse very low heat to avoid scorching the bottom layer. - serve
Gently fluff and serve the biryani hot.
What to keep in mind.
7 tips from the recipe — small details that make a real difference to the final dish.
- 1Drain the soaked jeerakasala rice thoroughly before cooking so the short grains stay fluffy, not sticky.
- 2Stop pressure cooking when the beef is just tender; overcooked pieces can shred during layering and dum.
- 3Fry the onions to a deep golden brown, not just soft, because they provide the signature sweet-savory biryani depth.
- 4Reduce the beef masala until it clings to the meat; a watery gravy will make the rice heavy and patchy.
- 5Keep the dum heat extremely low or place the pot on a tawa to protect the bottom layer from scorching.
- 6Rest the biryani after dum before fluffing so the rice firms up and the layers separate more cleanly.
- 7When serving, lift from the side and fold gently to keep some white rice, masala rice, and beef visible in each portion.
Adapt it for your goals.
Low-oil
Use less oil and ghee, and brown the onions more slowly with a splash of water as needed; you still get good flavor with a lighter finish.
muttonMutton
Swap beef for mutton or goat for a more traditional festive biryani profile; increase pressure-cooking time until the meat is tender.
spicierSpicier
Add an extra green chili and a little more black pepper for a sharper Kerala-style heat without changing the core flavor.
no nutsNo-nuts
Skip the cashews for allergy needs and use extra fried onions and raisins so the garnish still has sweetness and texture.
Why this is on our healthy list.
Protein-Rich Main Dish
Beef and yogurt make this biryani satisfying and protein-forward, helping turn the rice dish into a complete meal.
Herb-Driven Freshness
Mint, coriander, ginger, garlic, and green chili add fresh flavor compounds and plant ingredients that balance the richness.
Iron and B Vitamins
Beef contributes naturally occurring iron and B vitamins, which are valuable in hearty meat-based dishes like this one.
Frequently asked questions
Yes, but the result will be different. Jeerakasala gives Malabar biryani its compact, aromatic texture, while basmati makes it lighter and longer-grained.